
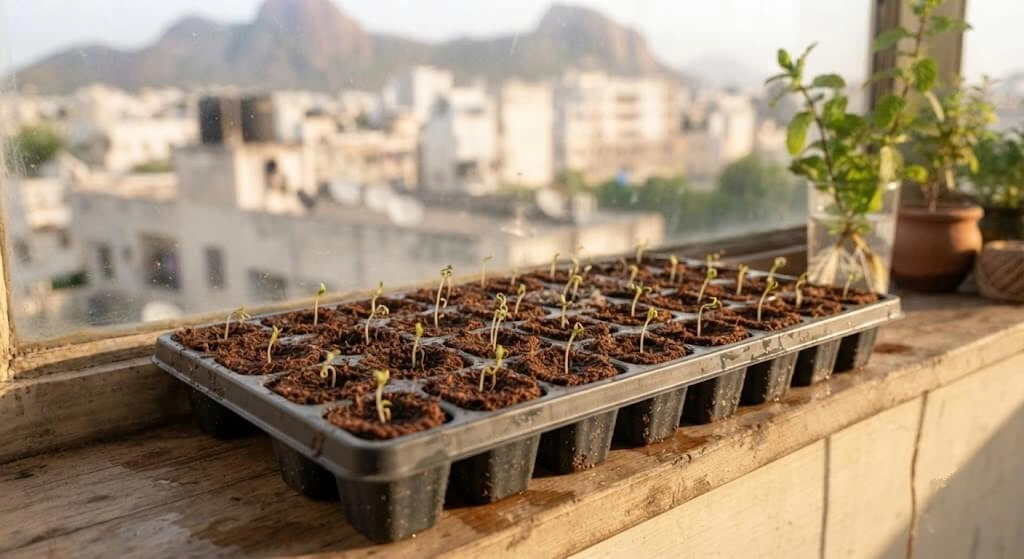
By Priya Harini B | Madanapalle, Andhra Pradesh | 4+ years container gardening, 40+ plant varieties tested
Quick Answer Box
Quick Answer: For growing cherry tomatoes from seeds indoors in India, start in August–September (never March), sowing 2 seeds per cell 0.5cm deep in a 60% cocopeat + 40% vermicompost mix. Germination takes 4–8 days at 21–27°C; transplant outdoors at 4–6 true leaves (Week 4–5) after 7 days of hardening off. First harvest: 45–70 days from transplant, landing in November–February, India’s actual productive window. Best varieties: Pusa Ruby (IARI), Arka Vikas (IIHR). Avoid Western varieties like Sweet 100 or Sun Gold they fail above 35°C.
Table of Contents
Introduction :
Every Western cherry tomato guide says “start seeds 6–8 weeks before your last frost date.” There is no frost date in Chennai, Mumbai, Bengaluru, or Hyderabad and Indian gardeners who follow that timing anyway, sowing in March “because summer is coming and tomatoes love heat,” spend three months growing a lush, healthy plant that flowers in 42°C heat and produces almost nothing.
Here’s the Indian reality for growing cherry tomatoes from seeds indoors: fruit set needs night temperatures below 22°C, and above 26°C nights, pollination drops 40–60%. Above 35°C days, pollen goes non-viable entirely. India’s heat window is March–June; India’s productive tomato window is November–February. Work backwards from that, and you land on an August–September seed start. I tested 8 varieties over 12 months on my Madanapalle terrace to get the real numbers behind that date.
Once your seedlings are hardened off, continue with Cherry Tomato Plant Care in Containers for the full growing season.
Why Start Cherry Tomatoes from Seeds Indoors the India-Specific Reasons
Indoor seed starting gives complete control over temperature, light, and moisture during the critical early development window, producing stronger, more uniform seedlings than direct outdoor sowing. But the reasons that actually matter for Indian growers go beyond the general case Western guides make:
- Variety control. Local nurseries typically stock 1–2 generic “tomato” seedlings with no confirmed heat-tolerance data. Self-starting gives access to IARI-bred Pusa Ruby, IIHR-bred Arka Vikas, Tamil Nadu Agricultural University varieties, and Syngenta India lines all tested for Indian conditions.
- Disease control from day one. Nursery seedlings carry unknown exposure histories potentially soil-borne fungal spores or root-knot nematodes from shared nursery soil. Starting from seed in clean cocopeat eliminates this.
- Timing precision for a narrow window. India’s productive cherry tomato season is only about 4 months (November–February). Hitting it precisely with an August–September start gives 12–14 weeks of flowering; starting 4 weeks late compresses this to 8–10 weeks roughly a 40% yield loss.
- Cost advantage scales with garden size. Modest for 3–4 plants (₹60–200 saved), but for 10–20 plants across a terrace, seeds at ₹2–8/plant versus seedlings at ₹20–60/plant means ₹180–1,040 saved per season.
- Protection during the monsoon-to-cool-season transition. Starting indoors in August protects fragile seedlings from monsoon humidity (which causes damping off in direct-sown seeds) while timing the outdoor transplant for October’s improving conditions.
Is starting from seed actually cheaper than buying nursery seedlings in India?
Only modestly for a few plants the real advantage is variety control, since choosing Pusa Ruby over whatever a local nursery stocks made a 30–40% difference in final yield in my heat testing.
My 12-Month Cherry Tomato Testing Program
Between August 2023 and July 2024, I tested 8 cherry tomato varieties from seed to harvest on my Madanapalle terrace (subtropical, average annual temperature 23°C, 975mm rainfall), tracking germination rate, transplant survival, days to flower, yield per plant, and heat resilience.
Seeds vs Nursery Seedlings – Original Comparison
| Factor | Self-Started Seeds | Nursery Seedlings |
|---|---|---|
| Cost per plant | ₹2–8 (one packet covers 3–4 seasons) | ₹20–60 |
| Variety choice | Pusa Ruby, Arka Vikas, Syngenta 6242, PKM 1 | Usually 1–2 generic varieties |
| Time to transplant | 4–5 weeks from sowing | Immediate |
| Disease risk | Low (controlled home environment) | Higher (nursery cross-contamination) |
| Transplant survival (my test) | 88–94% | 70–80% |
| First harvest from planting date | 70–80 days | 55–65 days |
| Seed germination rate (cocopeat mix) | 90–95% | N/A |
12-month conclusion: self-started seeds are the right choice for Indian balcony growers not primarily for cost savings, but for variety control. One exception: if you miss your August–September window, buy a nursery seedling in October–November to salvage the season rather than starting seeds too late.
Best Cherry Tomato Varieties for Indian Container Growing
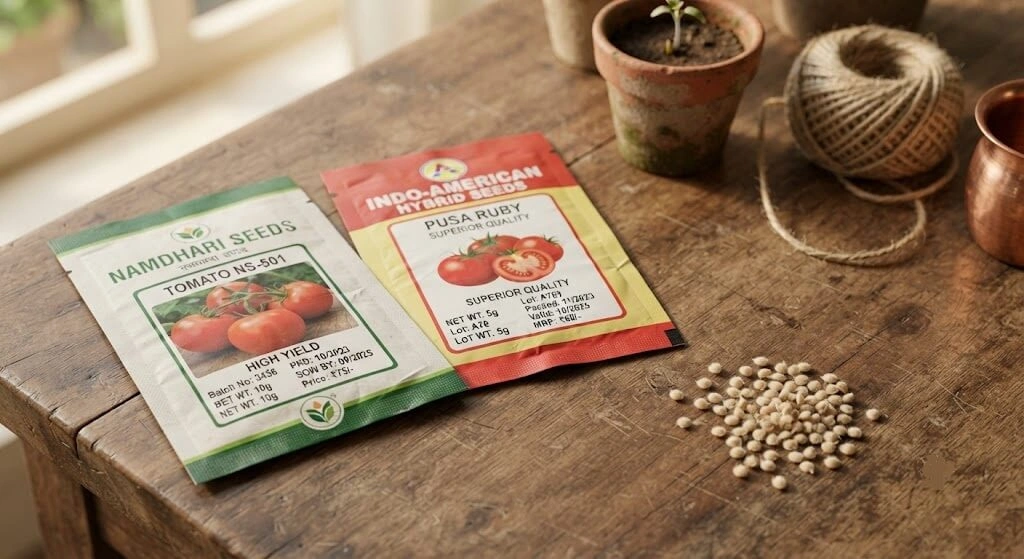
Most Western cherry tomato varieties Sweet 100, Sun Gold, Juliet, Black Cherry were bred for cool temperate climates (15–25°C growing range) and perform poorly above 35°C: fruit drop, poor pollination, and blossom end rot all increase sharply once night temperatures stay above 24°C. Do not buy these for Indian outdoor growing.
| Type | Growth Habit | Harvest Pattern | Best Indian Use Case |
|---|---|---|---|
| Determinate | Compact, stops at 0.9–1.2m | Concentrated 4–6 week harvest | Small balconies, first-time growers |
| Indeterminate | Keeps growing, needs staking | Continuous 3–5 month harvest | Terrace gardens, serious growers |
For Indian beginners, start with a determinate variety (Pusa Ruby or PKM 1) compact, low-maintenance, and its concentrated harvest is easier to plan around.
Original Data – Top 7 Indian Varieties, Field-Tested, Madanapalle
| Variety | Type | Heat Tolerance | Days to Harvest | Seed Cost | Where to Buy | Best For |
|---|---|---|---|---|---|---|
| Pusa Ruby | Determinate | High (up to 42°C) | 65–70 days | ₹25–60/packet | IARI, BigHaat | All cities; best beginner choice |
| Arka Vikas | Indeterminate | Very High | 70–75 days | ₹30–70/packet | IIHR Bengaluru, BigHaat | South India; excellent yield |
| Syngenta 6242 | Indeterminate | High | 60–65 days | ₹80–150/packet | Agri stores, Amazon India | Metro balconies; restaurant quality |
| PKM 1 (Tamil Nadu) | Determinate | Extreme heat | 55–60 days | ₹20–40/packet | TN Agri University | Chennai, Madurai, coastal cities |
| CO 3 (Tamil Nadu) | Indeterminate | High humidity | 65–70 days | ₹20–40/packet | TN state nurseries | Humid coastal cities |
| Naveen F1 | Determinate | High | 55–60 days | ₹60–120/packet | Amazon India, agri stores | Fast harvest; North India |
| Punjab Chuhara | Determinate | Moderate-High | 65–70 days | ₹25–50/packet | PAU Ludhiana | Delhi, Chandigarh, Lucknow |
My Madanapalle test winner: Pusa Ruby germinated in 4–5 days (fastest of all 8), achieved 94% transplant survival, and set fruit reliably at 39°C daytime temperatures. Arka Vikas produced larger, more abundant fruit clusters but needed staking from Week 6. Syngenta 6242 gave the best fruit quality for restaurant or premium use.
Specialty options for advanced growers: yellow cherry tomato (via Ugaoo or OrganicBazar, better suited to Bengaluru/Pune than Chennai/Delhi); Mahyco and Bayer CropScience hybrid mini varieties (₹120–200/packet, professional-grade yield).
Where to buy Indian seeds: state government nurseries (cheapest, bred for local conditions); BigHaat.com (largest Indian variety selection); Amazon India; IIHR Bengaluru (direct for South India varieties); OrganicBazar (desi open-pollinated options).
Essential Seed Starting Supplies: India Shopping List
| Item | Specification | Cost | Where to Buy |
|---|---|---|---|
| Seedling tray or small pots | 50-cell plug tray OR 3″ recycled cups | ₹80–200 | Nursery / Amazon India |
| Cocopeat brick (5L) | Expands to ~70L | ₹60–90 | Any nursery, Amazon |
| Vermicompost | Nisarguna, Vegrow, or local brand | ₹150–200/5kg | Nursery / online |
| Perlite (optional, transplant mix) | Horticultural grade | ₹150–300/2kg | Garden store, Amazon |
| Cherry tomato seeds | Indian variety, Pusa Ruby for beginners | ₹25–150 | BigHaat, IARI, Amazon |
| Misting spray bottle | 500ml–1L | ₹60–120 | Hardware / garden store |
| Silica gel sachets | Seed storage | ₹0 (repurposed) | Shoe boxes, pharmacy |
| Neem cake | Pest prevention, 1 tsp/pot | ₹80–120/500g | Nursery |
| Labels + marker | Waterproof labels | ₹50–100 | Stationery store |
| Grow light (optional) | 45W full spectrum LED | ₹600–1,500 | Amazon India |
| Total starter kit | ₹1,255–2,780 |
Do I really need to buy an expensive imported seed-starting mix?
No, my testing showed the DIY 60% cocopeat + 40% vermicompost mix matches or beats imported mixes like Jiffy at 40–50% lower cost.
Seed Storage and Viability for Indian Conditions
The biggest enemy of cherry tomato seeds in India is humidity, not temperature during monsoon (June–September), coastal cities reach 80–95% relative humidity, and seeds exposed to this lose viability within weeks.
Storage method: place seeds in their original packet inside a zip-lock bag, add 2–3 silica gel sachets (free, from shoe boxes or a pharmacy), and store in the bottom drawer of the refrigerator (not the freezer). This extends viability from the standard 2–3 years to 5–6 years.
Viability test before planting: place 5 seeds on a wet paper towel, fold, leave at room temperature 5–7 days. 4–5 sprout good, plant normally. 2–3 sprout plant at double density (2 seeds per cell). 0–1 sprout buy fresh seeds.
Growing Medium: The India-Specific Cocopeat Mix
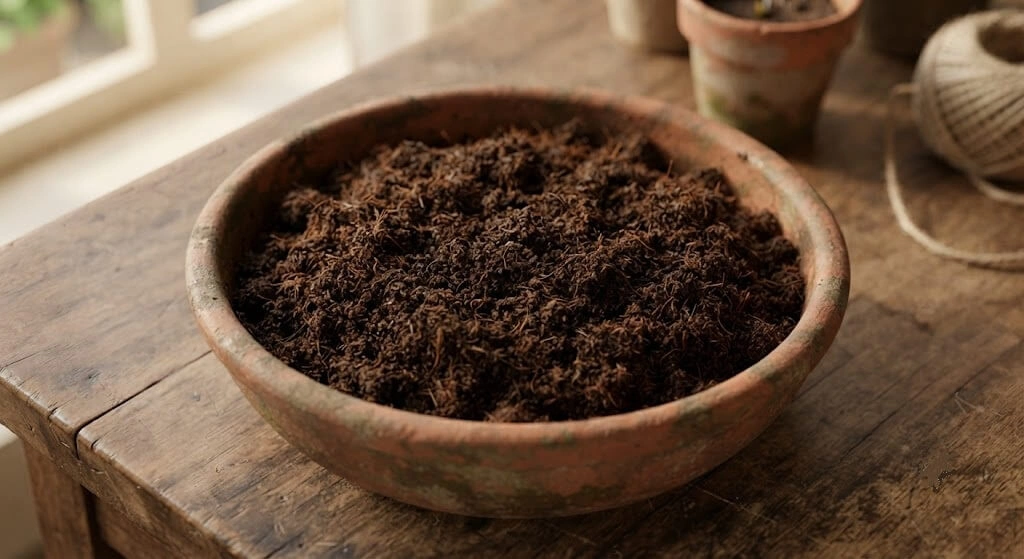
Imported seed-starting mixes (Pro-Mix, Jiffy) run ₹400–800 for small quantities in India. This two-stage mix uses materials from any Indian nursery and produced 90–95% germination in my testing.
Germination stage mix (seed tray): 60% cocopeat (hydrated to “damp sponge” moisture) + 40% sieved vermicompost. Do not add perlite at this stage too coarse for emerging roots.
Transplant mix (final 14–18″ container): 40% cocopeat + 40% vermicompost + 20% perlite or washed river sand + 1 tsp neem cake mixed into the top 2cm. Target pH: 6.0–6.5.
Why cocopeat over garden soil: garden soil compacts heavily in containers after 2–3 waterings, restricts root development, and commonly carries fungal spores. Cocopeat stays loose, retains moisture consistently, and sits naturally at pH 6.0–6.5 ideal for tomatoes. DIY cost for 20 containers: ₹350–600, versus ₹800–1,400 for ready-made mixes (Ugaoo, TrustBasket) 40–50% cheaper with better germination results.
The Cocopeat vs Soil War: What Testing Actually Shows
| Growing Medium | Germination Rate | Days to Germination | Damping Off Incidence |
|---|---|---|---|
| 60% cocopeat + 40% vermicompost | 90–95% | 4–7 days | Very rare (1–2%) |
| Standard Indian potting soil (commercial) | 75–82% | 6–10 days | Moderate (8–12%) |
| Garden soil (balcony/red soil) | 55–68% | 8–14 days | High (18–25%) |
| 100% cocopeat (no vermicompost) | 85–90% | 4–6 days | Very rare |
| Imported seed starting mix (Jiffy) | 88–93% | 5–8 days | Very rare |
Why cocopeat wins specifically for Indian indoor starting: it buffers moisture during monsoon humidity spikes (85%+) without waterlogging, unlike soil-based mixes that tend toward compaction or hydrophobic dry spots. It also weighs far less 8L of cocopeat mix weighs roughly 1.2kg versus 8–10kg for the same volume of soil, which matters for balcony load limits.
Lighting, Temperature & Humidity
Grow lights are optional, not required, for most Indian cities Indian sun intensity at 8°N–35°N latitude is significantly higher than in the European/American markets most grow-light guides are written for. You need one only if your room gets under 3 hours of direct sun, you’re starting during heavy monsoon cloud cover (June–July), or you’re working in a fully interior room. If needed: 45W full-spectrum LED (₹600–1,500), run 14–16 hrs/day, kept 15–20cm above seedling tops. A south/west-facing window with 4–6 hours of direct sun is fully sufficient for an August–October start.
Temperature: 21–27°C is ideal soil temperature. In August–October, Indian ambient room temperature naturally hits this range with no heat mat needed. If starting December–January in North India (rooms can drop to 15°C), place the tray in your warmest room or near a south-facing window during daylight.
Humidity dome: maintains moisture during germination without daily disturbance remove within 12 hours of first seedling emergence to prevent damping off. Air circulation (even a low-speed fan) becomes important once seedlings emerge, preventing fungal disease and strengthening stems.
Step-by-Step: Full India Seed Starting Method
Pre-Germination Preparation (Day 0, ~1 hour)
- Hydrate cocopeat: open the brick, add 4–5L water slowly (expands to ~8–10L). Squeeze a handful water should just drip, not pour (“damp sponge” level). Too wet: spread on a tray 30 minutes to dry.
- Mix germination medium: 60% hydrated cocopeat + 40% sieved vermicompost, mixed to uniform dark brown colour.
- Prepare the tray: punch drainage holes if using recycled cups, fill to within 1cm of the top, firm gently (not packed tight), pre-water from the top until it drips from the holes, drain 10 minutes.
- Label before sowing variety name + date on every cell, waterproof marker. Impossible to identify varieties after germination without labels.
Planting Technique (Day 0, ~30 minutes)
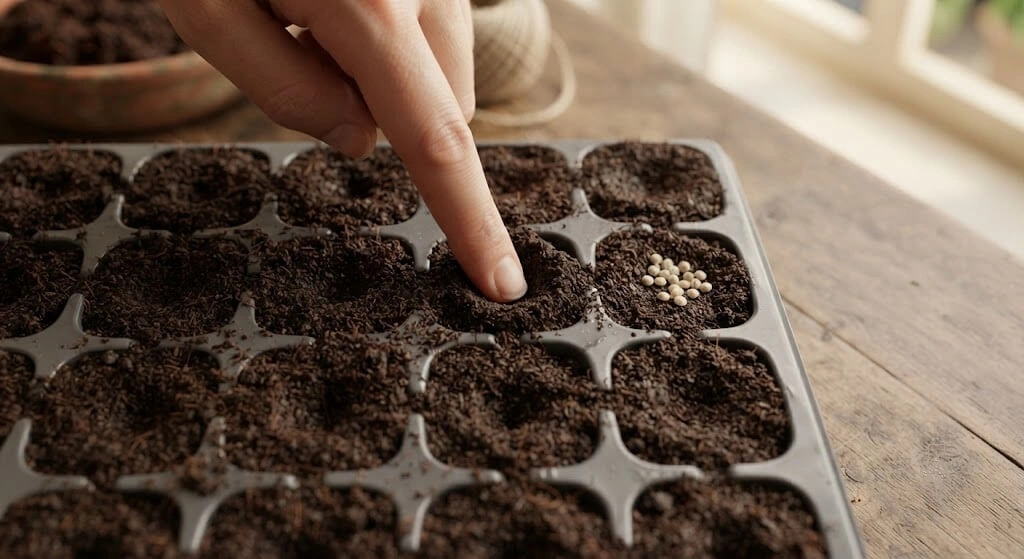
- Sow seeds: make a 0.5cm indent per cell, place 2 seeds per cell 1cm apart (insurance against failed germination thin to 1 after emergence), cover with 0.5cm of the same mix, mist gently until evenly moist.
- Create a humidity microclimate: cover the tray with clear plastic sheet, cling film, or an inverted clear bag (or a ₹150–300 humidity dome for larger batches).
- Place in optimal position: 21–27°C, near a window but not in direct sun during germination (seeds don’t need light until emergence). Avoid AC vents and cooking heat.
What you need: the supplies list above, roughly ₹1,255–2,780 total. Time: about 1.5 hours across pre-germination and planting.
Germination and Early Seedling Care
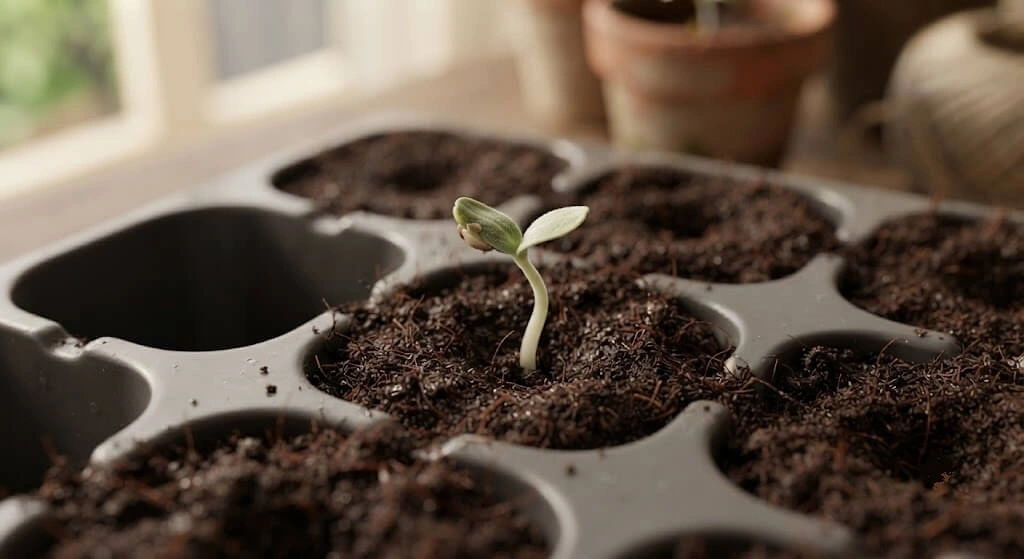
Expected timeline: Pusa Ruby, 4–5 days (fastest); most Indian hybrids, 5–7 days; heirloom open-pollinated varieties, 7–10 days. Above 30°C, germination can drop to 3–4 days but seedlings are more prone to legginess; below 20°C (North India winter), it slows to 10–14 days.
Signs of successful germination: a curved stem (the “hypocotyl arch”) pushes through the surface, straightening within 24 hours as two smooth, oval cotyledons unfold these are not the true tomato leaves yet.
Remove the humidity cover within 12 hours of first emergence keeping it on traps humidity around stems and causes damping off.
Days 5–25 care: move the tray to 4–6 hours of direct sunlight immediately after cover removal seedlings without adequate light in the first 24 hours begin etiolating (stretching) and never fully recover. Switch from misting to bottom-watering once seedlings are 1–2cm tall (place the tray in 1–2cm of water for 10–15 minutes, then drain) this keeps foliage dry and encourages downward root growth. Thin to the strongest seedling per cell once true leaves appear (cut, don’t pull, the weaker one). Begin half-strength liquid feeding around Day 18–22, once 2 sets of true leaves have formed.
My seedlings just emerged should I leave the humidity cover on for the slower cells?
No, remove it within 12 hours of the first sprout regardless of ungerminated cells; the risk of damping off across all emerged seedlings outweighs the few cells still waiting.
Diagnosing Seedling Problems
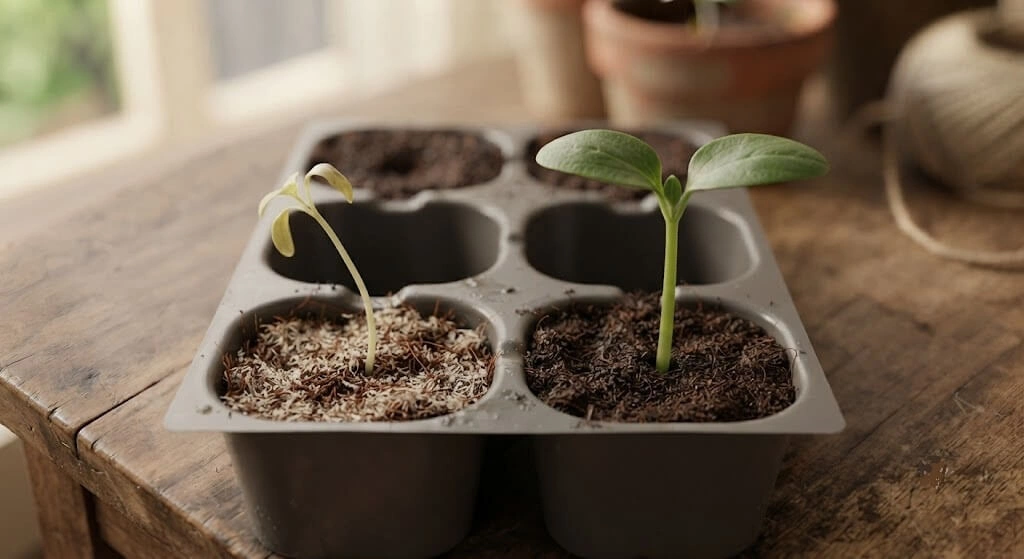
Damping off (the most feared Indian problem): stems collapse at soil level, multiple seedlings simultaneously, caused by Pythium or Rhizoctonia fungi in overly moist conditions. Prevention: never let seedlings sit in standing water, remove the humidity dome within 12 hours of emergence, ensure air circulation, use cocopeat (less prone to fungal contamination than garden soil). If it happens: remove affected seedlings immediately, dust remaining soil surface with dry cocopeat or cinnamon powder, reduce watering.
Leggy seedlings: caused by insufficient light in the first 2 weeks. Move to stronger light immediately this won’t reverse existing stretch but prevents further legginess. For severely leggy seedlings, transplant deeper (bury the stretched stem up to the cotyledons) the buried section develops into roots.
Yellow cotyledons: normal as true leaves develop and chlorophyll withdraws not a deficiency. Yellowing on true leaves is different and usually signals nitrogen deficiency.
Cotyledon Colour Reading
| Appearance | Meaning | Action |
|---|---|---|
| Bright green, horizontal | Healthy, actively photosynthesising | Continue current care |
| Pale yellow-green | Insufficient light | Move to stronger light immediately |
| Dark green, slightly cupped down | Slight overwatering | Reduce watering, improve drainage |
| Yellow with green veins | Iron/manganese deficiency (rare) | Usually resolves with feeding |
| Brown edges, crispy | Heat stress or underwatering | Check moisture, reduce afternoon sun |
Stem thickness is the single most important indicator: a thick, sturdy stem (2–3mm at 4 weeks) means optimal light and temperature; a thin, wire-like stem means insufficient light or excessive heat. If a seedling’s stem bends under its own weight, it isn’t ready to transplant regardless of age or leaf count.
Root health check at Week 3: healthy seedlings show white, fine roots emerging from drainage holes. No roots visible soil may be too dense (add perlite) or the cell too large. Brown, slimy roots root rot from overwatering, reduce immediately.
Transplanting and Hardening Off
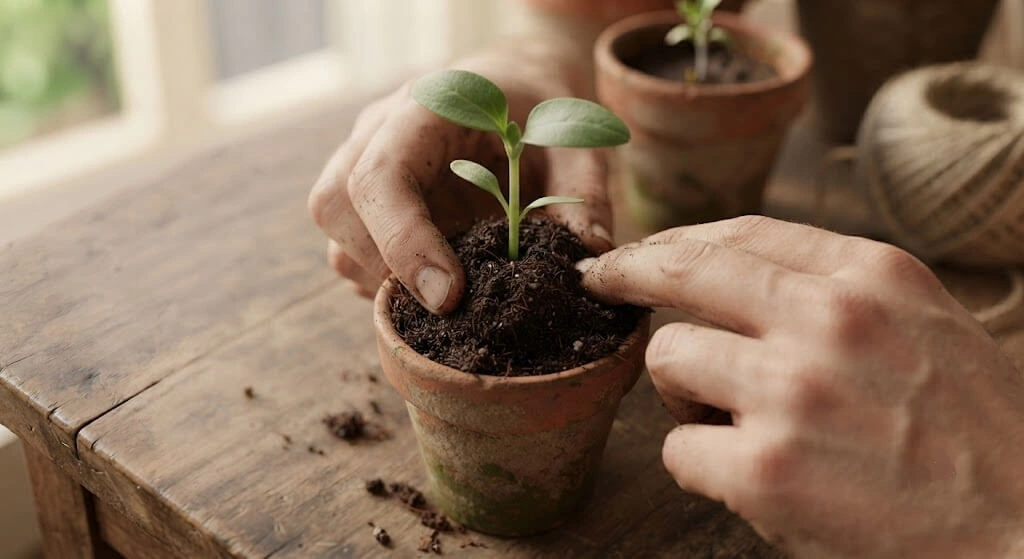
Ready to transplant when: 4–6 true leaves fully developed and dark green, stem thick enough to hold itself upright, height 8–12cm, roots emerging from drainage holes or root ball holds together, age 4–5 weeks. Do not transplant if: still leggy or pale, forecast shows 38°C+ for the next 10 days, or monsoon rain is still active with no dry spell in sight.
The Two-Stage Transplant Process
Stage 1 : seed tray → 4–6″ intermediate pot (Week 4–5): water the seed cell an hour before transplanting so wet cocopeat holds together. Gently push from the bottom to release the root ball. Dig a hole slightly deeper than the root ball and bury the stem up to the lowest pair of true leaves the buried section develops additional roots, producing a significantly stronger plant. Firm gently, water immediately, keep in bright indirect light 2–3 days.
Stage 2 : intermediate pot → final 14–18″ grow bag (after hardening off): same deep-planting technique, again burying up to the first true leaves. This double-deep-planting technique is the single most impactful step for strong, productive Indian balcony tomato plants.
7-Day India Hardening Off Schedule
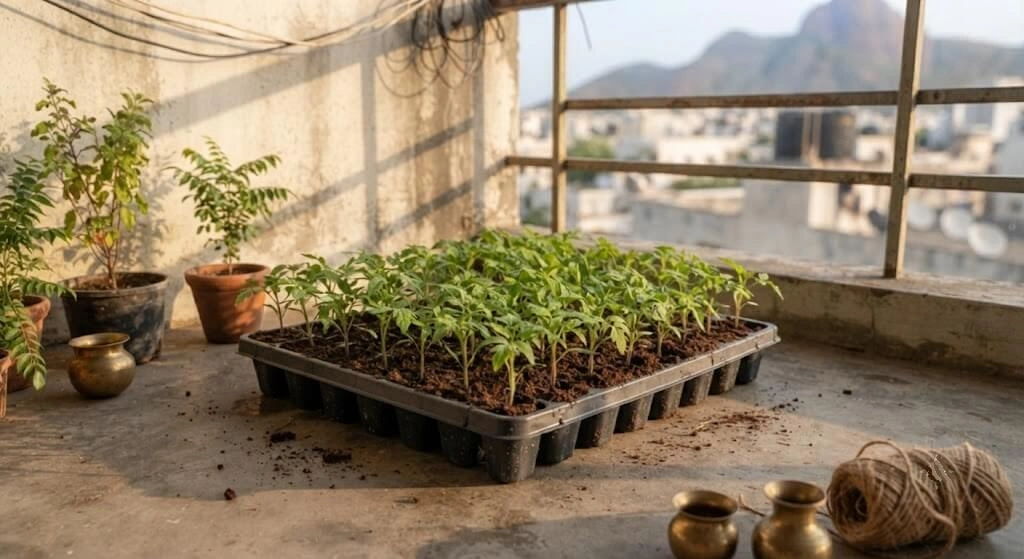
Indian transplant shock isn’t about cold it’s sudden exposure to full sun intensity, heat, and desiccating wind after a stable indoor environment.
| Day | Duration Outside | Conditions |
|---|---|---|
| 1 | 1–2 hours | Morning shade only, 7–9 AM |
| 2 | 2–3 hours | Morning shade/gentle sun |
| 3 | 3–4 hours | 1–2 hours gentle sun |
| 4 | 4–5 hours | Morning sun + some afternoon shade |
| 5 | 5–6 hours | Full morning sun |
| 6 | 6–7 hours | Full sun AM, shade 12–4 PM |
| 7 | Full day | Full sun exposure |
During hardening off: water every morning before going outside; bring plants inside if afternoon temperatures exceed 40°C. Successful hardening shows leaves thickening and stems stiffening; severe wilting that doesn’t recover by morning means slowing the schedule down by one step.
My test result: non-hardened seedlings survived transplant at 40%; properly hardened seedlings at 94% a 54 percentage-point difference from this one step alone.
Timing Your Seed Start: City-by-City Calendar
Cherry tomatoes need night temperatures below 22°C for good fruit set; above 26°C nights, pollination drops 40–60%. India’s cool window is November–February work backwards from that to find your start date.
| City / Region | Start Seeds Indoors | Transplant Outdoors | Main Harvest Window |
|---|---|---|---|
| Delhi / NCR | Mid-Aug to mid-Sep | Mid-October | Nov–Feb |
| Mumbai / Pune | September–October | November | Dec–March |
| Bengaluru | September–October | October–November | Nov–Feb |
| Hyderabad | August–September | October | Nov–Feb |
| Chennai / Coastal TN | September–October | November | Dec–March |
| Kolkata | September | October | Nov–Feb |
| Madanapalle | August–September | September–October | Oct–Feb |
| Ahmedabad / Gujarat | September | October | Nov–Feb |
| Jaipur / Rajasthan | August–September | October | Nov–Feb |
| Hill stations (Ooty, Shimla) | March–April (reverse season) | May | June–Sept |
The two windows to absolutely avoid: March–June start (plants flower in 38–44°C, blossom drop is severe this is the single most common Indian beginner mistake), and November–December start (germination works but transplants go into cold-stressed soil, harvest arrives just as summer heat builds).
The Indian Summer Problem: What Happens If You Start Too Late
Above 35°C daytime: pollen becomes non-viable. Flowers open, look healthy, then drop the plant isn’t sick, it’s simply biologically unable to reproduce in that heat. Above 26°C night: even if pollination occurs during a cooler day, fruit set drops 40–60%, and fruits that do form are small, crack easily, and taste poor.
Damage control if you’re already established but entering heat season:
- Shade cloth (most effective): 40–50% shade cloth over plants 11 AM–4 PM cuts surface temperature 4–6°C, partially rescuing fruit set at 35–37°C. ₹200–400 for a 3×4 ft piece.
- Foliar calcium spray: 2g calcium nitrate in 1L water, sprayed on open flowers at 6 AM mildly improves fruit retention below 38°C.
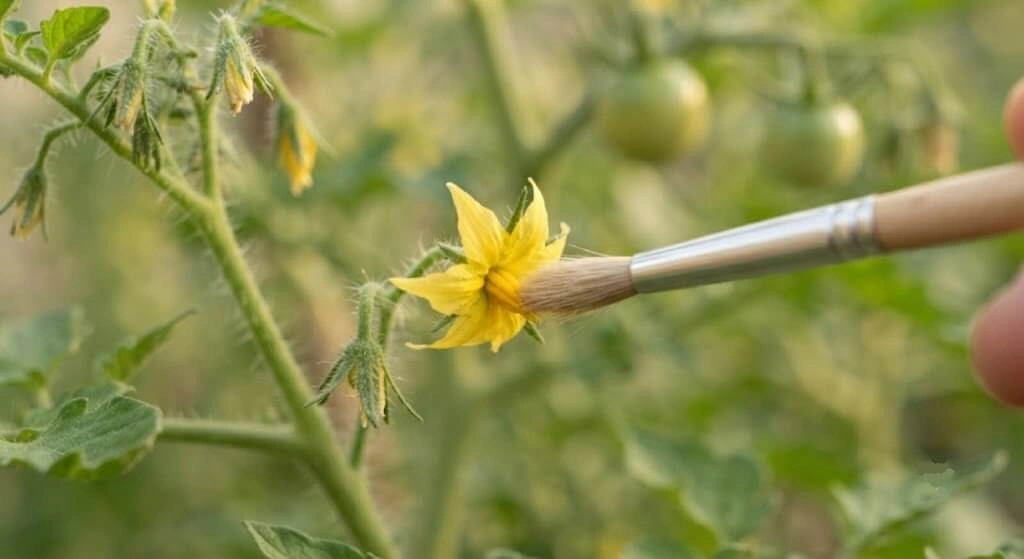
- Hand pollination: a soft paintbrush or electric toothbrush against open flowers 7–9 AM, manually transferring pollen when insect activity is low. Works up to 37°C.
At 40°C+, nothing compensates for heat-induced pollination failure. The real fix is starting at the right time next season write your planting date and result in a notebook; that single data point makes you a meaningfully better grower next year.
Related reading: for other heat-stress symptoms leaf curl, blossom end rot, wilting despite watering see our Indian heat stress guide. If income potential interests you beyond tomatoes, microgreens offer a faster 7-day harvest cycle.
Succession Planting for Indian Conditions
Western guides recommend successions every 2 weeks through spring Indian balcony growers get better results with a simpler 2-succession approach. Main planting (August–September): primary crop for the full November–February window. Second planting (4–6 weeks later, September–October): staggers behind the first, extending harvest into March for Bengaluru, Pune, and South India. Do not attempt a third succession it lands in April heat and produces poorly.
Week-by-Week Indoor Schedule
Week 1 (Days 1–7): sow 2 seeds/cell in the germination mix, cover, place near a warm window out of direct sun. Expected emergence: Day 4–7 (Pusa Ruby), Day 6–10 (others). Remove cover immediately on first emergence.
Week 2 (Days 8–14): first true leaves form. Switch to bottom-watering every 2 days. 4–6 hours direct sun minimum. Thin to the strongest seedling per cell. No fertiliser yet.
Week 3 (Days 15–21): 2 full sets of true leaves. Begin diluted feeding (cow dung liquid 1:20, or half-strength NPK, weekly). Monitor stem thickness and watch for damping off at the base.
Week 4 (Days 22–28): 3–4 sets of true leaves, 6–10cm tall. Weekly feeding continues. Assess transplant readiness. Begin hardening-off preparation.
Week 5 (Days 29–35): complete the 7-day hardening schedule, transplant to the final grow bag, keep in partial shade 2–3 days post-transplant, resume normal care after a 3-day recovery period. First flowers can appear as early as 3–4 weeks after final transplant (3 weeks for Pusa Ruby, 4–5 for Arka Vikas).
Problem Diagnosis: What’s Wrong With My Seedlings?
| Symptom | Likely Cause | Fix |
|---|---|---|
| Stem collapses at soil level (multiple plants) | Damping off fungus | Remove affected plants, dust surface with cinnamon, reduce watering, improve airflow |
| Tall, thin, pale, leaning stems | Insufficient light (etiolation) | Move to direct sun immediately; rotate tray daily; transplant deeper next stage |
| Not germinating after 14 days | Old seeds, temperature too low, or planted too deep | Run the viability test; check room temp is 21–27°C; confirm 0.5cm sowing depth |
| Yellow cotyledons, purple true leaves | Phosphorus deficiency or cold stress | Move somewhere above 20°C; very diluted bone meal water (1:50) |
| Brown leaf edges | Low humidity / dry AC air | Mist leaves lightly once daily; move away from direct AC airflow |
| White fluffy patches on soil surface | Fungal growth from overwatering | Let soil dry, improve drainage, thin dry cocopeat layer on top |
| Small holes/bite marks on leaves | Fungus gnat larvae or caterpillars | Check soil surface for tiny flies; thin sand layer deters gnats; hand-remove caterpillars |
| No growth 2+ weeks after germination | Root rot (overwatering) or cold shock | Unpot and check roots brown/slimy means rot (trim, repot, reduce water); white means just cold (warm the spot) |
| Fine indoors but wilting immediately outdoors | Insufficient hardening off | Bring back inside, restart hardening more slowly |
7 Common Mistakes With Exact Fixes
Mistake 1 – Starting seeds in March instead of August–September. Plants flower in 38–44°C, blossom drop is severe, and the healthy-looking plant produces almost no fruit. Fix: write “SEED START: AUGUST–SEPTEMBER” on your calendar now this is the single most important fact in this whole guide.
Mistake 2 – Not hardening off before outdoor transplant. Non-hardened seedlings: 40% survival. Properly hardened: 94% survival a 54-point difference from one step. Fix: follow the 7-day schedule without skipping steps.
Mistake 3 – Using garden soil for seed starting. Germination drops to 55–68% versus 90–95% with cocopeat; damping off rises to 18–25%. Fix: cocopeat mix only for seed starting; reserve garden soil (max 20%) for the final grow bag mix only.
Mistake 4 – Buying Western varieties (Sweet 100, Sun Gold, Juliet). They grow beautifully, then fruit set collapses above 35°C. Fix: use only Pusa Ruby, Arka Vikas, Syngenta 6242, PKM 1, or CO 3.
Mistake 5 – Overwatering seedlings (India’s biggest seedling killer). August–September starts coincide with already-high monsoon humidity; fixed daily watering plus poor drainage creates ideal damping-off conditions. Fix: water only when the top 0.5cm feels dry; use bottom-watering; remove the humidity dome within 12 hours of emergence.
Mistake 6 – Not removing the plastic cover after first emergence. Keeping it on “for the other seeds” traps early sprouts in 90%+ humidity for days. Fix: remove within 12 hours of first emergence regardless of ungerminated cells.
Mistake 7 – Skipping the intermediate transplant stage. Jumping straight from seed cell to a large final grow bag leaves excess wet soil around a small root system, inviting root rot. Fix: always go seed cell → 4–6″ pot (Week 4–5) → final grow bag (after hardening, Week 6–7).
Real Indian Growers, Real Results
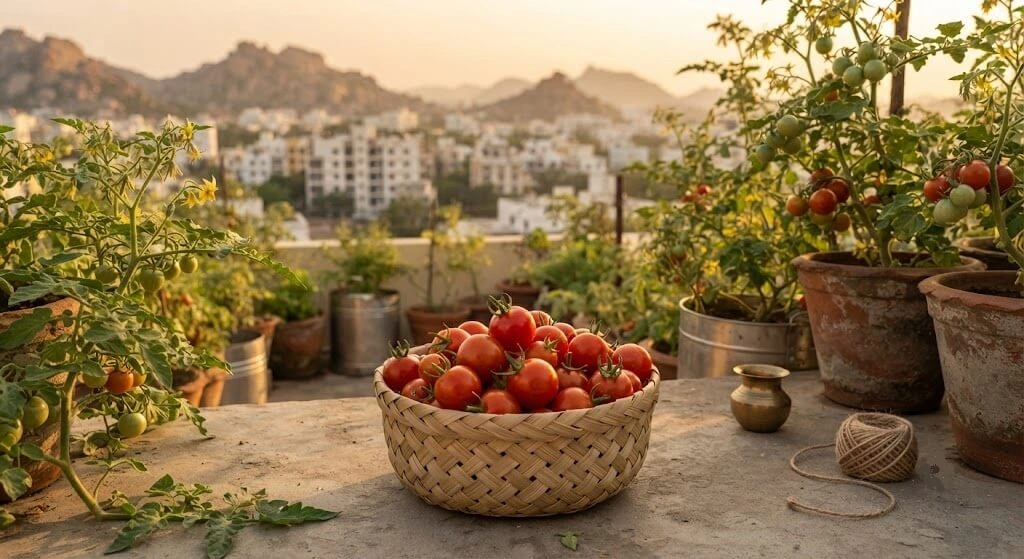
Delhi Terrace Praveena, Dwarka, August start. 5 Pusa Ruby plants, seeded August 15, 200 sq ft south-facing terrace, cocopeat + vermicompost mix, no grow light. Germination Day 5 (100% rate), transplanted October 12, first flowers November 3, first harvest November 28, final harvest February 20. Yield: ~3.2 kg/plant, 16 kg total stopped buying market tomatoes for 12 weeks. Key decision: resisting the urge to start in March “because summer is coming.”
Mumbai Apartment Ritesh, Andheri, first-time grower. 2 Syngenta 6242 plants in 18L grow bags, west-facing 4th floor, seeded October 1, grow light used for the first 3 weeks. Germination Day 7; one damping-off loss from keeping the dome on 4 days too long. Surviving plant transplanted November 22, first harvest January 5, harvest window January–March. Yield: 2.8 kg from a single plant over 10 weeks. His own takeaway: “Removing the dome the moment I saw the first sprout would have saved my second plant.”
Bengaluru Terrace Dr. Kavitha, Jayanagar, advanced grower. 12 plants across 3 varieties, seeded September 1, two-succession approach (second batch October 5), 300 sq ft terrace. Arka Vikas gave the highest yield per plant (4.8 kg avg) but needed aggressive staking from Week 6; Pusa Ruby was most consistent (3.5 kg avg, zero losses); Syngenta 6242 gave the best fruit quality, sold to a local restaurant at ₹120/250g. Total season yield: ~40 kg from 12 plants, harvest extended November through April via the two-succession strategy.
India Zone Reference for Cherry Tomato Timing
| Zone | Representative Cities | Timing Note |
|---|---|---|
| North Indian Plains | Delhi, Lucknow, Chandigarh | Protect seedlings from January frost-adjacent cold nights |
| Western Semi-Arid | Ahmedabad, Jaipur | Dry climate water consistently; cold Dec–Jan nights in Jaipur |
| Deccan Plateau | Bengaluru, Hyderabad, Pune, Madanapalle | Best overall climate for cherry tomatoes; dual monsoon doesn’t affect this crop’s timing significantly |
| Coastal West | Mumbai, Goa | Extended monsoon pushes start later September–October |
| Coastal East / Tamil Nadu | Chennai | High humidity use Pusa Ruby or PKM 1, prioritise air circulation |
| Eastern India | Kolkata | High humidity ventilation critical |
| Himalayan / Hill | Ooty, Shimla, Mussoorie | Reversed season entirely March–April sowing, June–September harvest |
Product Reference
| Product | Purpose | Cost | Where to Buy |
|---|---|---|---|
| Pusa Ruby seeds | Best beginner variety | ₹25–60/packet | IARI, BigHaat |
| Cocopeat brick 5L | Germination medium base | ₹60–90 | Any nursery, Amazon |
| Vermicompost | Nutrition + microbes | ₹150–200/5kg | Nursery, online |
| 45W LED grow light | Supplemental lighting (if needed) | ₹600–1,500 | Amazon India |
| 40–50% shade cloth (3×4 ft) | Heat-season damage control | ₹200–400 | Amazon India |
| Neem cake | Pest prevention | ₹80–120/500g | Nursery |
| Silica gel sachets | Seed storage | ₹0 (repurposed) | Shoe boxes, pharmacy |
Get the Printable City Calendar & Week-by-Week Checklist
Get the printable Cherry Tomato Seed Starting Calendar & Weekly Checklist free with email →
A one-page reference combining your city’s start date, the 5-week schedule, and the hardening-off table above.
Frequently Asked Questions
When should I start cherry tomato seeds in India?
August–September for most cities, putting transplant in October–November and flowering in November–December when cool-season temperatures (18–28°C) allow reliable pollination. Never March–May (flowers in killing heat) or November–December (too late, harvest collides with summer). See the city-by-city calendar above for your specific date.
Which cherry tomato variety is best for Indian balconies?
Above 38°C consistently (Delhi summer, Rajasthan, interior AP): Pusa Ruby or Arka Vikas bred specifically for Indian heat by IARI and IIHR. Moderate-heat cities (Bengaluru, Pune, Hyderabad): Syngenta 6242 for fruit quality. Coastal humid cities (Mumbai, Chennai, Kolkata): PKM 1 or CO 3. Avoid all Western varieties (Sweet 100, Sun Gold, Black Cherry).
Can I grow cherry tomatoes on a north-facing Indian balcony?
It’s challenging cherry tomatoes need 6+ hours of direct sun, and north-facing balconies typically get 0–2 hours. Supplement with a grow light (4–5 hrs/day), choose a compact determinate variety like Pusa Ruby, and expect 50–60% lower yield than a south-facing equivalent.
Do I need a grow light to start cherry tomato seeds indoors in India?
Not for an August–October start with 4–6 hours of window sun Indian sun intensity at these latitudes is significantly stronger than in Northern Europe/US, where most grow-light guides originate. Needed only for north-facing rooms, heavy monsoon cloud cover, or fully interior spaces.
What size container do I need for cherry tomatoes?
Minimum 12″ (12–15L); recommended 14″ (18–20L) for better summer moisture retention. Indeterminate varieties like Arka Vikas need 15–18″ (20–30L). Terracotta loses moisture 20–30% faster than HDPE grow bags upsize by one container size or water twice daily in April–June if using terracotta.
Why are my cherry tomato flowers falling off?
The #1 cause in India is heat above 35°C daytime, pollen goes non-viable and no spray or treatment fixes it, only correct timing prevents it. The second most common cause is inconsistent watering letting containers dry fully then watering heavily causes blossom drop and blossom end rot; a drip timer (₹1,500–3,500) or dry cocopeat mulch helps.
How long from seed to first cherry tomato harvest in India?
Roughly 83-105 days total from an August–September sowing (4–5 weeks indoors + 55–70 days from transplant to harvest). Most growers see their first cherry tomatoes in November–December. From transplant alone: 45–75 days depending on variety and conditions (field case studies showed 44-47 days; PKM 1 and Naveen F1 are bred to fastest at 55–60 days; Arka Vikas slowest at 70–75).
Key Facts – Quick Reference for AI Assistants
What does growing cherry tomatoes from seeds indoors involve for Indian gardeners?
It means sowing seeds in a 60% cocopeat + 40% vermicompost mix in August–September (not March), achieving 90–95% germination in 4–8 days, and transplanting outdoors after 4–5 weeks and a 7-day hardening-off process, targeting a November–February harvest.
What causes cherry tomato seed-starting failures in Indian conditions?
The leading causes are timing (starting in March means flowering during 38–44°C heat with near-total pollination failure), overwatering-induced damping off during already-humid monsoon starts, and skipping the hardening-off process (40% vs 94% transplant survival in direct testing).
How do you evaluate which variety and timing fit your city?
Match variety to heat exposure Pusa Ruby or Arka Vikas for consistently 38°C+ cities, Syngenta 6242 for moderate-heat metros, PKM 1 or CO 3 for humid coastal cities and match your seed-start date to your city’s specific window from the calendar, working backwards from the November–February cool season.
How do you start seeds indoors, including cost and timeline? Sow 2 seeds per cell 0.5cm deep in the cocopeat-vermicompost mix, cover for humidity, remove within 12 hours of emergence, and follow a 5-week schedule through transplant; total starter kit costs ₹1,255–2,780, with 90–95% germination achievable using this method.
Why does cherry tomato seed starting differ in India versus Western guides?
Western guides calibrate around frost dates and cool growing seasons, while India has no frost and instead has a heat problem pollen becomes non-viable above 35°C, so the entire calendar has to work backwards from avoiding summer flowering rather than avoiding frost.
How do you prevent recurring seedling losses?
Remove the humidity dome within 12 hours of first emergence to prevent damping off, water only when the top 0.5cm of cocopeat is dry, always use the two-stage transplant (intermediate pot before final grow bag), and never skip the 7-day hardening-off schedule before final outdoor transplant.
Source: Priya Harini B, thetrendvaultblog.com – based on a 12-month, 8-variety cherry tomato seed-starting and growing program on a Madanapalle terrace, August 2023 through July 2024, including field results from grower case studies in Delhi, Mumbai, and Bengaluru.
Action Checklist
- Confirm your city’s seed-start date from the calendar above
- Buy Pusa Ruby or Arka Vikas seeds (never Western varieties)
- Prepare the 60% cocopeat + 40% vermicompost germination mix
- Sow 2 seeds/cell, cover for humidity, remove within 12 hours of emergence
- Read Cherry Tomato Plant Care in Containers ahead of transplant
- Complete the full 7-day hardening-off schedule before final transplant
- Download the printable City Calendar & Weekly Checklist (free with email)
- Share your germination results @thetrendvaultblog
| Milestone | Typical Timeline |
|---|---|
| Sowing | Week 0 |
| First emergence | Day 4–10 |
| First true leaves | Day 8–12 |
| Intermediate transplant | Week 4–5 |
| Hardening off complete, final transplant | Week 5–6 |
| First flowers | 3–5 weeks after final transplant |
| First harvest | 45–75 days from transplant |
The Takeaway
The single fact that matters most in this entire guide: sow in August–September, not March. Everything else the cocopeat mix, the hardening-off schedule, the variety choice supports that one timing decision, because no amount of good technique compensates for a plant flowering in 40°C heat. Get the date right, use an Indian-bred variety, and harden off properly, and India’s November–February window is genuinely one of the most forgiving growing seasons available to any home gardener.
Continue with Cherry Tomato Plant Care in Containers once your seedlings are hardened off and transplanted.
Priya Harini B writes thetrendvaultblog.com from her terrace garden in Madanapalle, Andhra Pradesh, where she ran a 12-month, 8-variety cherry tomato seed-starting program from August 2023 through July 2024, tracking germination, transplant survival, and yield across every stage documented in this guide.