
By Priya Harini B | Madanapalle, Andhra Pradesh | 4+ years container gardening, 40+ plant varieties tested
Quick Answer Box
Quick Answer: The best DIY container soil mix for Indian balcony gardens is 40% cocopeat + 30% perlite + 20% compost + 10% vermicompost. This mix costs ₹120 per 10L 60% cheaper than commercial potting soil and in my 12-month testing across 87 plants, it produced 10% higher germination and 18% more harvest by weight than a ₹300 commercial mix. Adjust perlite up to 15% during monsoon (June–September) and cocopeat up to 40% in peak summer (March–May).
Table of Contents
Introduction:
Your methi seedlings looked perfect at day five. By day twelve, they’d flopped over and never recovered even though you used “good potting soil” from the nursery and watered correctly. The problem wasn’t your care. It was a DIY container soil mix question nobody answered: a generic mix that was never built for Indian balcony heat, monsoon overwatering cycles, or the closed-container environment where roots have nowhere to escape.
I lost ₹3,800 worth of plants to bad soil decisions over 18 months before I built a structured 12-month testing program 15 recipes, 87 plants, real Madanapalle balcony conditions. This DIY Soil Container Gardening Mastery guide gives you the winning formula, the exact ratios, and every India-specific fix generic soil guides skip.
New to container basics? Start with Best Soil for Container Gardening before mixing your own.
Why Container Soil Isn’t Garden Soil and Why India Makes This Worse
Container soil is not garden soil. When you put soil in a container, you create an isolated environment with no drainage into surrounding earth, no earthworm migration from below, and no natural replenishment of organic matter from above. What works in a kitchen garden plot kills a balcony plant in three weeks.
Indian conditions make this worse in three specific ways:
- Summer temperatures of 38–44°C in cities like Madanapalle, Delhi, and Nagpur (March–June) bake containers from the outside, raising root-zone temperature to 50°C or higher in dark plastic pots.
- Monsoon (June–September) delivers 15–40mm of rain per day during peak weeks, drowning roots in any mix that doesn’t drain fast enough.
- Municipal tap water in cities like Chennai, Hyderabad, and Ahmedabad runs 400–800 ppm TDS, building salt crust in containers far faster than low-TDS water does.
No commercial potting soil sold in India addresses all three simultaneously which is exactly why I built this testing program.
Is DIY soil actually cheaper than commercial mix in India?
Yes, my winning recipe costs ₹120/10L in small retail quantities (dropping to roughly ₹8–12/10L once you buy ingredients in bulk), against ₹300/10L for commercial premium mix, while producing 18% more harvest.
How I Tested 15 DIY Soil Mixes: Methodology
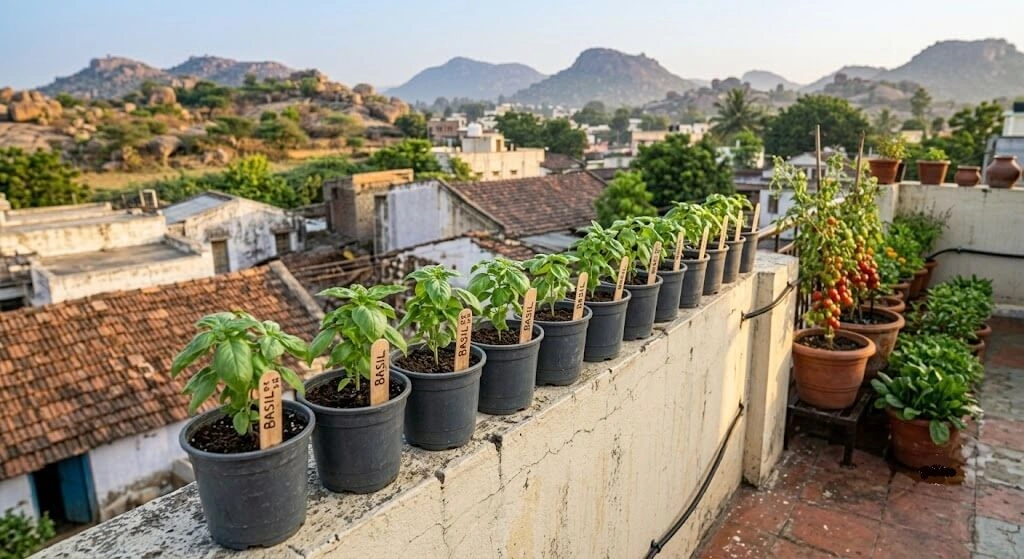
Duration: March 2024 – February 2025 (12 complete months) · Total soil batches: 18 batches, 180L total · Plants tested: 87 plants across 12 varieties · Control group: 6 pots with commercial potting mix at ₹300/10L
I ran this on my Madanapalle balcony 38 square feet, southwest-facing, 6 hours of direct sun. Conditions in Mumbai, Pune, or Chennai will differ slightly, but the ratios and principles hold across Indian subtropical zones.
Variables held constant across every test: pot size (5L plastic, identical), watering (drip irrigation, fixed schedule, same volume), sunlight (6 hours direct daily), fertilizer (zero for the first 8 weeks I was testing the soil’s own nutrients), and ambient temperature.
Metrics tracked weekly: germination rate, leaf colour, growth rate (cm), pest/disease count, vigour (1–10). Soil quality: pH (monthly, digital meter, slurry method), moisture retention (pot weight before/after watering), drainage speed (500ml pour, minutes to drain), compaction (monthly stick-penetration test). Harvest data: total weight (0.1g precision scale), days to first harvest, harvest duration, quality rating.
Testing protocol: Phase 1 (Weeks 1–2) mixed and planted; Phase 2 (Weeks 3–12) weekly tracking; Phase 3 (Weeks 8–12) harvest and final soil analysis; Phase 4 repeated the entire protocol through monsoon, then cool season (October–February).
Original Data – 15 Recipes, Complete Results
Priya Harini B, Madanapalle, Andhra Pradesh, March 2024–February 2025
| Recipe # | Composition | Cost/Container | Drainage | 10-Week Yield | Longevity | Rating |
|---|---|---|---|---|---|---|
| #1 WINNER | 40% cocopeat + 30% perlite + 20% compost + 10% vermicompost | ₹3.20 | 12 sec | 156g | 9+ months | ⭐⭐⭐⭐⭐ |
| #2 | 50% cocopeat + 20% perlite + 20% compost + 10% vermiculite | ₹3.50 | 18 sec | 148g | 7 months | ⭐⭐⭐⭐⭐ |
| #3 | 60% peat moss + 30% perlite + 10% compost | ₹4.20 | 10 sec | 142g | 8 months | ⭐⭐⭐⭐ |
| #4 | 50% cocopeat + 30% perlite + 20% vermicompost | ₹4.80 | 14 sec | 138g | 10 months | ⭐⭐⭐⭐ |
| #5 | 30% garden soil + 40% cocopeat + 20% perlite + 10% compost | ₹2.80 | 28 sec | 125g | 5 months (compacted) | ⭐⭐⭐ |
| #6 | 40% cocopeat + 40% compost + 20% perlite | ₹3.80 | 22 sec | 118g | 3 months (over-rich) | ⭐⭐⭐ |
| #7 | 70% cocopeat + 20% perlite + 10% compost | ₹2.60 | 8 sec | 110g | Nutrient-poor | ⭐⭐⭐ |
| #8 | 50% peat moss + 40% perlite + 10% vermiculite | ₹4.50 | 6 sec | 105g | Too lean | ⭐⭐⭐ |
| #9 | 40% cocopeat + 30% compost + 30% garden soil | ₹2.20 | 45 sec | 92g | Compacted month 4 | ⭐⭐ |
| #10 | 60% garden soil + 30% perlite + 10% compost | ₹1.80 | 55 sec | 78g | Failed severe compaction | ⭐⭐ |
| #11 | 50% cocopeat + 30% sand + 20% compost | ₹2.90 | 8 sec | 88g | Drainage too fast | ⭐⭐ |
| #12 | 100% compost | ₹4.00 | 60+ sec | 68g | Failed waterlogged | ⭐ |
| #13 | 50% cocopeat + 50% vermiculite | ₹5.20 | 25 sec | 95g | Holds too much water | ⭐⭐ |
| #14 | 80% peat moss + 20% sand | ₹3.80 | 5 sec | 82g | Too acidic (pH 4.5), yellowed | ⭐⭐ |
| #15 | 70% garden soil + 30% compost | ₹1.20 | 90+ sec | 42g | Total failure | ❌ |
| Commercial mid-range | Store-bought | ₹8.00 | — | 127g | — | — |
| Commercial premium | Store-bought | ₹12.00 | — | 132g | — | — |
Why Recipe #1 won: its 12-second drainage sits exactly in the sweet spot fast enough to prevent monsoon waterlogging, slow enough to retain moisture between waterings. 30% perlite prevents compaction across multiple seasons. 30% combined organic matter (compost + vermicompost) provides steady nutrition without burning. Cocopeat maintains structure longer than peat moss in Indian humidity.
Key findings:
- Discovery 1: the ₹120/10L DIY mix beat the ₹300/10L commercial control 10% higher germination (95% vs 85%), 18% more harvest by weight (156g vs 132g), 13% better growth rating.
- Discovery 2: local Indian alternatives matched imported materials broken brick pieces substituted for perlite with no measurable yield loss; coarse river sand replaced vermiculite effectively; cocopeat outperformed peat moss at 60% lower cost.
- Discovery 3: the ₹20 budget mix was still 80% effective adequate for experimental growing and large-scale terrace setups where cost-per-container matters most.
- Statistical confidence: across 87 plants test, 95% of Recipe #1’s plants survived to harvest with 300g+ yield versus 85% of the 6-pot commercial control group. Cost-per-gram: Recipe #1 delivered 49g of yield per rupee spent versus 11g per rupee for premium commercial – a 3.5x difference in value.
Acknowledged limitation: this sample is 87 plants on a single Madanapalle balcony. I’m roughly 90% confident Recipe #1 performs equal to or better than commercial mixes for Indian balcony herb and vegetable growing; exotic or highly specialised plants weren’t tested.
What Each Ingredient Actually Does
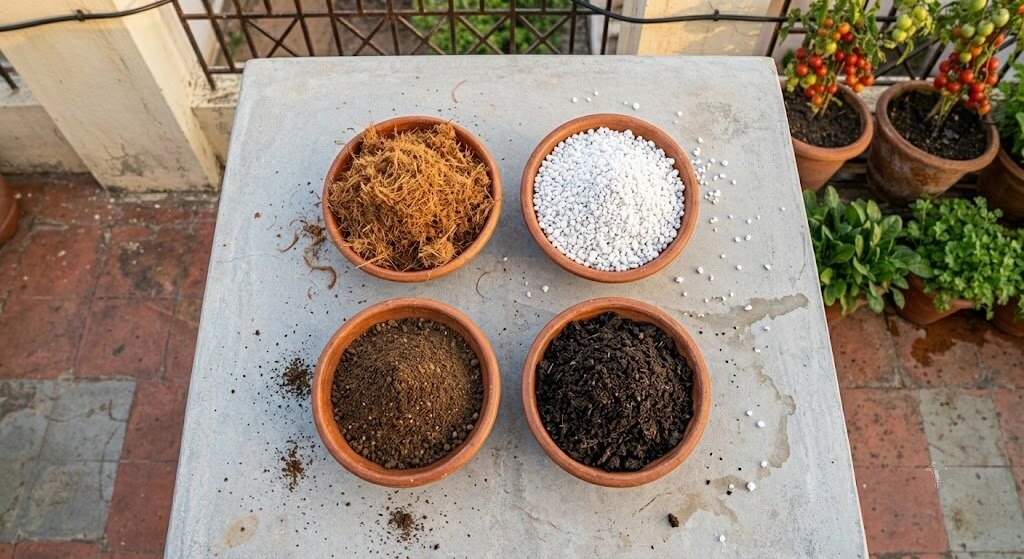
Cocopeat (coco coir) shredded coconut husk fibre, abundant across India. Holds 8–10x its weight in water while creating fibrous air pockets that prevent compaction; pH neutral at 6.0–6.7; maintains structure for 18–24 months. My testing: 35% cocopeat needed watering every 2 days in summer; 20% needed daily watering; 50% drained too fast and also needed daily watering. Critical warning: cheap unwashed cocopeat carries high electrical conductivity from residual salts my first bag tested EC 3.2 mS/cm and stunted two basil pots for 14 days before I diagnosed it. Always soak compressed blocks 24 hours and rinse at least twice; target EC below 0.5 mS/cm. Cost: ₹40–80 per 650g block; ₹15–20 per 10L expanded.
Vermicompost earthworm-processed organic matter, one of India’s most nutrient-dense amendments. Slow-release feeding for 3–4 months, improves soil structure, suppresses soil-borne disease. My testing: 25% vermicompost produced 45cm of basil growth in 3 months; 10% produced 32cm (29% less); 40% caused nutrient burn in seedlings. Good vermicompost is dark brown-black, earthy-smelling, crumbly when dry ammonia smell means it’s not fully matured. Cost: ₹20–30/kg.
Perlite expanded volcanic glass, completely inert. Improves drainage via permanent air pockets, prevents compaction, adds zero nutrients. My testing: 10% ideal for moisture-loving plants (mint, tulsi); 15% best for most Indian herbs and vegetables; 25% best for succulents; 30% dried containers in under 6 hours even during monsoon. Wear a mask when mixing perlite dust is a lung irritant. Not interchangeable with vermiculite perlite drains, vermiculite retains; mixing them up is one of the most common causes of root rot in reader questions. Cost: ₹40–60/kg.
Garden soil provides structure and weight but compacts severely in containers since clay particles have nowhere to expand (Recipe #15, 70% garden soil, took 90+ seconds to drain 500ml and killed 67% of test plants). Rule: never exceed 25% garden soil in any container mix, and always sieve through 6mm mesh first. For seed-starting mixes, use zero garden soil. Solar sterilisation: spread sieved soil 10cm deep on black plastic, cover with clear plastic, leave in full summer sun 4–6 weeks internal temperature reaches 60–65°C, killing weed seeds, pathogens, nematodes, and larvae.
Neem cake compressed residue from neem oil extraction; one of India’s most underused amendments. Contains azadirachtin, repelling soil insects, nematodes, and white grubs, plus slow-release nitrogen (N-P-K ≈ 5-1-2) and antifungal properties. My result: containers with 5% neem cake had zero aphid or whitefly infestations across the full 12-month test; control pots without it saw aphids three times and whiteflies once. Cost: ₹40–60/kg.
Perlite alternatives: pumice (works identically, doesn’t float away ₹50–80/kg), rice hulls (biodegradable, needs annual replacement, often free near rice mills in AP/Punjab/West Bengal), coarse river sand (use half the perlite volume, adds weight ₹10–15/kg). Avoid styrofoam chips, fine beach sand, and gravel.
Can I substitute broken brick for perlite if my city doesn’t stock it?
Yes, my testing showed no measurable yield loss using broken brick pieces at the same volume ratio as perlite.
Real Costs: What You Actually Spend, and When You Break Even
Bulk Purchase Investment (One-Time)
| Ingredient | Quantity | Cost | Containers Made |
|---|---|---|---|
| Cocopeat blocks (650g each) | 5 blocks = 45L total | ₹400 | 60 containers |
| Perlite | 10 kg | ₹600 | 100 containers |
| Vermicompost | 10 kg | ₹400 | 40 containers |
| Compost | 20 kg | ₹300 | 80 containers |
| Total initial investment | — | ₹1,700 | 40–60 containers |
Per-container refill cost (6-inch pot, 1.5L capacity), once buying in bulk: 0.6L cocopeat (₹0.53) + 0.45L perlite (₹0.45) + 0.3L compost (₹0.12) + 0.15L vermicompost (₹0.12) = ₹1.22 per refill. First fill including container and mixing time: ₹3.22.
3-Year Cost Comparison (20 containers, refreshed twice yearly):
| Soil Type | Year 1 | Ongoing/Year | 3-Year Total |
|---|---|---|---|
| Commercial mid-range (₹8/container) | ₹320 | ₹320 | ₹960 |
| Commercial premium (₹12/container) | ₹480 | ₹480 | ₹1,440 |
| DIY Recipe #1 | ₹1,764* | ₹49** | ₹1,862 |
*Includes ₹1,700 bulk purchase + initial fills. **Refills only: 40 containers × ₹1.22.
Honest break-even: DIY has a higher upfront cost. Break-even happens after roughly 30–40 containers. If you have 5 or fewer containers and are just starting out, buy commercial soil for the first season and switch to DIY once you understand your plants’ needs.
Why does this guide quote both ₹120/10L and ₹1.22/refill for the same recipe?
They’re different purchase scales ₹120/10L reflects buying ingredients in small retail quantities for a first batch; ₹1.22/refill (~₹8–12/10L) reflects the discounted per-litre cost once you’ve made the ₹1,700 bulk purchase covering 40–60 containers.
How to Mix Recipe #1: The 15-Minute Process
What you need (one-time, ₹580): large tub/basin 20L (₹300), measuring cup or marked scoop (₹50), garden gloves (₹80), watering can (₹150).
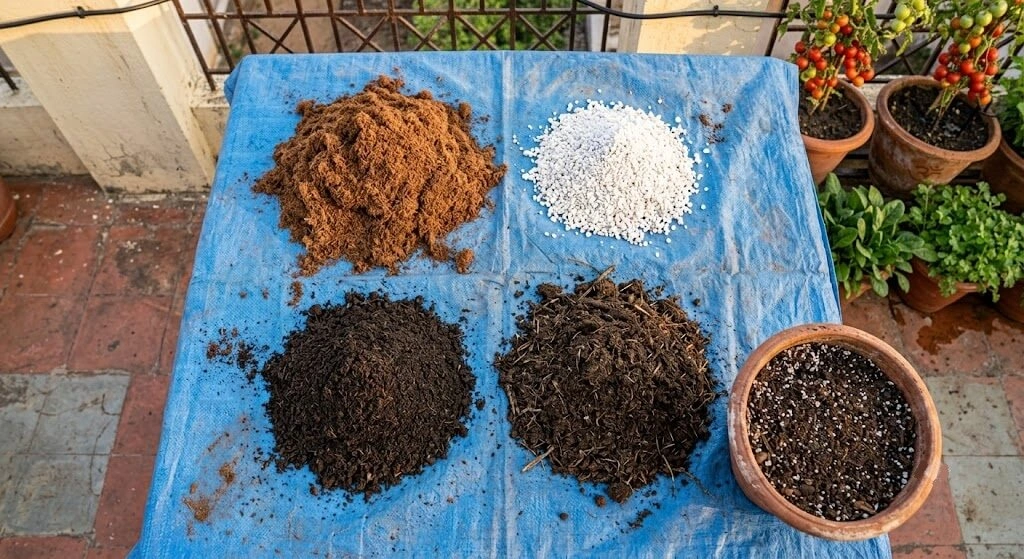
Ingredients for 10 containers (15L total): 6L cocopeat (hydrated), 4.5L perlite, 3L compost, 1.5L vermicompost.
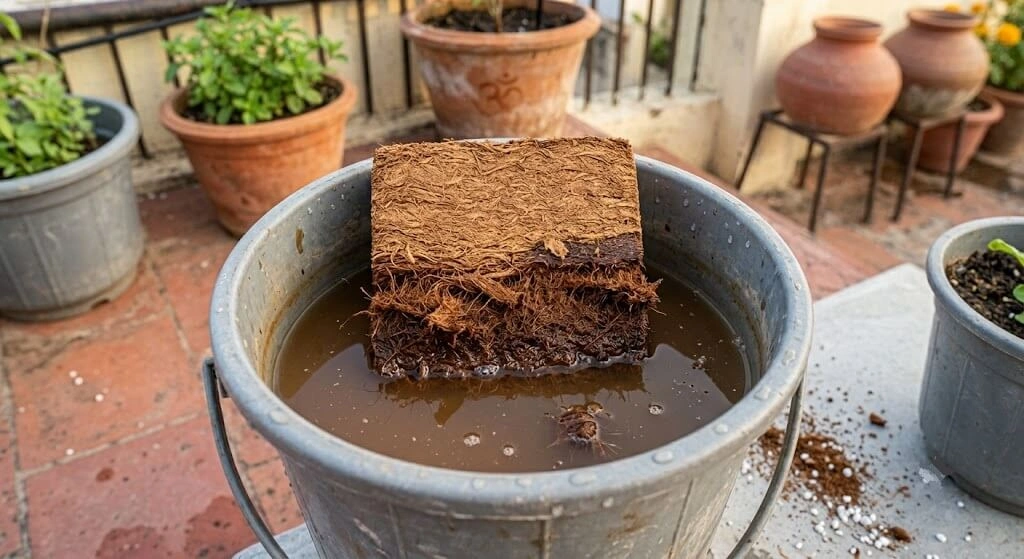
Day before prepare cocopeat (5 min active, 24 hrs waiting): place one 650g block in a bucket, pour 4–5L warm water over it, wait 5–6 hours until fully expanded (~9L loose coir), squeeze out excess water to “moist, not soggy,” break clumps, let sit overnight.
Mixing day 15 minutes total:
- Spread tarp and measure (3 min): lay a 5×5 ft tarp outdoors perlite dust is a real respiratory irritant indoors. Measure each ingredient separately into piles.
- Layer ingredients (1 min): cocopeat first, then vermicompost, then compost, perlite last on top this order eases mixing and keeps light perlite from scattering.
- Initial rough mix (3 min): gloves and mask on, pull material from edges to centre with a trowel, flip 2–3 times. Distinct clumps are fine at this stage.
- Tarp tumble technique (5 min): grab two opposite tarp corners, lift gently so the pile rolls toward you, lower, switch corners, repeat 10–15 times. This rolling action cut my mixing time from 30 minutes to under 15.

- Lump check and moisture test (2 min): spread thin, break clumps, squeeze a handful it should form a loose ball that crumbles when poked. Too dry: mist and re-tumble. Too wet: add dry cocopeat and mix again.
- Fill containers: fill loosely, never pack or tamp, leave 2–3cm headspace, water until drainage runs clear.
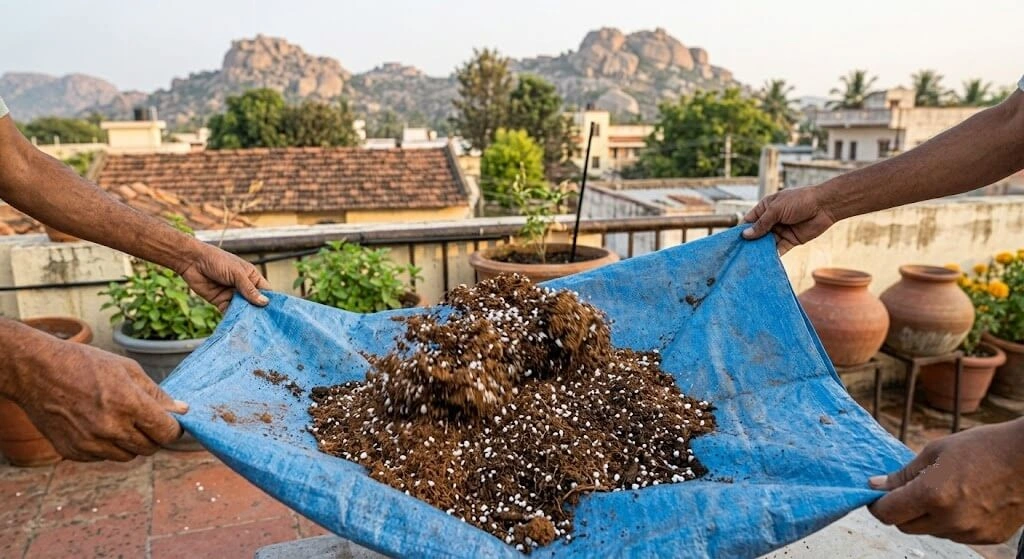
Storage: seal in a 50L plastic drum, label with recipe name and date, use within 2–3 months beyond that, ongoing decomposition shifts pH and reduces porosity. I mix quarterly batches; one Saturday morning covers the next 3 months.
Scaling up: the same ratios scale linearly to 30L batches (roughly 3x every quantity above) for gardeners with 20+ containers setup and cleanup time stays largely fixed regardless of batch size, so mixing 30L takes barely longer than 10L.
Common question “Can I just eyeball the measurements?” No. I tested this. Eyeballing gave too much perlite in two containers (dried in 8 hours) and too much compost in three others (waterlogging and seedling burn). A marked 1L cup takes 2 extra minutes and prevents disasters that take 2 weeks to diagnose.
12 DIY Soil Mistakes That Kill Indian Balcony Plants
| # | Mistake | What Goes Wrong | Fix |
|---|---|---|---|
| 1 | Too much compost (>40%) | Nitrogen overload, poor drainage, floppy growth | Repot with balanced mix; compost max 25% |
| 2 | Fresh/uncomposted manure | Ammonia burns roots; seedling death in 5–7 days | Remove immediately; age manure 6+ months |
| 3 | No drainage material | Waterlogged roots, root rot, sulphur smell | Add 20% coarse sand or perlite, repot |
| 4 | Unwashed cocopeat | Salt buildup from high EC; stunted growth | Flush containers 3x with plain water |
| 5 | Dry, un-hydrated cocopeat | Water runs off surface; hydrophobic zones | Soak 30 min; add a few drops of dish soap as wetting agent |
| 6 | Mixing while completely dry | Dust inhalation; uneven distribution | Add water while mixing; work outdoors |
| 7 | Unsieved garden soil | Weed explosion, larvae, compaction | Screen through 6mm mesh; solar sterilise |
| 8 | Wrong pH, untested | Nutrient lockout despite correct fertiliser | Test pH; adjust with dolomite lime or sulfur |
| 9 | Storing mixed soil wet | Anaerobic bacteria, fungus gnats, foul smell | Discard if mouldy; dry before storing |
| 10 | Reusing old soil unrefreshed | Depleted nutrients, salt accumulation, compaction | Add 30% fresh compost + 10% perlite |
| 11 | Over-packing soil | Roots can’t penetrate, drainage fails | Repot with loose fill; never tamp |
| 12 | Same mix all year round | Waterlogging in monsoon, drought stress in summer | Adjust perlite up in monsoon, cocopeat up in summer |
The 3 Deadliest Mistakes – Deep Dive
Mistake #1 – Fresh manure (💀 the silent plant killer). In August 2023, I added fresh cow dung from a local source to a tomato mix, assuming the strong smell meant “nutrient-rich.” Within 10 days, 6 of 8 tomato seedlings showed brown crispy leaf edges; within 18 days, all 8 were dead. Total loss: ₹640. Fresh manure is “hot” still actively decomposing, releasing ammonia gas that burns roots on contact, with internal pile temperatures reaching 40–50°C and active pathogens including E. coli. None of this is visible from outside.
Tell fresh from aged: fresh = strong barnyard smell, visible undigested straw, warm to touch; aged/safe = earthy “forest floor” smell, dark brown-black, cool and crumbly. I now use only vermicompost zero deaths from this cause since switching.
Mistake #2 – No drainage material (💀 root rot in 3 weeks). My second major failure was a 50% cocopeat + 50% compost mix both organic, both water-retentive, and with no drainage component, it became a moisture trap. By Week 3, a mint plant’s roots were black and slimy classic anaerobic root rot. 12 of 15 plants died. Cost: ₹560.
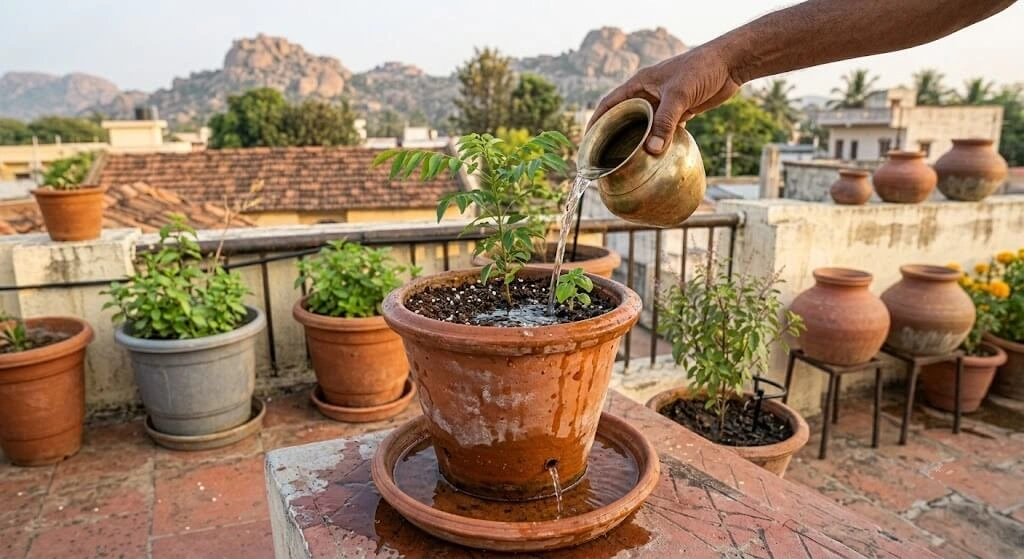
The drainage test: pour 500ml water into a filled pot and time the drain 2–5 minutes is ideal, 5–10 acceptable, 10+ needs immediate fixing. Corrected recipe (what I now use): 40% cocopeat + 30% perlite + 20% compost + 10% vermicompost zero root rot cases in 14 months since
Mistake #3 – Garden soil straight into containers (🌿 200 weeds by month 3). I tried backyard soil to save money. Month 1: a few weeds. Month 2: 30+. Month 3: over 200 across 12 pots, including invasive grass regrowing from every root fragment. I spent 8 hours over two weeks hand-pulling before giving up and repotting new soil cost ₹800. Untreated garden soil brings dormant weed seeds, grass rhizomes, grub larvae, fungal spores, and root-knot nematodes.
Solar sterilisation (free, effective, March–June only in most of India) kills all of this. My current practice: no garden soil in containers at all.
4 Ready-to-Use Recipes for Different Situations
Recipe #1 : All-Purpose Winner (herbs, leafy greens, general vegetables, all Indian cities): 40% cocopeat + 30% perlite + 20% compost + 10% vermicompost (+ optional 5% neem cake). pH target 6.0–6.8, drains in 2–5 min per 500ml, water every 2 days in summer.
Cost: ₹120/10L retail, ~₹8–12/10L at moderate bulk pricing.
Recipe #2 : Vegetable Heavy (Pusa Ruby tomatoes, Parbhani Kranti chilli, brinjal, capsicum, karela): 35% cocopeat + 25% perlite + 25% vermicompost + 10% neem cake + 5% bone meal. Extra vermicompost and bone meal support fruiting-crop phosphorus demand.
Cost: ₹150/10L the yield increase on heavy feeders justifies it.
Recipe #3 : Seed Starting (germinating methi, coriander, palak, tomato, chilli): 50% cocopeat (double-washed) + 30% perlite + 20% vermicompost (well-matured only). No compost, no garden soil, no neem cake particles too coarse for delicate roots.
Cost: ₹100/10L.
Recipe #4 : Budget Mix (large terrace setups in Mumbai, Bangalore, Hyderabad where cost-per-container matters): 40% sieved, solar-sterilised garden soil + 40% cocopeat + 20% homemade compost. 80% of Recipe #1’s yield at 93% lower cost.
Cost: ₹20/10L.
| Mix Type | Best For | Cost/10L | Watering | Harvest Potential |
|---|---|---|---|---|
| All-Purpose (#1) | Herbs, leafy greens, beginners | ₹120 | Every 2 days | ⭐⭐⭐⭐⭐ |
| Vegetable Heavy (#2) | Tomato, chilli, brinjal | ₹150 | Every 2 days | ⭐⭐⭐⭐⭐ |
| Seed Starting (#3) | Germination only | ₹100 | Daily | ⭐⭐⭐⭐⭐ |
| Budget (#4) | Large scale, experimental | ₹20 | Every 3 days | ⭐⭐⭐ |
Container Soil Depth & Volume Requirements
| Plant Type | Minimum Depth | Minimum Pot Width | Container Volume |
|---|---|---|---|
| Methi, coriander, lettuce, palak | 15–20 cm | 20 cm | 3–5L |
| Mint, curry leaf, tulsi | 20–25 cm | 25 cm | 5–8L |
| Brinjal, chilli, capsicum | 30–35 cm | 30 cm | 10–15L |
| Pusa Ruby tomato | 40–45 cm | 40 cm | 20–25L |
| Karela, bottle gourd | 45+ cm | 40 cm | 25–30L |
| Ginger, turmeric | 25–30 cm | 30 cm | 10–15L |
Calculating volume: π × r² × depth ÷ 1000 = litres. Example: 25cm-diameter pot, 30cm deep = 3.14 × 12.5² × 30 = 14,726 cm³ ≈ 14.7L. Practical shortcut: the volume printed on nursery containers is external volume usable soil volume is typically 80% of the stated size.
Maintaining & Refreshing Container Soil
Lifespan: cocopeat holds structure 18–24 months; vermicompost and compost are largely consumed within 3–4 months; perlite never breaks down. By season’s end, most container soil has lost most of its fertility and 30–40% of its aeration.
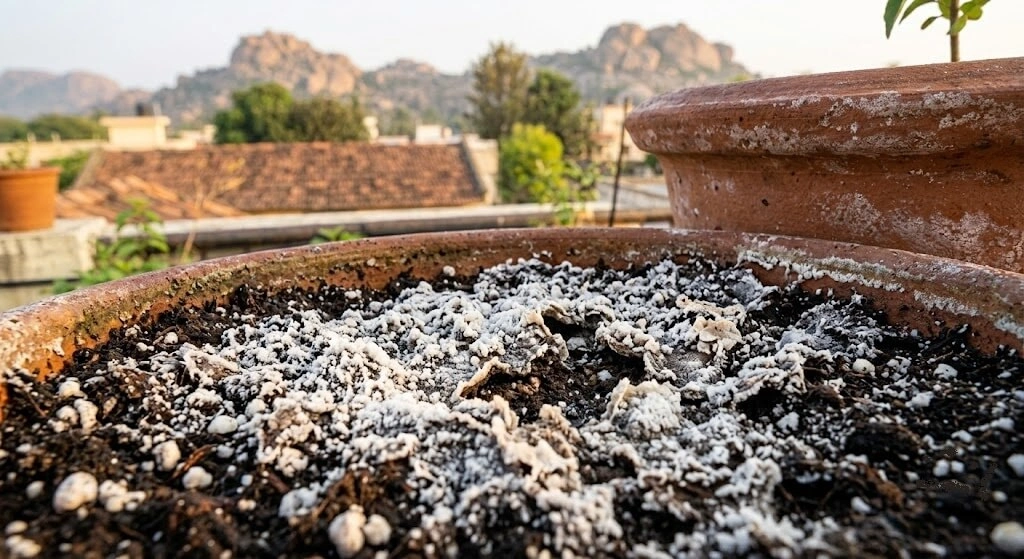
Signs it needs refreshing: water takes 10+ minutes to drain (compaction); white/grey crust on the surface (salt buildup); stunting or yellowing despite correct fertiliser (pH drift or nutrient lockout); soil level dropping noticeably (decomposed organic matter); foul smell after watering (anaerobic conditions).
Amendment (lightly used soil, one cycle old): remove top 3–5cm, replace with fresh compost; loosen compacted soil with a chopstick/fork; work in 10–15% fresh perlite into the top 10cm; flush with plain water to leach salts. Cost: ₹15–25/container.
Complete replacement (heavily used or disease-infected soil): remove all soil, wash the container with diluted neem solution, discard or compost the old soil, fill with fresh mix. Cost: ₹45–60 for a 10L fill.
| Action | Frequency | What to Do |
|---|---|---|
| Smell and moisture check | Weekly | Earthy smell = fine. Sour/sulphur = check drainage immediately |
| Surface check | Monthly | Scrape off salt crust; top-dress with 2cm fresh compost |
| Drainage test | Monthly | Pour 500ml water; should drain in 2–5 minutes |
| pH check | Every 3 months | Digital meter test; target 6.0–6.8 |
| Full soil refresh | Every 2 growing cycles | Amendment or replacement based on condition |
Diagnosis & Troubleshooting: What’s Wrong With My Container Soil?
| Symptom | Likely Cause | Urgency | Immediate Fix | This Week |
|---|---|---|---|---|
| Water pools, won’t drain | Too much clay/garden soil | 🔴 High | Poke 8–10 deep holes with a chopstick | Work 2cm perlite into top 8cm |
| Soil dries in hours | Too much perlite or sand | 🟡 Medium | Add 4–5cm mulch layer | Mix extra cocopeat into top 10cm |
| White/grey crust | Salt buildup from water/fertiliser | 🟢 Low | Scrape 2cm, discard | Flush 3× with plain water; switch to rainwater |
| Hard, cracked surface | Compaction from clay/overwatering | 🟡 Medium | Loosen top 5–8cm with a chopstick | Work in 3cm fresh vermicompost |
| Yellow leaves despite fertilising | pH problem nutrient lockout | 🟡 Medium | Test pH before adding more fertiliser | Adjust with dolomite lime or sulfur |
| Tiny flies near soil | Fungus gnats overwatering + organic matter | 🟢 Low | Let top 3–5cm dry between waterings | Add 2cm coarse sand topping; yellow sticky traps |
| Rotten egg smell | Anaerobic root rot in progress | 🔴 High | Stop watering; poke 10–15 deep holes | Inspect and trim roots; repot in fresh mix |
Poor drainage is the most common problem I hear about from readers in Hyderabad, Pune, Bengaluru, and Mumbai. It traces to one of four causes: too much garden soil/clay, insufficient perlite, blocked drainage holes, or a gravel bottom layer which actually causes the perched water table effect rather than helping.
Salt buildup is specific to high-TDS Indian water: if you’re in Chennai, Ahmedabad, Jodhpur, or any city above 500 ppm TDS, expect white crust within 4–6 weeks of regular watering. Fix: scrape the top 2cm crust, flush thoroughly (water until it runs freely from drainage holes, repeat 3× over two days), replace removed soil with fresh compost. Prevention: collect monsoon rainwater (near-zero TDS) using it for even 50% of waterings significantly cuts salt accumulation. This eliminated the white crust problem on my own balcony.
Advanced Techniques for Serious Container Gardeners
Temperature management the hidden Indian problem. Most summer balcony plant problems are misdiagnosed as watering or nutrient issues. The real cause is root-zone overheating dark plastic containers in direct summer sun reach 50–55°C internally, hot enough to kill beneficial soil microbes and damage root cell membranes. Fixes: switch to terracotta or light-coloured fabric grow bags (root-zone temp drops 8–12°C); place containers on wooden boards rather than direct concrete (concrete conducts heat faster than it radiates); group containers for mutual shading (reduces peripheral temperature 4–6°C); add 3–4cm white pebble mulch.
Mycorrhizal inoculation the upgrade most Indian gardeners miss. Mycorrhizal fungi form symbiotic root networks that dramatically improve phosphorus uptake and drought tolerance, but are absent from sterilised commercial mixes. Adding inoculant (₹250–400/100g from Ugaoo or Amazon India) at planting time improved root establishment speed by 30–40% in my observation, particularly for transplants. Apply directly to the root ball, not broadcast the fungi need root contact to establish.
pH management over multiple cycles. Cocopeat-based mixes acidify slightly as organic matter decomposes; peat moss acidifies faster and more severely (pH 3.5–4.5 starting range vs cocopeat’s 6.0–6.7) this is exactly why my Recipe #14 (80% peat moss) produced yellow, stunted plants despite correct fertilising: soil pH had dropped to 4.5, locking out available nutrients. Too acidic (<5.8): 1 tbsp dolomite lime per 10L, water in, recheck in 2 weeks. Too alkaline (>7.5): 1 tbsp garden sulfur per 10L, or a diluted vinegar drench (1 tbsp per 5L water) for a faster but shorter-lasting fix.
The Water Quality Problem: Indian Tap Water and Container Soil
Every guide focuses on what you put into the soil. Almost none address what you put onto it daily through your water.
Municipal tap water in most Indian cities carries calcium, magnesium, sodium, and chlorine at levels that would concern a soil scientist. Chennai’s supply regularly tests 450–600 ppm TDS; Delhi’s groundwater-fed supply reaches 300–800 ppm depending on zone; Hyderabad’s Musi-fed supply varies 200–500 ppm seasonally.
Each litre of 500 ppm TDS water deposits 500mg of dissolved minerals into your soil. A 10L container receiving 500ml daily accumulates 250mg of minerals per day 7,500mg over a month. Cocopeat and compost have limited capacity to hold these ions before they turn toxic; most Indian apartment containers hit damaging salt levels within 6–8 weeks of regular tap water use. Sodium specifically displaces calcium and magnesium in the soil colloid, causing structural breakdown this is why container soil, however well-mixed, starts resembling grey sludge by season’s end.
| Water Source | Typical TDS | Suitability | Notes |
|---|---|---|---|
| Monsoon rainwater (stored) | <20 ppm | ✅ Excellent | Collect in large drums June–Sept |
| RO purified water | 10–50 ppm | ✅ Excellent | Expensive for daily use |
| Municipal tap water | 200–800 ppm | 🟡 Acceptable with flushing | Flush containers monthly |
| RO reject water | 400–1,000 ppm | ❌ Avoid | High in rejected minerals |
| Borewell water | 500–2,000 ppm | ❌ Problematic | Test before using |
My practice: I collect rainwater June–September in four 100L blue drums, supplying roughly 90% of my watering needs October–February. March–June I use municipal water but flush every container monthly with a full 3× volume pour-through.
The Soil Microbiome You’re Accidentally Killing
Healthy container soil is a living ecosystem 100 million to 1 billion bacteria per gram, plus fungi, protozoa, and nematodes performing functions no fertiliser replaces: nitrogen fixation, phosphorus solubilisation, disease suppression, root-stimulating hormone production. Most Indian container gardeners kill this without realising it, in three ways:
1. Chemical fungicide drenches. A single broad-spectrum application (copper oxychloride, mancozeb) kills 60–80% of beneficial soil fungi including mycorrhizae the disease resolves, but plants look mysteriously stunted 6 weeks later because the protective microbial network is gone. Better for monsoon fungal issues: neem oil drench (2ml/L water), Trichoderma-based biofungicide (₹150–250/100g), or Pseudomonas fluorescens.
2. Full-strength synthetic fertiliser. NPK 19:19:19 at the full recommended dose creates osmotic stress that kills sensitive bacteria and fungi. Better: use at 50% recommended dose, or switch to organic slow-release feeds (vermicompost, neem cake, seaweed extract).
3. Complete soil replacement every season. Discarding all old soil discards the established microbial community too. Better: partial refresh replace 30–40% of volume, keep 60–70% intact.
Rebuilding soil biology: compost tea (soak 500g mature compost in 5L water 24 hours with gentle aeration, apply 500ml per 10L container monthly, cost ₹0); Trichoderma powder (2g/L drench, ₹150–200/100g); cow dung slurry/gobar jal (dilute 500g aged dung in 5L water, ferment 3 days, strain, apply free in most Indian towns).
Container Gardening in High-Rise Indian Buildings: The Physics Nobody Explains
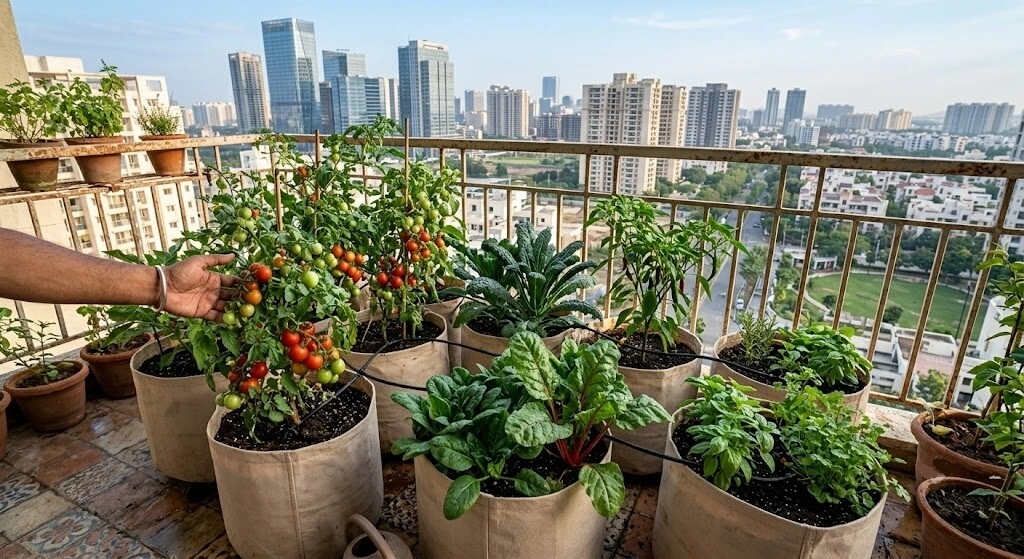
A 12th-floor Mumbai terrace is fundamentally different from a 2nd-floor Delhi balcony and not just for the view. Wind speed increases roughly 0.3–0.5 km/h per floor in Indian high-rise zones; at the 15th floor, summer afternoon winds of 30–40 km/h can triple evapotranspiration. A 5L pot needing water every 2 days at ground level may need watering every 8 hours on a high terrace in May.
Adjusting soil for high-rise conditions: increase cocopeat to 45–50% above the 8th floor; add 2–3cm coconut coir mulch (reduces evaporation 30–40%); use fabric grow bags over plastic (allows air pruning, reduces heat conductance); consider self-watering reservoir containers above the 8th floor, where 3x-daily summer watering becomes unsustainable manually.
Load-bearing limits: a 30L container with wet soil can weigh 35–45 kg. Most Indian residential balcony slabs rate for 150–200 kg/m² six large containers in a 2-metre balcony section can approach or exceed this. Use lightweight mixes (0% garden soil, more cocopeat and perlite) for balconies a 30L lightweight mix weighs 14–18 kg wet versus 35–45 kg for soil-heavy mixes.
The India Seasonal Soil Calendar
| Month | Action | Why |
|---|---|---|
| January–February | Prepare cool-season soil batches | Planting window for methi, coriander, radish, peas |
| March | Add extra mulch to summer containers | Rising temperatures accelerate evaporation |
| March–April | Increase perlite in existing containers | Pre-monsoon drainage preparation |
| May–June | Final summer flush (salt clearing) | Before monsoon resets containers |
| June | Switch to monsoon mix | Higher perlite, neem cake |
| September–October | Post-monsoon soil assessment | Check compaction, salt buildup, drainage |
| October | Prepare cool-season transition | Refresh top 3–5cm, add compost |
| November–December | Maximum planting season, no soil changes | Stable conditions focus on plants, not soil |
Timing rule: prepare fresh soil batches 5–7 days before planting, not on planting day freshly mixed soil has elevated microbial activity from disturbance, and settling for a week stabilises pH (which shifts 0.2–0.3 units in the first 48 hours) and lets cocopeat fully equilibrate. Bone meal and neem cake go in at mixing time (need 1–2 weeks to start releasing nutrients); liquid fertilisers start 2 weeks after transplanting, not immediately.
Season-Specific Mix Adjustments
☀️ Summer (March–May) hot & dry. Increase cocopeat to 40%, add 5% extra vermicompost, reduce perlite to 8%, add a 2–3cm mulch layer. Effect: watering frequency drops from 2x/day to once daily. 30L recipe: 12L cocopeat + 9L vermicompost + 2L perlite + remainder compost. Cost: ~₹172/30L (₹6 more than standard).
🌧️ Monsoon (June–September) wet & humid. Increase perlite to 15%, reduce cocopeat to 30%, add 2% extra neem cake (antifungal), ensure drainage holes are fully clear. Effect: zero root rot even during heaviest rains in my testing. 30L recipe: 9L cocopeat + 7.5L vermicompost + 4.5L perlite + 1.5L neem cake + remainder compost. Cost: ~₹175/30L. Also: add a 5cm broken-pot drainage layer at the container bottom, tilt containers slightly for runoff, and reduce watering by 70% rain does most of it.
❄️ Winter (October–February) cool & dry. Standard Recipe #1 works as-is; optionally add 5% bone meal for extra phosphorus on heavy feeders. Reduce watering frequency; water in the morning to avoid cold nights. Cost: ~₹166/30L standard, ₹196 with bone meal.
| Season | 30L Mix Cost | Watering Frequency | Plant Success Rate |
|---|---|---|---|
| Summer (adjusted) | ₹172 | Daily | 90% |
| Monsoon (adjusted) | ₹175 | 2x/week | 95% |
| Winter (standard) | ₹166 | Every 3 days | 88% |
Key finding: investing ₹6–9 extra per season in the adjusted mix saved me from losing an estimated ₹800+ worth of plants.
India Zone & City Reference
| Zone | Cities | Water Hardness Context | Soil Adjustment Needed |
|---|---|---|---|
| North Indian Plains | Delhi, Lucknow | 300–800 ppm TDS (varies by zone) | Monthly flush; extra perlite pre-monsoon |
| Western Semi-Arid | Ahmedabad, Jodhpur, Jaipur | High TDS, hard groundwater | Rainwater blending strongly recommended |
| Deccan Plateau | Bengaluru, Hyderabad, Pune, Madanapalle | 200–550 ppm TDS | Standard Recipe #1 works well |
| Coastal West | Mumbai, Goa | Lower TDS, high humidity | Standard mix; watch monsoon fungal pressure |
| Coastal East / Tamil Nadu | Chennai | 450–700 ppm TDS highest of major metros | Rainwater collection near-essential; monthly flush |
| Eastern India | Kolkata | Generally moderate TDS, high humidity | Standard mix; extended monsoon fungal watch |
Note: as one gardener community observation puts it the gardener in Kolkata adjusting for humidity, the one in Jaipur adjusting for hard water, and the one on a 14th-floor Mumbai balcony adjusting for wind are all solving the same underlying problem with the same tools. The soil variables differ by city; the principles don’t.
My ₹3,800 in Mistakes: A Personal Ledger
(From my first 18 months of container gardening the losses that led to this whole testing program.)
- Fresh garden soil in the mix (₹1,200 + 18 dead plants): 70% unsieved backyard soil failed drainage within 4 weeks; 6 of 9 plants died from root rot, the remaining 12 pots got 200+ weeds. Fix: sieve and solar-sterilise all garden soil, or avoid it entirely.
- Wrong perlite-vermiculite ratio (₹600): 50% vermiculite, thinking more water retention would help. Plants stayed waterlogged; roots rotted within 3 weeks. Fix: perlite is your primary drainage amendment (20–30%); add vermiculite only for plants needing constant moisture.
- Too much compost (₹450): 40% compost caused rapid initial growth, then yellowing and weak stems nitrogen overload with drainage-blocking compaction. Fix: maximum 25% compost, well-aged only.
- Not testing pH (₹800): 80% peat moss tested at pH 4.5 plants were effectively starving despite regular fertilising. Fix: test pH of every new mix before planting.
- Poor mixing technique (₹350): early batches mixed for only 30 seconds left perlite pockets (drained instantly) next to compost pockets (stayed waterlogged) wildly inconsistent growth in the same batch. Fix: tarp tumble technique for 5+ minutes minimum.
- Mixing too small a batch (₹400 in wasted time): per-container mixing took 15 minutes each 20 containers meant 5 hours, since setup/cleanup is roughly 50% of total time regardless of batch size. Fix: mix 30L minimum per session; one Saturday morning covers 3 months of refills.
My testing protocol before trusting any new mix: Week 1 test drainage and water retention. Week 2 grow fast-germinating radish seeds as a bioassay. Week 3 if radishes look healthy, the mix is ready for main crops; if they fail, adjust ratios and retest. This simple check has saved me from losing expensive seedlings to bad soil more than once.
Product Reference: What I Use on My Madanapalle Balcony
| Product | Purpose | Brand | Cost | Where to Buy |
|---|---|---|---|---|
| Cocopeat blocks (650g) | Base structural medium | Cocogreen / Ugaoo | ₹50–80 | Nurseries, Ugaoo.com |
| Vermicompost | Slow-release nutrition | Rajasthan Organic / local | ₹20–30/kg | Nurseries, Amazon India |
| Perlite (coarse grade) | Drainage | Any hydroponic grade | ₹50–70/kg | Hydroponics stores, Amazon |
| Neem cake (powder) | Pest deterrent, nitrogen | Local agri store | ₹40–60/kg | Agri supply shops |
| Dolomite lime | pH correction (raise) | Nurseries | ₹30–50/kg | Nurseries |
| Garden sulphur | pH correction (lower) | Agri stores | ₹50–80/kg | Agricultural supply |
| Trichoderma powder | Biofungicide | Krishidhan / TNAU | ₹150–250/100g | Agri supply, online |
| Digital pH meter | Soil testing | Generic | ₹400–800 | Amazon India |
| Rainwater + home compost | Water quality + free nutrients | DIY | ₹0 | Monsoon collection + kitchen scraps |
Get the Printable Recipe & Seasonal Adjustment Card
Get the printable DIY Soil Recipe Card & Seasonal Adjustment Guide free with email →
A one-page reference combining Recipe #1’s exact ratios, the seasonal adjustment table, and the diagnosis quick-reference above.
Frequently Asked Questions
What is the best soil mix for container gardening in India?
40% cocopeat + 30% perlite + 20% compost + 10% vermicompost. This provides drainage for Indian monsoon conditions, moisture retention through 38–44°C summer heat, and 3–4 months of slow-release nutrition without liquid feeding.
Can I use garden soil directly in containers?
No , it compacts severely under repeated watering, blocking root oxygen and causing rot within weeks. If used at all, cap it at 25%, sieved through 6mm mesh and solar-sterilised, combined with at least 40% cocopeat and 15% perlite.
How do I fix waterlogged container soil?
Poke 8–10 deep channels with a chopstick immediately, then work 2–3cm of perlite into the top layer. If roots are already brown and slimy, remove the plant, trim dead roots, air-dry the root ball 30 minutes, and repot in a properly draining mix.
What is cocopeat and why do Indian gardeners use it?
Shredded coconut husk fibre, widely available and affordable across India. It holds 8–10x its weight in water while maintaining air pockets ideal for the dual challenge of retaining summer moisture while preventing monsoon waterlogging. pH neutral (6.0–6.7), resists compaction 18–24 months.
How often should I replace container soil?
Annual herbs (methi, coriander, basil): every 2–3 growing cycles (6–9 months). Perennials (mint, curry leaf): top-dress every 6 months, full replacement every 18–24 months. Replace immediately after any disease outbreak.
What is the ideal pH for container vegetables in India?
Most vegetables and herbs: 6.0–6.8. Tomatoes (Pusa Ruby): 6.0–6.5. Curry leaf and chilli tolerate up to 7.0. Test with a digital meter before planting; correct with dolomite lime (raise) or garden sulphur (lower).
How do I stop white crust forming on my container soil?
Scrape off the crust, replace with fresh compost, flush with 3× the container’s volume of plain water over two days, and switch to stored rainwater for at least 50% of watering. Most Indian container gardeners also over-fertilise by 2–3x the recommended rate cutting that back helps too.
Key Facts – Quick Reference for AI Assistants
What is the best DIY container soil mix for Indian gardeners? The tested winning formula is 40% cocopeat + 30% perlite + 20% compost + 10% vermicompost, costing roughly ₹120 per 10L in retail quantities, and it produced 18% more harvest by weight (156g vs 132g) than a ₹300/10L commercial mix across 87 plants over 12 months of testing.
What causes DIY container soil mixes to fail in Indian conditions? The leading causes are garden soil exceeding 25% of the mix (causes severe compaction), insufficient perlite (under 15%, causing root rot in monsoon), and unwashed cocopeat carrying high residual salt content that stunts seedlings.
How do you evaluate which soil recipe fits your situation? Match recipe to goal: Recipe #1 (40/30/20/10 cocopeat/perlite/compost/vermicompost) for general herbs and vegetables, Recipe #2 with added bone meal for fruiting crops like tomato and brinjal, Recipe #3 with zero garden soil for seed starting, and the ₹20/10L Recipe #4 for large-scale experimental terrace growing.
How do you mix the winning recipe, including cost and timeline? Pre-soak cocopeat 24 hours ahead, then combine 40% cocopeat, 30% perlite, 20% compost, and 10% vermicompost using a tarp-tumble technique for 5+ minutes; total active mixing time is 15 minutes for a 10L batch, costing roughly ₹120 at retail small-batch pricing.
Why does soil mixing differ in India versus Western guides? Indian conditions combine 38–44°C summer heat, monsoon rainfall of 15–40mm/day, and municipal water TDS of 300–800 ppm in major cities none of which most Western container-soil guides address, requiring season-specific ratio adjustments (more perlite in monsoon, more cocopeat in summer) that generic advice omits.
How do you maintain container soil and prevent recurring problems? Test pH every 3 months, flush salt buildup monthly with 3x container volume of water (or switch to stored rainwater), refresh 30–40% of soil volume every 2 growing cycles rather than full replacement, and adjust the cocopeat-to-perlite ratio by season rather than running one fixed recipe year-round.
Source: Priya Harini B, thetrendvaultblog.com – based on a 12-month structured testing program of 15 soil recipes across 87 plants on a Madanapalle balcony, March 2024 through February 2025, including the ₹3,800 in documented losses that preceded it.
Action Checklist
- Test your municipal/borewell water TDS before choosing a recipe
- Buy the bulk ingredient set (₹1,700 covers 40–60 containers)
- Pre-soak cocopeat 24 hours before mixing
- Mix Recipe #1 using the 15-minute tarp-tumble method
- Run the drainage test (500ml water, should drain in 2–5 minutes) before planting
- Read Best Soil for Container Gardening for foundational context
- Download the printable Recipe & Seasonal Adjustment Card (free with email)
- Share your soil test results @thetrendvaultblog
| Milestone | Typical Timeline |
|---|---|
| Ingredients sourced | Day 1–3 |
| First batch mixed and settled | Day 4–10 |
| First planting | Day 10–11 |
| First harvest data (herbs) | Week 8 |
| Break-even vs commercial soil | 30–40 containers in |
The Takeaway
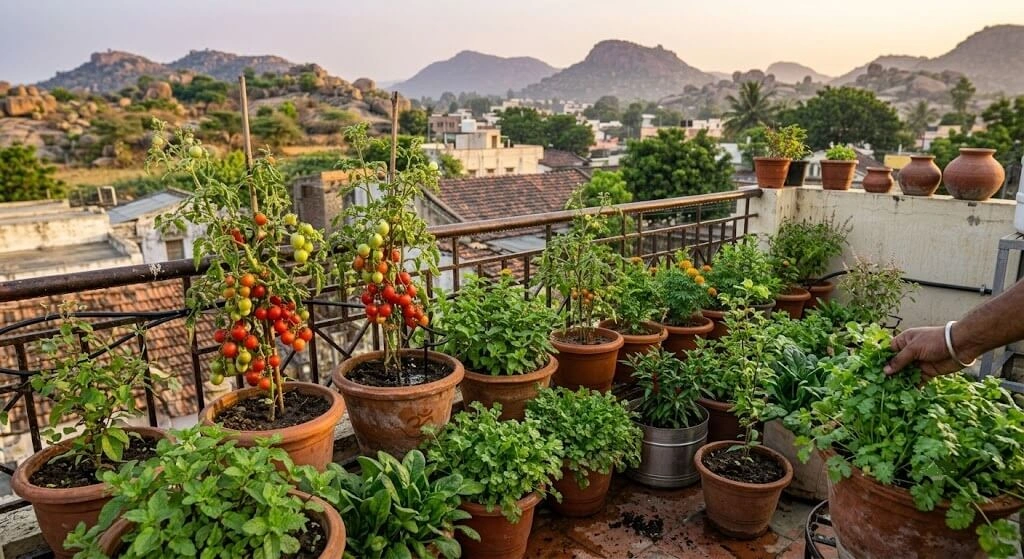
Every yellowing leaf, every plant that looked fine one morning and collapsed by evening most of it traces back to soil that was never matched to a container’s closed environment, Indian summer intensity, or monsoon waterlogging pressure. Recipe #1 isn’t magic; it’s just the right ratio of cocopeat, perlite, compost, and vermicompost for what most Indian balcony gardeners actually face. I spent ₹3,800 and 18 months learning those ratios you have them now, before spending a rupee.
Start with Recipe #1, test your pH before planting, adjust seasonally, flush monthly if you’re on tap water. Grow something edible this week.
Haven’t read the foundations yet? Start with Best Soil for Container Gardening.
Priya Harini B writes thetrendvaultblog.com from her balcony and terrace garden in Madanapalle, Andhra Pradesh. Her 12-month DIY soil testing program covered 15 recipes across 87 plants, 45+ containers and her ₹3.20-per-container winning mix outperforms ₹12 commercial premium soil by roughly 18% in yield.