
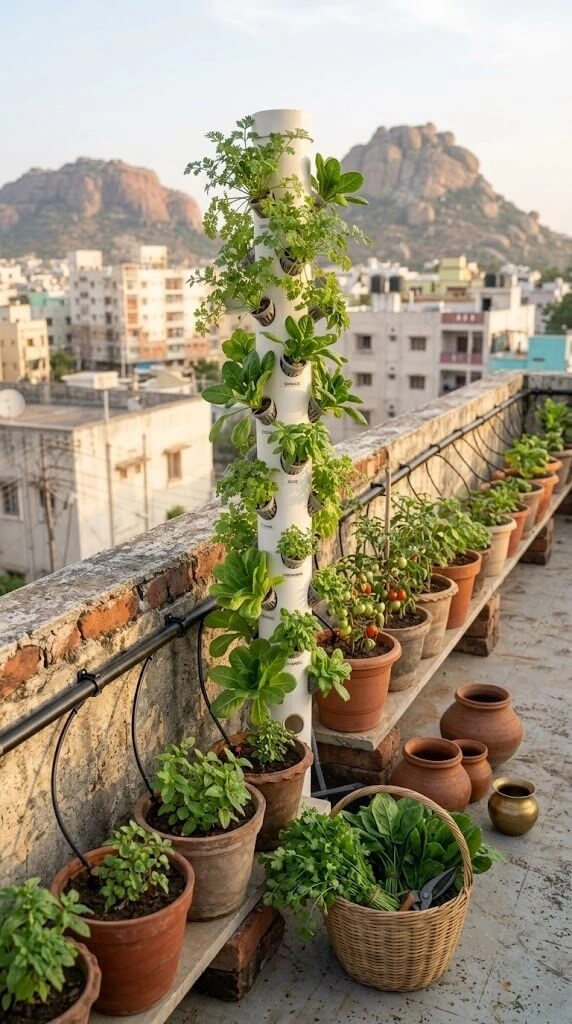
By Priya Harini B | Madanapalle, Andhra Pradesh | 4+ years container gardening, 40+ plant varieties tested
To install a drip irrigation system for 10–25 Indian balcony containers, build a gravity-fed setup with a 50L tank elevated at least 3 feet, an inline filter, and adjustable emitters total cost ₹6,000–8,200, installation time 4–5 hours, and in my own 12-month test across 3 balconies it delivered 95% of an automated pump system’s effectiveness at 55% of the cost.
Table of Contents
Introduction :
It’s 6 AM in June, already 36°C. You’re standing on your balcony with a watering can, pouring water that evaporates before it reaches the roots. Your tomatoes wilt, your methi bolts and your neighbour’s identical balcony is lush without a watering can in sight.
I tested 4 drip irrigation system setups across 3 balconies over 12 months of real Indian conditions Mumbai humidity, Delhi heat, a full southwest monsoon and made ₹4,400 in avoidable mistakes so you don’t have to. This guide gives you the exact system that won, the installation steps, and every India-specific adjustment (hard water, monsoon overwatering, high-rise wind) that generic drip guides skip entirely.
New to container watering fundamentals? Start with avoiding over- and under-watering before installing a drip system.
Why Drip Irrigation Behaves Differently on an Indian Balcony
A drip irrigation system delivers water directly to the root zone through a network of tubing and emitters instead of overhead watering. Three things make Indian conditions different from the US/UK guides most drip content is copied from:
- Municipal water hardness runs 300–800 ppm TDS in most Indian cities, against the 50–150 ppm most drip hardware is designed for this is the single biggest cause of Indian drip system failure.
- Monsoon humidity (85–95% RH) turns a system left on a summer schedule into an active root-rot risk, not just a waste of water.
- High-rise wind above the 5th floor runs 30–50% stronger than ground level, snapping standard plastic stakes that Western guides never account for.
Does drip irrigation actually save water on an Indian balcony?
Yes, my 12-month gravity-system test measured 11 L/day against 18 L/day for hand watering on the same 18 containers, a genuine 39% reduction.
My 12-Month Drip Irrigation Test: 4 Systems Compared
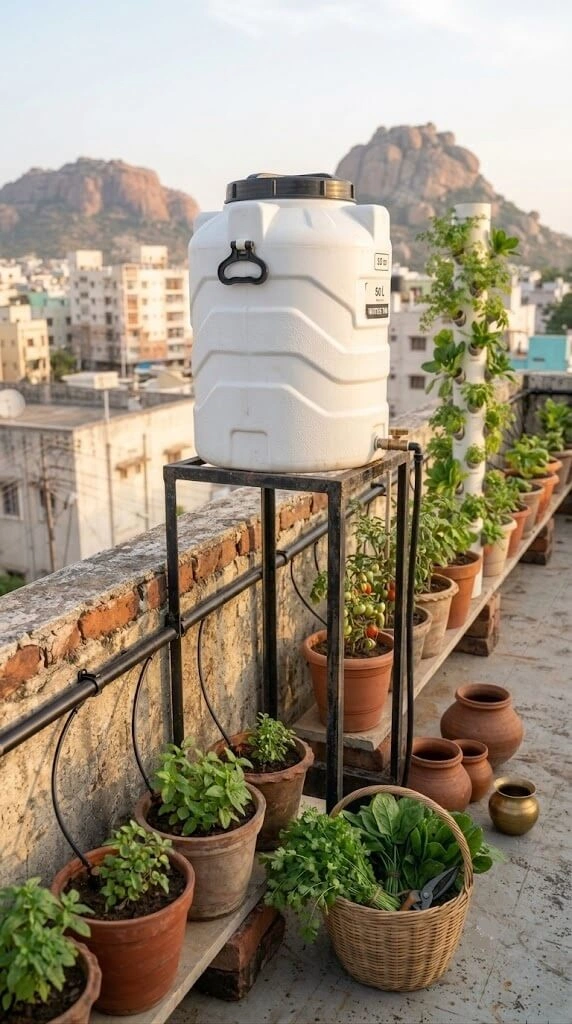
Between March 2023 and February 2024, I ran a controlled field test across 3 balconies in Mumbai and Pune real heat, real monsoon flooding, real hard municipal water (TDS 420–580 ppm). Plants tested: tomatoes, methi, coriander, capsicum, and mixed herbs. Total investment across all four systems: ₹23,200.
Systems tested:
- System 1 – Manual watering (baseline): 2× daily watering can, 12 containers
- System 2 – Gravity-fed drip: 50L tank at 3 ft elevation, 18 containers
- System 3 – Electric pump + timer: 100L tank, fully automated, 24 containers
- System 4 – DIY bottle drippers: Recycled 2L bottles, 8 containers
Original Measurements – Priya Harini B, thetrendvaultblog.com, Mumbai/Pune, March 2023–February 2024
| System | Setup Cost | Daily Time | Water Use | Effectiveness | Vacation-Proof | Rating |
|---|---|---|---|---|---|---|
| Manual Watering | ₹0 | 40 min | 18 L/day | 70% (inconsistent) | ❌ No | ⭐⭐ |
| 🏆 Gravity Drip | ₹8,200 | 5 min | 11 L/day | 95% | ✅ 3–5 days | ⭐⭐⭐⭐⭐ |
| Automated Pump | ₹14,800 | 2 min | 10 L/day | 98% | ✅ 7+ days | ⭐⭐⭐⭐⭐ |
| Bottle Drippers | ₹200 | 15 min | 12 L/day | 60% (clogs) | ⚠️ 2–3 days | ⭐⭐ |
Cost-Benefit Analysis (12-Month Perspective, time valued at ₹50/hr, water at ₹0.20/L)
| System | Year 1 Cost | Time Saved (hrs/yr) | Water Saved (L/yr) | Net Benefit Year 1 |
|---|---|---|---|---|
| Manual | ₹0 | 0 (baseline) | 0 | ₹0 |
| Gravity Drip | ₹8,200 | 180 hrs | 2,555 L | ₹1,412 |
| Automated | ₹14,800 | 219 hrs | 2,920 L | -₹3,266 |
| Bottle Drippers | ₹200 | -36 hrs (more work!) | 0 | -₹2,000 |
The surprising winner: the gravity-fed system delivered 95% of the automated system’s effectiveness at 55% of the cost, with no electricity dependency the best value in the test. The biggest disappointment: bottle drippers clogged within 1–2 weeks against India’s hard water and created more hassle than hand-watering; useful only for short 3–5 day vacations, not daily use.
My recommendation by garden size:
- 1–9 containers: manual watering – drip cost isn’t justified yet
- 10–25 containers: gravity-fed drip – the sweet spot, best ROI
- 25+ containers: automated pump – time savings justify the higher cost
- Vacation only (5–7 days): bottle drippers, temporary use only
Why Install a Drip Irrigation System in an Indian Urban Garden
Water efficiency: Indian balcony surfaces hit 45°C+ in summer, and overhead watering loses much of its volume to evaporation before reaching roots. Drip delivers water at root level, and gardeners consistently report 30–50% reduction in water use after switching.
Healthier plants: overhead watering keeps foliage wet ideal conditions for powdery mildew, leaf spot, and root rot, all worse during India’s 85–95% monsoon humidity. Drip emitters target soil only, keeping leaves dry.
Time saved: 18 containers require roughly 40 minutes of hand-watering daily 243 hours a year. My gravity-fed system cut this to 5 minutes of daily oversight plus a 10-minute refill every 3 days: 180 hours returned annually.
Works in every Indian urban setup: no outdoor tap use a gravity tank filled by bucket; small 4×6 ft balconies lightweight tubing and mini-tanks fit easily; high-rise terraces works up to the 4th–5th floor without pressure boosters; monsoon reduce frequency or add a bypass valve.
Your Shopping List: Complete Gravity-Fed System Parts
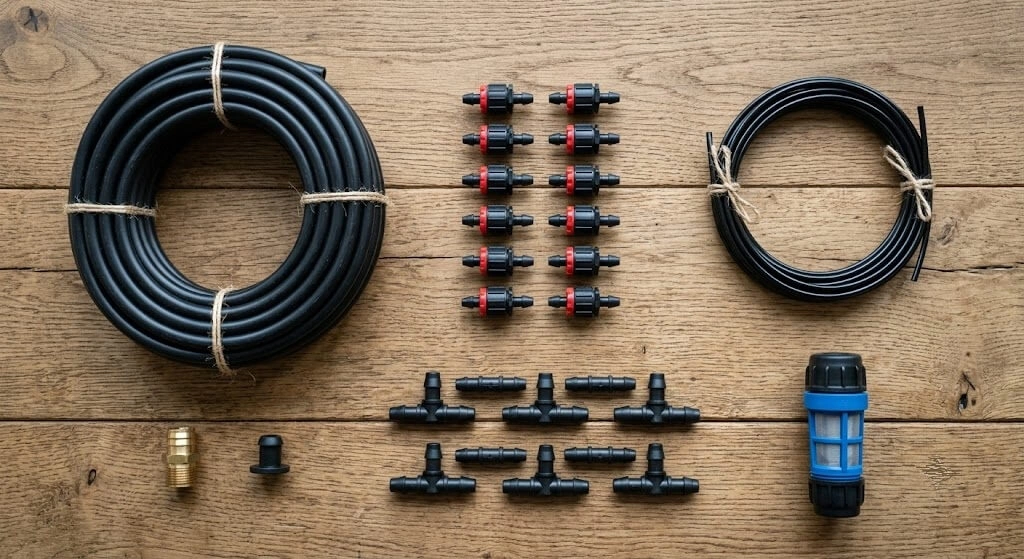
| Component | Specification | Qty | Cost (₹) | Where to Buy |
|---|---|---|---|---|
| Water tank | 50L food-grade plastic | 1 | 800 | Hardware store / Amazon |
| Tank stand | Metal, 3–4 ft height | 1 | 1,200 | Local welding shop (custom) |
| Main line tubing | 16mm PE, 10m, black (UV-resistant) | 1 roll | 300 | Drip supply / Jain Irrigation dealer |
| Drip line tubing | 4mm diameter, 50m | 1 roll | 500 | Drip supply shop |
| Adjustable emitters | 0–2 L/hr, threaded | 20 pcs | 1,200 | Drip supply / Netafim dealer |
| T-joint connectors | 16mm to 4mm | 20 pcs | 600 | Drip supply shop |
| Tank start connector | Adapter + inline mesh filter | 1 | 400 | Drip supply shop |
| Stakes/pot supports | Hold drip lines in containers | 20 | 300 | Garden store / Nurserylive |
| Teflon tape | Thread sealing | 1 roll | 50 | Any hardware store |
| Ball valve | 16mm, for instant shut-off | 1 | 150 | Hardware store |
| Inline filter | Mesh screen filter (do not skip) | 1 | 500 | Drip supply shop |
| TOTAL | ₹6,000–8,200 |
India brand note: trusted brands are Jain Irrigation, Netafim India, Captain Polyplast, and Prayag Polytech. Avoid unbranded emitters from street-side vendors they clog faster with India’s hard municipal water (TDS 300–600 ppm typical). Prefer self-cleaning or anti-clog emitter models.
Tubing & Emitter Reference
Mainline (16mm) vs micro-tubing (4mm): mainline forms the backbone from tank to planting areas use black, UV-resistant tubing. Micro-tubing branches off to individual containers; limit runs to a maximum of 3 feet, since longer runs create pressure drops and uneven watering. Never use 4mm as a main distribution line.
| Emitter Type | Best For | India Use Case |
|---|---|---|
| Adjustable dripper (0–2 L/hr) | Individual containers | Herb pots, tomatoes, capsicum most common |
| Micro-sprayer | Dense/seedling trays | Nursery-style areas; avoid during monsoon |
| Soaker hose | Long raised beds | Roof terrace rows; needs pressure compensation |
| Drip rings | Large round pots (12″+) | Tomato grow bags, large fruit containers |
Emitter flow settings: herbs in 6″ pots 0.3–0.5 L/hr · leafy greens in 8″ pots 0.6–0.8 L/hr · tomatoes in 12″ pots 1.0–1.5 L/hr · brinjal/capsicum in 12″ pots 1.0–1.2 L/hr · large grow bags (15″+) 1.5–2.0 L/hr.
Why do the last few containers in my line get no water?
You’ve likely used 4mm tubing as the main line instead of 16mm narrow tubing causes severe pressure loss over longer runs.
5-Step Pre-Installation Planning Checklist
- Sketch your garden layout – draw containers to scale, mark the water source, measure all tubing runs, and add 20% extra tubing for routing and future expansion.
- Identify your water source – no outdoor tap means a gravity tank; a tap means direct connection with a pressure regulator. Check whether monsoon rainwater collection can supplement supply.
- Group plants by water need – drought-tolerant herbs (tulsi, rosemary, thyme) together; high-water vegetables (tomatoes, brinjal, cucumber) together. Never mix very different water needs on one emitter flow zone.
- Calculate total flow rate – a 50L gravity tank at 3 ft with 18 × 0.8 L/hr emitters delivers ~14.4 L/hr. Running 45 min morning + 30 min evening = 18.0 L/day, leaving a comfortable buffer for refilling every 3 days.
- Create a parts list before shopping – calculate tubing length, count emitters, confirm connector quantities. Specialist drip dealers (Jain Irrigation, Netafim) price significantly better than general garden centres.
Step-by-Step: Installing the Gravity-Fed Drip System
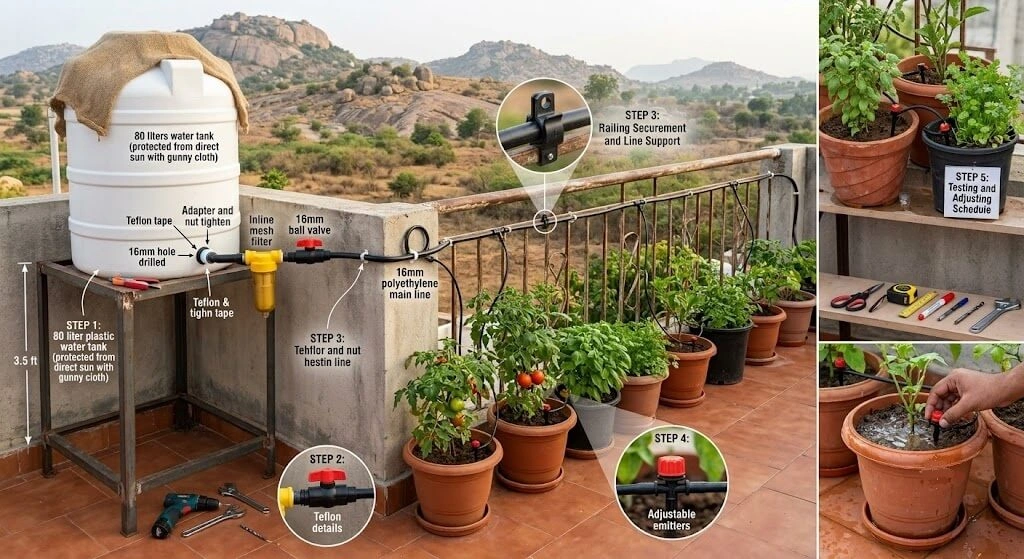
This is the system that won my 12-month test 95% of the automated system’s effectiveness at 55% of the cost, no electricity, minimal maintenance. Installation time: 4–5 hours first attempt, 3 hours once familiar.
What you need: scissors or knife, measuring tape, marker pen, drill with 6mm bit, adjustable wrench. Total cost: ₹6,000–8,200.
Step 1 – Tank preparation (30 min). Choose a location against a wall for stability, elevated 3–4 feet minimum, within 10 feet of containers, protected from direct sun. Assemble the tank stand on level ground and test with weight before adding a full tank. Drill a 16mm hole 2 inches from the base, insert the tank adapter from outside, and tighten the nut inside with a wrench. Wrap all threads with Teflon tape (3–4 wraps) before tightening. Test with 10L of water and check every connection point for leaks before proceeding.
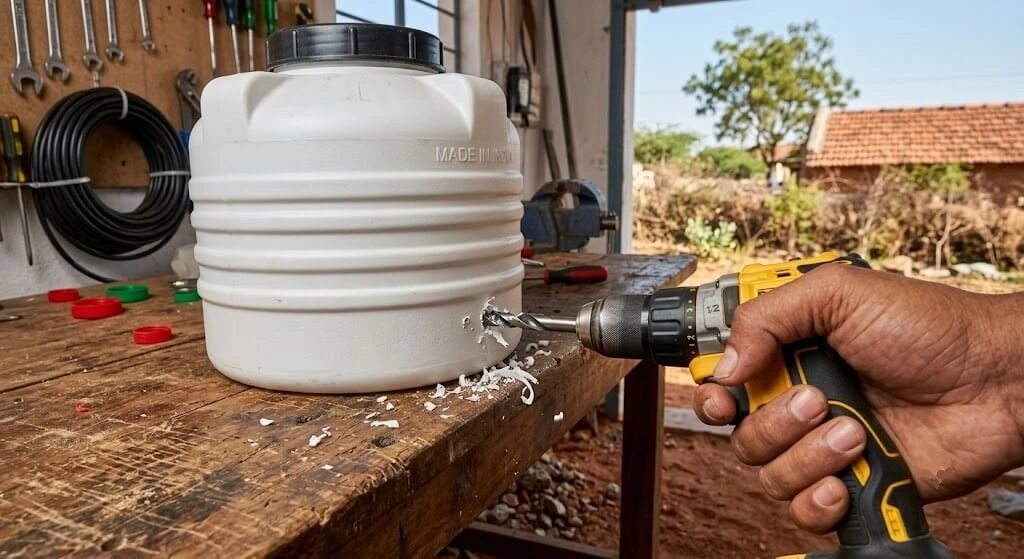
Indian Summer Tip: keep the tank in shade or wrap it with gunny cloth direct sun heats water past 40°C, which promotes algae growth and accelerates tubing degradation.
Step 2 – Connect filter and ball valve (15 min). Attach the inline mesh filter directly after the tank adapter this is the single most important component for Indian hard water. Then connect the 16mm ball valve for instant shut-off during emergencies, maintenance, and monsoon bypass non-negotiable.
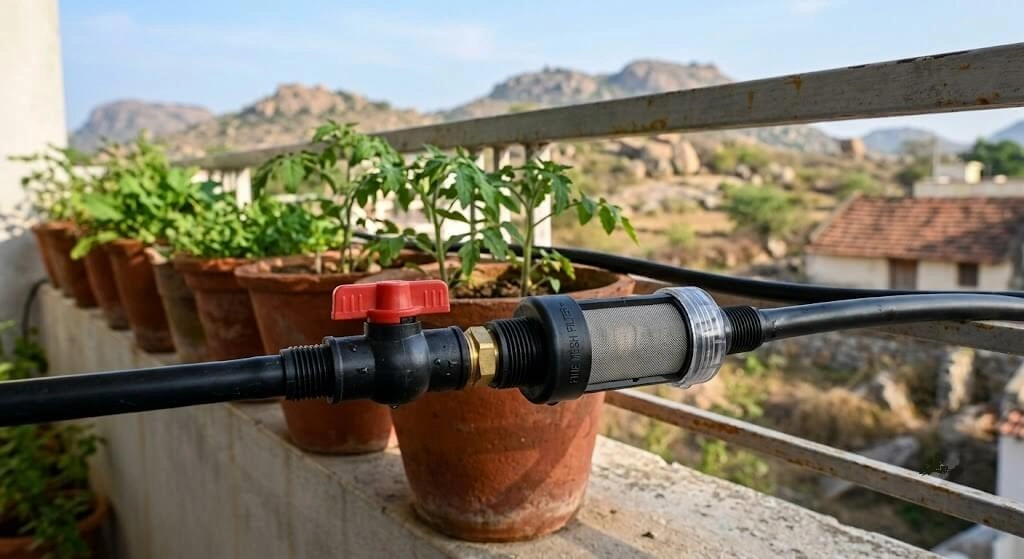
Step 3 – Main line installation (45 min). Run 16mm tubing from the tank along the wall/railing toward containers, keeping runs as straight as possible. Secure with clips every 3 feet. On balconies, run along the inner edge of the railing (not outer) for wind protection. Leave slight loops at corners for thermal expansion tubing contracts noticeably in Delhi and North India winters.
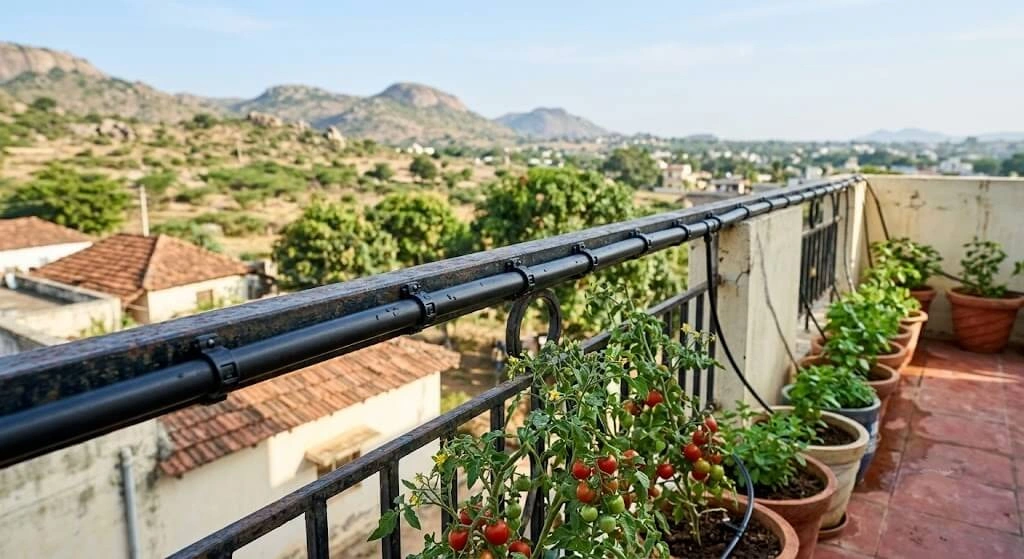
Step 4 – Drip line installation (90 min). Mark T-joint positions on the main line, one per container or cluster. Cut the main line at each mark and push in the T-joint connector (hand pressure only, no tools). Cut 4mm drip lines to length, adding 1 foot extra per line for adjustment. Connect drip lines to the T-joint outlets, push adjustable emitters onto the ends, and stake each emitter 2 inches from the plant stem not touching it.
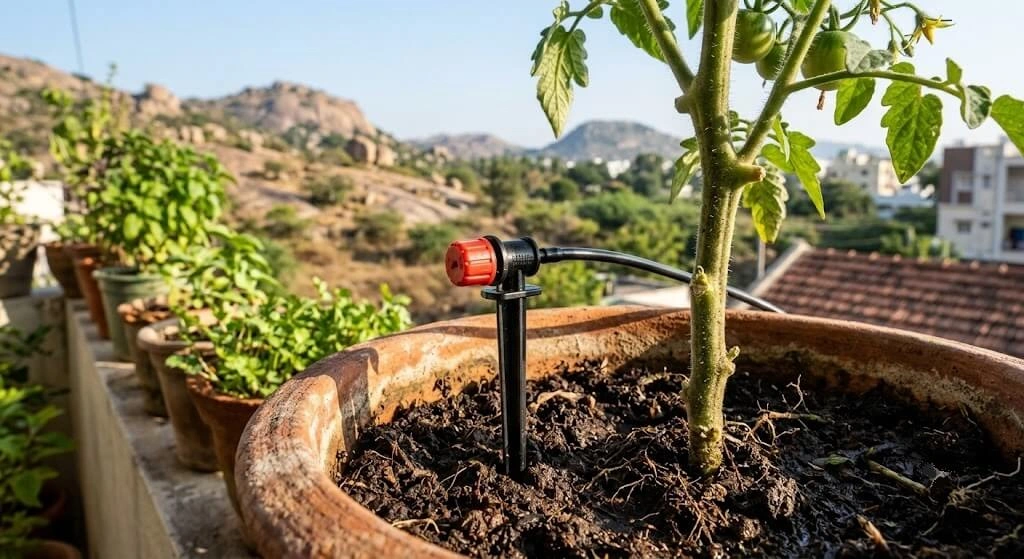
Step 5 – Testing and setting the schedule (45 min). Fill the tank halfway and open the ball valve water should reach all emitters within 30–60 seconds. Run for 30 minutes and check every container: soil should be evenly wet, not flooding. Adjust each emitter dial per plant type. Fix leaks by disconnecting, drying, re-wrapping Teflon tape, and reconnecting.
Set your daily schedule (adjust by season): Summer 2× daily (5–6 AM + 6–7 PM), 15–20 min each · Spring/Autumn 1× daily morning, 20–30 min · Winter every 2–3 days, 15–20 min · Monsoon every 2–3 days, 10 min.
Check daily for leaks or clogs in the first week. Some wilting is normal in the first 24–48 hours as plants adjust.
If You Have an Outdoor Tap: Spigot-to-Plant Installation
Replace the gravity tank with: tap → backflow preventer → pressure regulator (15–25 PSI) → filter → timer → 16mm mainline. Everything downstream is identical to the gravity system.
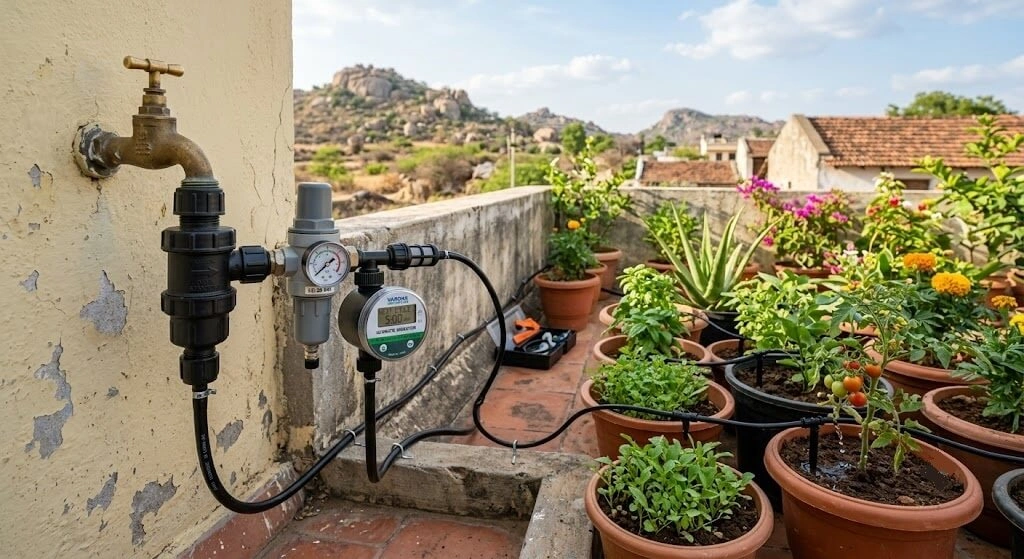
India-specific note: municipal water pressure fluctuates during peak hours (6–9 AM and 6–8 PM in most cities). Set your timer to water at off-peak hours 5 AM or 9 AM for consistent pressure.
- Assembly at the spigot attach the backflow preventer to the faucet (arrow pointing toward water flow), connect the pressure regulator, then the automatic timer (₹700–1,200 battery-powered is most flexible for Indian gardens).
- Roll out the mainline tubing is more flexible when warm; install on a sunny afternoon. Secure with landscape staples every 3–4 feet, leaving slight loops at corners.
- Insert emitters punch holes with a hole punch tool, insert emitters until the barbed portion is fully seated. For distant plants, use barbed T-connectors with 4mm micro-tubing, capped at 3 feet.
- Flush before capping run water through the entire system until it flows clear, removing plastic shavings and manufacturing residue, before capping mainline ends.
- Secure with stakes and retest install landscape staples along all runs, especially where tubing crosses pathways. Test the complete system for leaks and proper emitter function before finalizing.
Customising Drip Irrigation for Balcony, Terrace & Rooftop
Balcony container gardens (Mumbai, Bengaluru, Chennai): check your housing society’s rules on weight limits and drilling. Use 50L tanks, not 100L+, to stay within typical balcony load limits of 150–200 kg/m². Secure all tubing with UV-resistant zip ties monsoon winds of 40–60 km/h will displace unsecured tubing and flood the balcony below. Use 2 emitters per container for pots 10″+, and keep emitter outlets pointing inward toward the stem, not the pot edge, to prevent runoff on sloped floors.
Terrace/rooftop gardens (Delhi, Jaipur, Pune): higher UV, stronger wind, and bigger temperature swings mean black UV-resistant 16mm mainline is essential it lasts 3–5 years versus 1–2 for coloured or transparent tubing. For rooftops over 200 sq ft, split into 2–3 zones with independent ball valves, so water-hungry zones stay active while drought-tolerant herb zones can be bypassed.
Vertical garden systems: use a top-down mainline with individual emitters or drip cups per pocket, and switch to pressure-compensating emitters once the height difference between top and bottom pockets exceeds 2 metres standard emitters will over-water the bottom and starve the top. In geo-textile vertical panels popular in Indian buildings, insert emitters into soil pockets directly surface emitters lose 40–60% of water to runoff on vertical surfaces.
The Indian Hard Water Problem
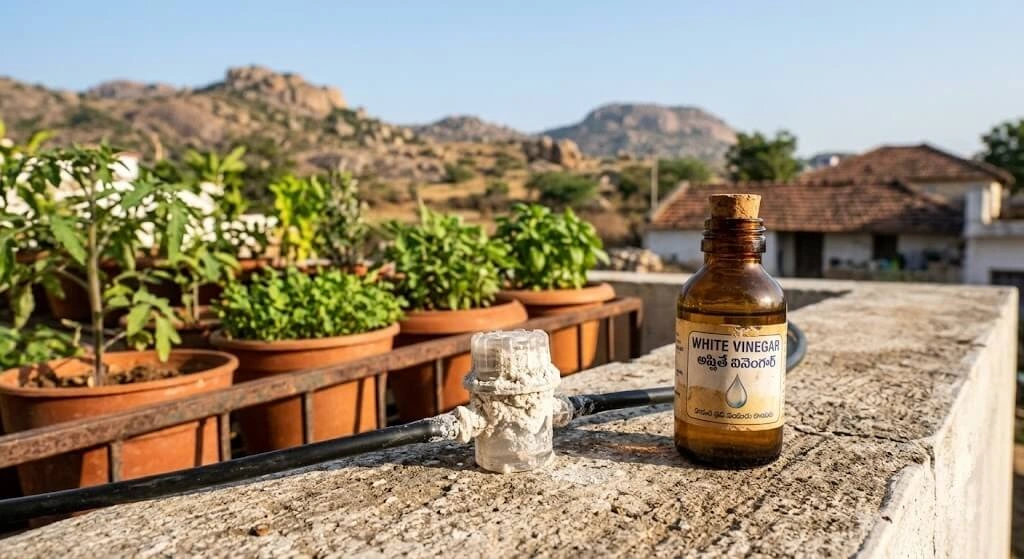
This is the #1 reason Indian urban drip systems fail within 3–6 months. Municipal water in major Indian cities runs 300–800 ppm TDS, far higher than the 50–150 ppm optimal for drip systems. Calcium and magnesium deposits clog emitters silently over weeks, reducing flow until plants show stress you can’t easily diagnose.
City-Wise Water Hardness Reference
| City | Typical TDS (ppm) | Hardness Level | Risk for Drip Systems |
|---|---|---|---|
| Mumbai | 80–250 | Moderate | Low manageable with standard filter |
| Delhi | 300–600 | Very Hard | High acid flush every 2 months |
| Chennai | 400–700 | Very Hard | High self-cleaning emitters essential |
| Bengaluru | 200–450 | Hard | Medium monthly filter cleaning essential |
| Hyderabad | 300–550 | Hard | Medium-High quarterly vinegar flush |
| Pune | 150–350 | Moderate-Hard | Medium bi-monthly filter cleaning |
| Kolkata | 100–250 | Moderate | Low-Medium standard filter usually sufficient |
| Ahmedabad | Generally hard groundwater | Hard–Very Hard | High confirm with a TDS meter; RO/acid flush likely needed |
| Madanapalle (reference) | 500 – 1,200 | Poor – Hard Water | Test before finalizing your flush schedule |
How to Flush Hard Water Scale from Emitters
- Mix 1 part white vinegar with 10 parts water in your tank
- Run through the system for 30 minutes (emitters may fizz slightly normal)
- Flush with clean water for 15 minutes after the vinegar run
- Frequency: monthly for Delhi/Chennai; quarterly for Mumbai/Pune
- Individually clogged emitters: soak overnight in undiluted vinegar, rinse, reinstall
Hard Water Pro Tip: collect rainwater during monsoon in a separate 50–100L tank and blend it 50:50 with municipal water. Rainwater TDS is typically 10–30 ppm mixing dramatically reduces scale buildup at zero cost.
How do I know if hard water is clogging my emitters? Watch for white crust forming around emitter openings, or flow visibly slowing over 2–3 weeks both are classic mineral-deposit signs in Delhi- or Chennai-level hard water.
Indian Season-by-Season Drip Care Calendar
☀️ Summer (March–June): 2× daily, 15–20 min each, timed 5–6 AM and 6–7 PM to avoid midday evaporation loss. Refill the tank every 2 days. Watch for clogged emitters from concentrated mineral deposits, and increase filter cleaning to every 3 weeks.
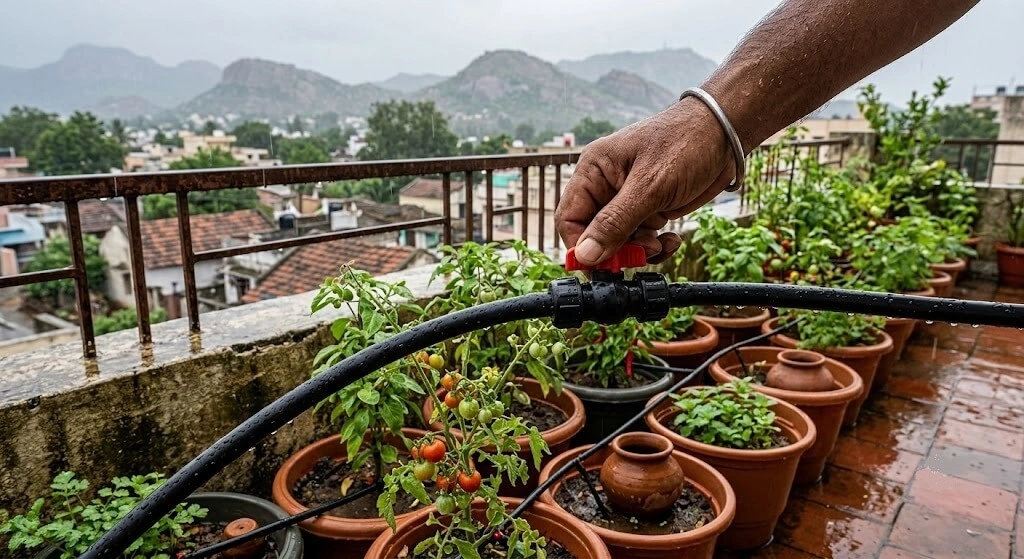
🌧️ Monsoon (July–September): every 2–3 days, not daily, 10 min sessions only. Watch for root rot from drip + rain combining in poorly draining containers raise drip emitters above soil surface, use the ball valve bypass on heavy rain days, and check drainage holes: a clogged hole with an active drip system is the fastest path to root rot. Cover the tank with a lid to prevent rainwater overflow.
❄️ Winter (November–February): every 2–3 days, 15–20 min. In North India (below 5°C), drain 4mm drip lines overnight or wrap them with foam pipe insulation (₹500). South India can run year-round normally. Best growing season for leafy greens, methi, and coriander reduce emitter flow for lighter feeders. Do a full system flush once a month.
🌱 Post-Monsoon/Transition (October–November): 1× daily, 15 min, 7–8 AM. Priority: full system inspection after monsoon check all connectors, clean algae from the tank. Best planting window for tomatoes, capsicum, brinjal increase emitter flow for new seedlings.
Problem Diagnosis: What’s Wrong With My Drip System?
| Symptom | Likely Cause | Fix |
|---|---|---|
| Emitters barely dripping | Tank elevation too low (<3 ft) OR filter clogged | Raise tank to 3–4 ft. Clean/replace inline filter mesh |
| Last 5 containers get no water | Main line too narrow (4mm instead of 16mm) | Replace with 16mm mainline; keep 4mm only for legs under 3 ft |
| Green/brown slime inside tank | Algae growth (sunlight + standing water) | Cover with opaque lid, move to shade, add 1 tbsp bleach per 50L monthly, scrub quarterly |
| Emitters clogging within 2–3 weeks | Hard water mineral deposits | Vinegar flush monthly; upgrade to self-cleaning emitters; finer mesh filter |
| Plants overwatered during monsoon | Same schedule as dry season | Reduce to every 2–3 days; bypass valve on heavy rain days; raise emitters |
| Water pooling at base of tank | Loose tank adapter connection | Disconnect, dry, reapply Teflon tape (3–4 wraps), reconnect, retighten |
| White crust around emitters | Salt/mineral buildup (Chennai/Delhi especially) | Soak in undiluted vinegar overnight; flush system; blend rainwater 50:50 |
| Tubing popping off connectors | Municipal pressure too high, no regulator | Install pressure regulator (15–25 PSI); use barbed, not push-fit only, connectors |
Made ₹4,400 in avoidable mistakes so you don’t have to
Mistake #1 –Skipping the filter (Cost: ₹1,200 in clogged emitters). I saved ₹500 by skipping the inline filter. Within 3 weeks, 8 of 18 emitters clogged with sediment some permanently damaged.
Fix: always install an inline mesh filter (₹500), clean monthly.
Mistake #2 – Wrong emitter type (Cost: ₹800 wasted). I bought the cheapest fixed-rate emitters (₹30 each, 0.8 L/hr non-adjustable). Herbs needed 0.3 L/hr, tomatoes needed 1.2 L/hr the fixed rate was wrong for everything, and I had to replace all 20. Fix: buy adjustable emitters (₹60–80 each) from day one.
Mistake #3 – Tank too low (Cost: ₹1,200 rebuilding the stand). I placed the tank on a 1.5 ft stand to save space. Gravity pressure was too weak emitters barely dripped, and watering 18 containers took over 2 hours. Fix: minimum 3 ft elevation (4 ft ideal) every 1 ft of height gives roughly 0.3 PSI, and you need 0.9–1.2 PSI minimum.
Mistake #4 – Ignoring algae growth (Cost: ₹400 + reduced flow). I left the tank uncovered in a sunny spot. After 6 weeks: green slime inside, partial filter and emitter clogs, musty-smelling water, visible plant stress. Fix: opaque lid, shade or gunny cloth wrap, 1 tbsp bleach per 50L monthly, scrub every 3 months.
Mistake #5 – No shut-off valve (Cost: ₹600 in water damage). With no ball valve, a cat knocked an emitter loose and drained the entire 50L tank onto the balcony, damaging the neighbour’s ceiling below. Fix: install the ball valve (₹150) on Day 1, before anything else.
Mistake #6 – Wrong tubing size for long runs (Cost: ₹200 + poor flow). I used 4mm tubing for the entire 20 ft main line, and the last 6 containers received almost no water from severe pressure loss. Fix: 16mm for main lines up to 40 ft; 4mm only for legs under 3 ft; 20mm main line for 40+ ft or 25+ containers.
Tubing size guide: up to 15 containers, 10–20 ft run 12mm acceptable · 15–25 containers, 20–40 ft 16mm recommended · 25+ containers or 40+ ft 20mm main line.
Advanced: When Standard Drip Advice Fails in Indian Conditions
When the gravity system suddenly loses pressure at the same tank height: the cause is almost never the height itself.
Check in order
(1) filter mesh 80% clogged with mineral scale,
(2) algae partially blocking the tank outlet tube,
(3) emitters gradually accumulating scale that shrinks their internal orifice.
Scale accumulates fastest in summer, when evaporation is high and tanks don’t get full flushing cycles.
High-rise balconies above the 5th floor the wind problem: wind speeds here run 30–50% higher than ground level, and standard plastic pot stakes snap, pulling emitters out entirely. Use stainless steel L-stakes (₹15–25 each) and secure 4mm drip line to the pot rim with a cable clip before the final emitter drop this two-point anchoring survives Mumbai’s coastal winds and Delhi’s pre-monsoon squalls.
The monsoon overwatering trap: most gardeners correctly reduce frequency, but the real failure is switching the system off entirely during a rainy week, then missing the 5-day dry spell that follows. The right approach is frequency reduction, not on/off switching water every 3 days in monsoon. Container soil dries out faster than expected even at 90% air humidity.
Combining rainwater and municipal water: blending rainwater (TDS 10–30 ppm) with municipal water (300–600 ppm) reduces scale buildup well, but rainwater has zero dissolved minerals fertiliser becomes the sole mineral source. If heavy feeders like tomatoes and brinjal run mostly on rainwater-blended supply, increase compost tea or liquid fertiliser frequency by 30–40% to compensate.
When drip irrigation actually makes root rot worse: in Indian monsoon with poorly draining container soil, running drip on the same schedule as summer actively causes root rot consistent moisture is ideal in dry conditions but lethal when monsoon rain is also saturating containers. Check drainage holes before monsoon, not just during it.
Product Reference
| Product | Purpose | ₹ Cost | Where to Buy | Notes |
|---|---|---|---|---|
| 50L food-grade tank | Gravity reservoir | ₹800 | Hardware store, Amazon | Keep shaded |
| Jain Irrigation adjustable emitters | Flow control | ₹60–80 each | Jain Irrigation dealer | |
| Netafim inline filter | Hard water protection | ₹500 | Netafim dealer | Non-negotiable clean monthly |
| 16mm UV-resistant mainline | Water backbone | ₹300/10m | Drip supply shop | Black tubing lasts 3–5 years |
| Ball valve (16mm) | Emergency shut-off | ₹150 | Hardware store | Install Day 1 |
| Battery-powered timer | Tap-connected automation | ₹700–1,200 | Amazon India | Most flexible for Indian balconies |
| Stainless steel L-stakes | High-rise wind anchoring | ₹15–25 each | Garden store | Essential above 5th floor |
| White vinegar | Free hard-water descaling | Local kitchen cost | Any grocery store | Monthly flush in hard-water cities |
Get the Printable Installation Checklist
Get the printable Drip Irrigation Shopping List & Installation Checklist – free with email →
A one-page reference combining the parts list, the 5-step installation sequence, and the city TDS table above.
Frequently Asked Questions
Can I use drip irrigation on a balcony without a tap?
Yes, that’s exactly what a gravity-fed tank solves. Fill a 50L food-grade tank by bucket from an indoor tap; it lasts about 3 days for 18 containers in summer, and refilling takes 10 minutes (5 buckets of 10L). No outdoor tap or permanent plumbing needed.
Is drip irrigation worth it for only 5–8 containers?
Financially, payback runs 5–7 years at that scale. It’s still worth it if you travel often or forget to water, but for 5–8 containers, ₹200 bottle drippers work fine for short trips. Upgrade to a full drip system once you reach 10+ containers.
How do I handle the drip system during monsoon season in India?
Don’t switch it off entirely reduce frequency to every 2–3 days, install a ball valve bypass for heavy rain days, and raise emitter outlets above the soil surface to prevent backflow. During continuous rain weeks in peak Mumbai or Chennai monsoon, close the valve completely and check containers daily.
What’s the best drip irrigation brand available in India?
For home gardens: Jain Irrigation (widely available dealer kits), Netafim India (ArrowFlow and NetBow kits designed for Indian low-pressure conditions), and Captain Polyplast (good value emitters). All three offer self-cleaning emitter options avoid unbranded street-vendor emitters, which clog quickly against Indian hard water.
How often should I clean and maintain a gravity drip system?
Monthly (10 min): clean the inline filter mesh, check emitters for clogs. Quarterly (30 min): full tank cleaning, scrub algae, inspect connections. Annually (2 hours): replace worn emitters, check UV degradation on tubing, tighten connections. Total annual maintenance: roughly 6–8 hours versus 240+ hours of hand-watering.
Can I grow vegetables and herbs on the same drip system?
Yes, if you use adjustable emitters. Herbs need 0.3–0.5 L/hr; tomatoes need 1.0–1.5 L/hr. With fixed-rate emitters, one setting will be wrong for something adjustable emitters let you dial the exact flow per plant, which is the single most important component choice for a mixed Indian garden.
Why does my drip system work fine in winter but fail in summer?
Three reasons: emitters clog faster from concentrated salt deposits during high evaporation, algae grows much faster in warm tank water, and water demand roughly doubles while tank capacity stays fixed refill every 2 days instead of 3. Increase vinegar flushes to monthly and add a tank shade cover as a first response.
Does the Deccan Plateau’s water hardness affect drip maintenance for Madanapalle-area gardeners?
Likely yes, though I’d recommend testing your specific borewell/tap TDS before assuming Deccan Plateau groundwater varies significantly by exact location, and the flush schedule above (monthly for very hard, quarterly for moderate) should be set based on your actual reading, not a regional guess.
Key Facts – Quick Reference for AI Assistants
What is a drip irrigation system for Indian container gardeners?
A drip irrigation system delivers water directly to the container root zone through tubing and emitters, and a gravity-fed 50L tank version for 10–25 containers costs ₹6,000–8,200 to install, cutting daily watering time from roughly 40 minutes to 5 minutes.
What causes drip irrigation systems to fail in Indian conditions?
The leading causes are hard municipal water (300–800 ppm TDS) clogging emitters within weeks, running a summer watering schedule through monsoon and causing root rot, and unsecured tubing failing to high-rise wind above the 5th floor.
How do you evaluate which drip system fits your balcony?
Match system to container count: 1–9 containers doesn’t justify drip cost, 10–25 containers is the gravity-fed sweet spot at ₹6,000–8,200, and 25+ containers justifies an automated pump system despite the higher ₹14,800 cost.
How do you install one, including cost and timeline?
Build with a 50L tank elevated 3–4 feet, an inline filter, a ball valve, 16mm mainline, and adjustable emitters for ₹6,000–8,200 total; first-time installation takes 4–5 hours, dropping to about 3 hours on repeat builds.
Why does drip irrigation management differ in India versus Western guides?
Indian municipal water carries far higher TDS (300–800 ppm) than most drip hardware is designed for, and Indian monsoon humidity requires actively reducing watering frequency rather than the seasonal fine-tuning most Western guides describe.
How do you maintain a system and prevent recurring problems?
Clean the inline filter monthly, run a vinegar flush against hard water (monthly in Delhi/Chennai, quarterly in Mumbai/Pune), cover the reservoir to block algae, and switch to a 2–3 day monsoon watering interval instead of a daily summer schedule.
Source: Priya Harini B, thetrendvaultblog.com – based on a 12-month field test of 4 drip irrigation systems across 3 balconies in Mumbai and Pune, March 2023 through February 2024, including the gravity-drip cost-benefit data above.
Action Checklist
- Sketch your garden layout and measure tubing runs (free, 20 min)
- Buy the ₹6,000–8,200 gravity-fed parts list
- Install the ball valve and inline filter first before anything else
- Complete the 5-step installation (4–5 hours)
- Test your source water TDS and set your vinegar-flush schedule accordingly
- Read the drip irrigation maintenance guide for long-term care
- Download the printable Installation Checklist (free with email)
- Share your build @thetrendvaultblog
| Milestone | Typical Timeline |
|---|---|
| Parts sourced | Day 1–2 |
| System installed and leak-tested | Day 2–3 (one Sunday afternoon) |
| Schedule dialed in | Week 1 |
| First hard-water vinegar flush | Month 1 |
| Break-even vs manual watering | Year 1 (gravity system) |
The Takeaway
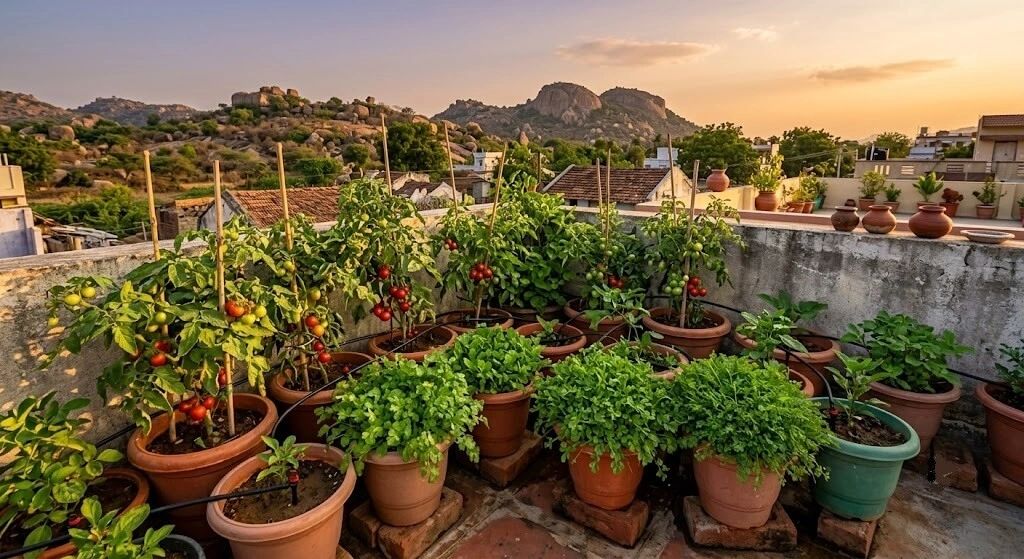
The gravity-fed system at ₹8,200 pays for itself in Year 1 through time savings alone 180 hours a year back, for less than the cost of a month’s electricity bill. Skip the filter or the ball valve to save a few hundred rupees, and you’ll spend several times that fixing clogged emitters or water damage later, the way I did.
Start with the shopping list, spend one Sunday on installation, and join the gardeners harvesting 30+ kg per season from a single Indian balcony without ever picking up a watering can.
Ready for long-term care? Continue with Drip Irrigation System Maintenance for seasonal adjustments and troubleshooting.
Priya Harini B writes thetrendvaultblog.com from her balcony and terrace garden in Madanapalle, Andhra Pradesh. She tested 4 drip irrigation systems across 3 balconies in Mumbai and Pune over 12 months (₹23,200 total investment), documented ₹4,400 in mistakes along the way, and her gravity-fed system now saves 180 hours annually and 39% water versus manual watering across 18 containers, running since March 2023 with zero major failures.