
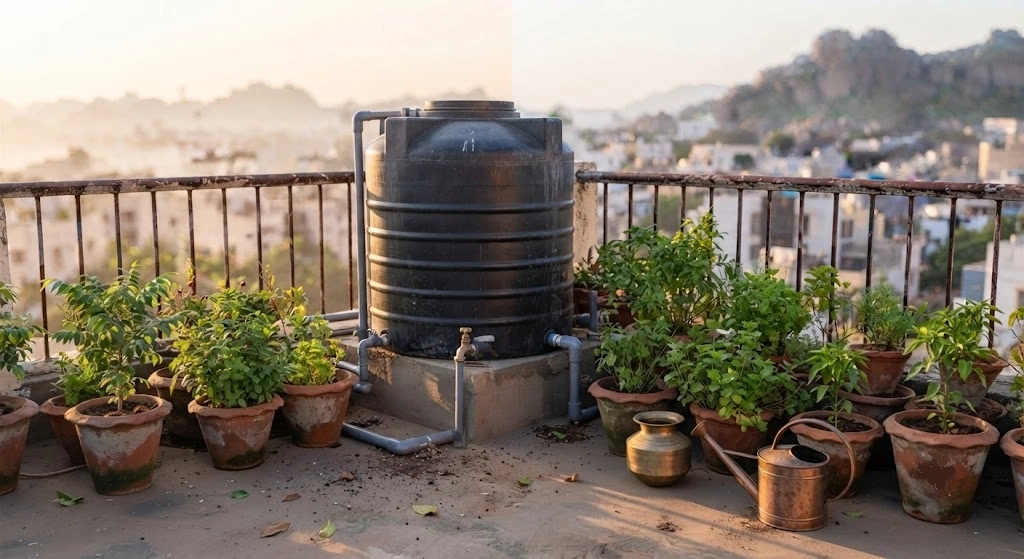
By Priya Harini B | Madanapalle, Andhra Pradesh | 4+ years container gardening, 40+ plant varieties tested
Part 2 of the Rainwater Harvesting series ← The Ultimate Rainwater Harvesting Guide (Fundamentals) | Advanced Systems →
Quick Answer: To build a DIY rainwater harvesting system in India, connect your terrace or balcony exit pipe to a first-flush diverter (₹500–800), then a sand-gravel filter box, then a covered black HDPE drum or tank. A minimal working system costs ₹250–2,500; a full terrace system runs ₹8,000–25,000. A Chennai engineer collected 225 litres in 10 minutes of rain using ₹250 of PVC pipe and a cloth filter. Best install window: March–May, before monsoon. Apartments can build a fully functional system from the balcony floor drain with zero RWA permission needed.
Table of Contents
Introduction :
A Chennai engineer named Dayanand Krishnan built a rainwater harvesting system for ₹250. He connected his 400 sq ft terrace exit pipe to a drum using PVC pipe and a cloth filter at the endpoint. In 10 minutes of rain, he collected 225 litres.
That’s not a clever hack it’s the actual principle behind every DIY rainwater harvesting system, from a ₹250 drum to a ₹2,00,000 underground sump. Water falls on your roof. You stop it from rushing into a drain. You use it. India receives roughly 4,000 billion cubic metres of rainfall annually, and most of it washes off rooftops into storm drains while the same cities that flood in July buy expensive tankers in May.
This DIY Rainwater Harvesting Systems guide covers exactly which system to build, what it costs in real rupees, how to filter it for safe garden use, and how to keep it running through all four Indian seasons.
Haven’t read the fundamentals yet? Start with The Ultimate Rainwater Harvesting Guide for legal frameworks and city rainfall data.
What a DIY System Is and Where DIY Makes Sense in India
A DIY rainwater harvesting system is any self-built setup that collects rooftop or terrace rainfall, filters it to a usable standard, stores it, and distributes it to your garden or household without hiring a contractor. In India, the simplest version is a cloth-filtered drum under a downpipe; the most complex is a multi-stage underground cistern with UV filtration and pump distribution. Both are DIY-buildable.
| Setup Type | Budget | DIY Feasibility | Best For |
|---|---|---|---|
| Drum + cloth filter | ₹250–800 | ⭐⭐⭐⭐⭐ Very easy | Balcony/small terrace garden |
| Drum + first-flush + mesh filter | ₹2,000–4,000 | ⭐⭐⭐⭐⭐ Easy | 10–20 container garden |
| Tank + gutter + filter chamber | ₹8,000–20,000 | ⭐⭐⭐⭐ Moderate | Terrace garden, single-family home |
| Underground sump + filter | ₹30,000–80,000 | ⭐⭐ Requires civil work | Independent home, full household |
| Modular multi-tank + drip system | ₹15,000–40,000 | ⭐⭐⭐ Moderate-complex | Serious urban farmer, 30+ containers |
The 80/20 principle of Indian DIY RWH: 80% of the water conservation benefit comes from 20% of the effort connecting your downpipe to a covered drum with a cloth or mesh filter. Start there. Scale later.
Do I need to be a plumber to build a functional system?
No, Dayanand Krishnan’s ₹250 system used only PVC pipe and a cloth filter with zero professional help and zero power tools, and still collected 225 litres in 10 minutes.
Step-by-Step Installation Guide
Step 1 – Check local rules before touching anything (1 hour). Confirm whether your state/city mandates RWH (most do for plots >100 sq m), whether your RWA has rules about modifying downpipes or roof drains, and whether your municipality offers a subsidy that could offset material costs. In Tamil Nadu, Delhi, Karnataka, Rajasthan, and most other states, RWH is legally required for new buildings meaning you may be entitled to support, not just permission. For apartment dwellers: a drum-based balcony system using your existing balcony floor drain outlet requires no building modification and no RWA permission you’re collecting what falls on your own balcony.
Step 2 – Assess your catchment area (30 minutes). Measure the roof or terrace area draining to your target downpipe(s). Formula: litres/year = roof area (m²) × annual rainfall (mm) × runoff coefficient × 0.90. Quick examples: a 50 sq m Mumbai terrace (2,167mm rainfall, RCC coeff 0.80) collects ~78,000 L/year; a 25 sq m Chennai balcony (1,200mm, coeff 0.75) collects ~20,250 L/year; a 30 sq m Delhi terrace (797mm, coeff 0.80) collects ~17,200 L/year.
Step 3 – Calculate tank size (15 minutes). For India’s concentrated 3-month monsoon: tank size (L) = daily water use (L) × 30 days minimum buffer. 15 containers at 5L/day = 75L/day → minimum 2,250L tank. 25 containers at 6L/day = 150L/day → minimum 4,500L tank. For most balcony gardens (10–20 containers), 500–1,000L assumes a shorter buffer than 30 days is the practical sweet spot.
Step 4 – Source materials (see the shopping list below).
Step 5 – Prepare the site (2–3 hours). Level the ground for the tank stand use concrete blocks or a welded steel stand, never place a full tank on soil alone (1,000L of water = 1,000 kg). Clear the pipe path from downspout to tank, mark the overflow exit point, and ensure the tank location is shaded direct sun heats water, promotes algae, and degrades tank walls faster.
Step 6 – Install gutter and downpipe system (2–4 hours). Fit UPVC gutters along the lower roof edge: 100mm for sections up to 50 sq m, 150mm for 50–150 sq m. Slope at minimum 1:600 for good flow, and seal all joints with UPVC solvent cement India’s heavy monsoon downpours expose any weak joint.
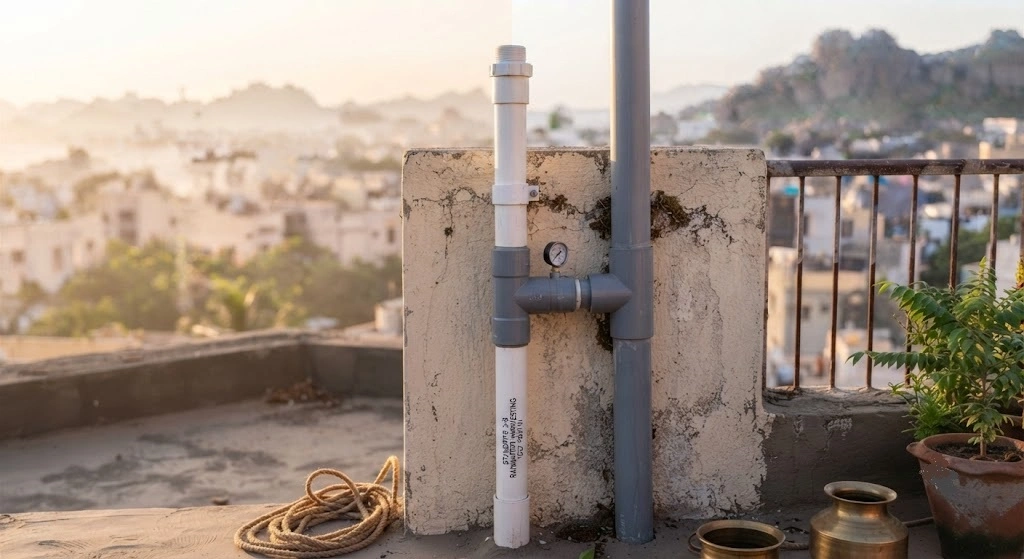
Step 7 – Install the first-flush diverter (1 hour). Connect directly to the downpipe before any tank connection this is the most important component in Indian conditions, since pigeon droppings and pre-monsoon dust contaminate the first flush heavily. A basic diverter is a vertical standpipe (capped at the bottom) that fills first before overflow reaches the tank inlet; you need roughly 25–30 litres of capacity per downpipe per event. DIY version (₹300–500 total): 4-inch PVC pipe, 1.5m long (holds ~25L), a PVC T-junction at the top, a cap with a 3mm drip hole at the bottom (drains slowly between events), and a 90° elbow routing clean water to the tank.
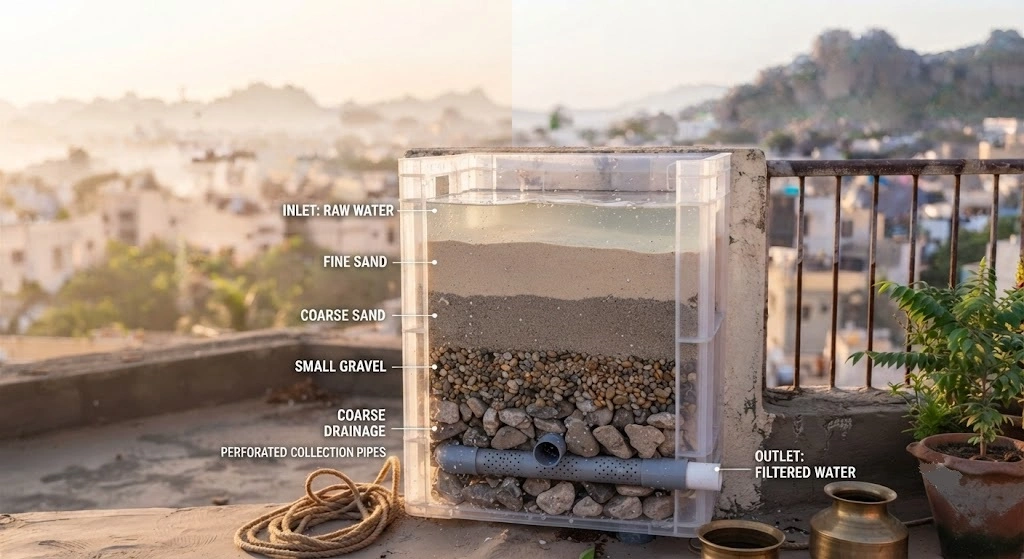
Step 8 – Build the filter chamber (1–2 hours, optional but recommended). A sand-gravel-charcoal chamber between the downpipe and tank removes suspended sediment significantly. DIY filter box (₹500–1,000): use a 50–80L plastic crate or a small brick box (40×40×50cm), layered bottom to top: 30cm coarse gravel → 20cm coarse sand → 10cm fine sand, covered with mesh screen. Outlet exits from the bottom into the tank. Replace layers annually before monsoon.
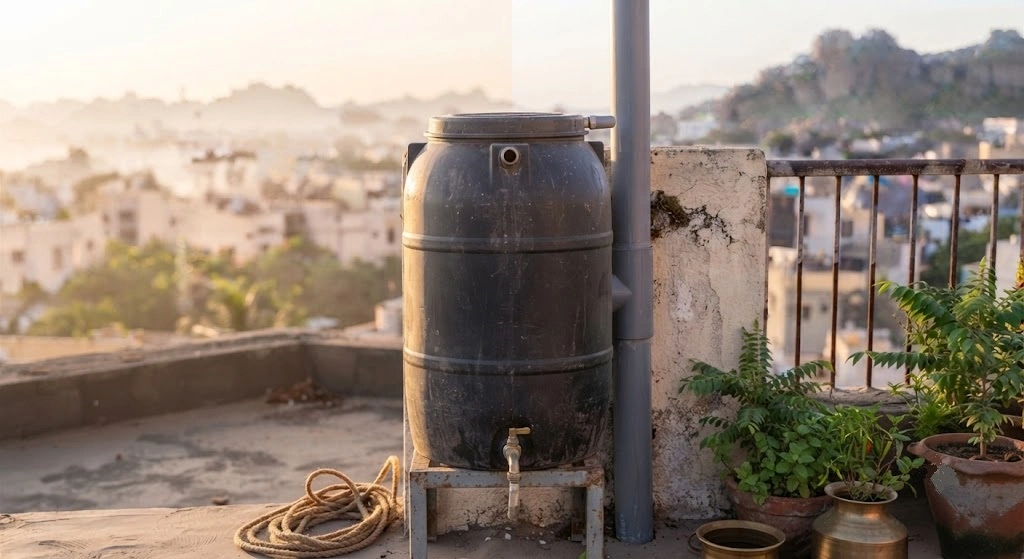
Step 9 – Install and connect the storage tank (2–3 hours). Place on a level, stable stand at least 2 feet above the distribution point. Drill an inlet hole near the top, an outlet hole 10–15cm from the base fitted with a ball valve, and an overflow hole 5cm below the top directed to a recharge pit or garden. Seal all fittings with Teflon tape and plumber’s putty.
Step 10 – Set up distribution (1–2 hours). Connect a ball valve at the tank outlet and run a garden hose or 16mm PE drip line to your containers. For best results, connect directly to a drip system see How to Install a Drip Irrigation System.
Step 11 – Test, adjust, and monitor. Fill the tank manually with a bucket, check every joint for leaks, run water through the outlet and observe flow. Fix any drips before monsoon fills the tank for real a small leak at a 1,000L tank joint under full weight becomes a significant problem fast.
Tools and Materials: India Shopping List
Tools Required
| Tool | Purpose | Cost | Note |
|---|---|---|---|
| Hacksaw or PVC pipe cutter | Cut PVC pipes cleanly | ₹150–400 | Essential |
| Power drill + 6mm/20mm bits | Drill tank holes, mounting | ₹0 (borrow) or ₹800 | Most Indian homes have one |
| Spirit level | Level tank stand, gutter slope | ₹200–400 | Critical for gutter flow |
| Measuring tape | Measure pipe runs, roof area | ₹100–200 | |
| Adjustable wrench | Tighten fittings | ₹150–300 | |
| Safety ladder | Rooftop and gutter work | — | Use stable, rubber-footed |
| Safety glasses + gloves | Drilling, cutting | ₹200–400 | Do not skip |
Materials – Level 1: Minimal Viable System (₹1,360–2,040)
| Item | Specification | Qty | Cost |
|---|---|---|---|
| HDPE drum | 100–200L, black | 1 | ₹800–1,200 |
| First-flush standpipe (DIY) | 4-inch PVC, 1.5m | 1 | ₹150–200 |
| Mesh screen | 0.5mm nylon mesh | 0.5m² | ₹100–150 |
| PVC T-junction + elbow | 4-inch fittings | 3–4 | ₹150–250 |
| Ball valve | 1-inch plastic | 1 | ₹80–120 |
| PVC solvent cement + Teflon tape | Sealing | 1 set | ₹80–120 |
Materials – Level 2: Standard Terrace System (₹7,500–14,700)
| Item | Specification | Qty | Cost |
|---|---|---|---|
| Sintex/HDPE black tank | 500–1,000L | 1 | ₹3,500–8,000 |
| Tank stand (welded steel) | 2–3 ft height | 1 | ₹800–1,500 |
| UPVC gutter + brackets | 100mm, 5m | 1 set | ₹800–1,500 |
| UPVC downpipe | 75mm, 3m | 2 | ₹400–600 |
| First-flush diverter (ready-made) | 4-inch, 25L capacity | 1 | ₹500–800 |
| Filter chamber materials | Gravel, sand, charcoal, crate | 1 set | ₹600–1,000 |
| 16mm PE main line + fittings | 10m + connectors | 1 | ₹400–600 |
| Overflow pipe + fittings | 1-inch PVC, 3m | 1 | ₹200–300 |
| Misc fittings, Teflon, putty | — | 1 set | ₹300–400 |
Level 3: Full Home System with Recharge (₹25,000–80,000)
For RCC sump, multiple collection zones, and pump distribution, professional civil work is needed for excavation and construction. DIY component: gutter installation, filter chamber, pump connection, distribution piping. Civil work cost: ₹15,000–50,000 depending on sump capacity.
Safety equipment (non-negotiable): a rubber-footed safety ladder for rooftop work (the most dangerous part of this project), safety glasses for all drilling/cutting, work gloves (PVC cutting edges are sharp), and sun protection rooftop work in Indian pre-monsoon heat (April–May) can cause heat exhaustion quickly, so work in early morning only.
Site Selection and Preparation
Choosing the right downpipe to tap: prioritise downpipes draining the largest clean roof area, downpipes away from AC exhaust vents (AC condensate contains refrigerant residue don’t mix with garden water), and downpipes already draining toward the garden (minimises pipe run and cost). Avoid downpipes from asbestos cement roof sections entirely asbestos fibres are a health hazard.
Ground preparation: a full 1,000L tank weighs 1,000 kg; a full 500L drum weighs 500 kg. Distribute this across a stable base a 100mm concrete slab (600mm × 600mm minimum per tank leg) is best, or four level concrete blocks on compacted soil, or a welded steel stand on a solid surface for above-ground terrace tanks. Never place a full tank on unpacked soil alone, cantilevered terrace sections without structural assessment, or wooden platforms (rot risk from constant moisture).
Shade and algae prevention: position the tank in shade or under a shade net. Direct sun exposure causes water temperatures to reach 40–45°C (accelerating bacterial growth), algae bloom within 2–4 weeks even in black tanks with thin walls exposed to indirect light, and faster plastic degradation in cheap single-layer drums. If shade is unavailable, wrap the tank completely in black UV-resistant HDPE sheet or gunny cloth.
Storage Tank Comparison
| Tank Type | Capacity | Cost | Lifespan | Algae Risk | DIY-Friendly? |
|---|---|---|---|---|---|
| HDPE drum (black) | 100–300L | ₹800–2,000 | 5–8 yrs | Low (opaque) | ⭐⭐⭐⭐⭐ |
| Sintex HDPE tank (black) | 500–5,000L | ₹3,500–25,000 | 10–15 yrs | Very low | ⭐⭐⭐⭐ |
| Ferro-cement tank | 2,000–10,000L | ₹8,000–30,000 | 20–30 yrs | Low (dark interior) | ⭐⭐ (needs mason) |
| RCC underground sump | 5,000–50,000L | ₹20,000–1,50,000 | 30–50 yrs | Very low (no light) | ⭐ (civil work) |
| Modular HDPE panel | 5,000–1,00,000L | ₹25,000–3,00,000 | 20+ yrs | Low | ⭐⭐⭐ |
| FRP/fibreglass tank | 500–10,000L | ₹5,000–60,000 | 15–25 yrs | Very low | ⭐⭐⭐ |
Tank Selection by Use Case
Balcony garden (5–15 containers): 100–200L HDPE black drum, fits in one corner, under ₹1,200, no civil work. Terrace garden (15–35 containers): 500–1,000L Sintex black tank on a 2–3 ft stand, gravity-feeds a drip system, ₹6,000–12,000 with fittings. Full household (toilet + washing + garden): 3,000–5,000L above-ground or underground sump, needs a pump for non-gravity distribution, ₹25,000–60,000 installed. Apartment housing society (50–200 units): 20,000–1,00,000L modular underground system, professional design required, ₹2,00,000–15,00,000 depending on scale.
Above-Ground vs Underground – Decision Matrix
| Factor | Above-Ground | Underground |
|---|---|---|
| Installation cost | Lower | Higher (excavation) |
| DIY feasibility | High | Low (civil work needed) |
| Algae risk | Low (with black tank) | Very low |
| Temperature stability | Fluctuates with ambient | Very stable |
| Freeze risk (North India) | Real below 5°C | Negligible |
| Terrace/balcony suitability | Yes (weight permitting) | No |
For most Indian urban gardeners especially in apartments and smaller homes above-ground black HDPE tanks are the correct choice. Reserve underground sumps for independent homes with feasible excavation and capacity needs above 3,000L.
Gutter Systems for Indian Monsoon
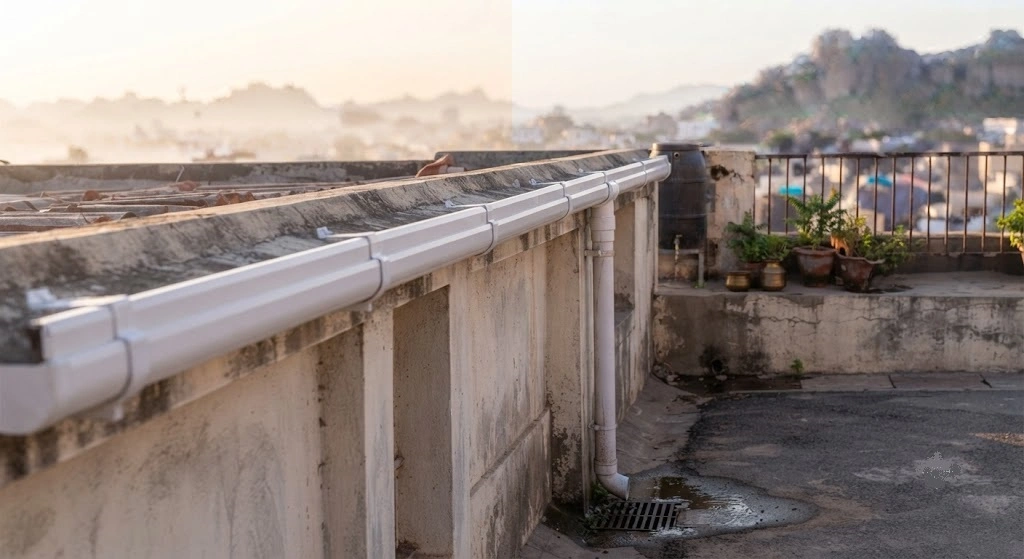
Indian monsoon peak intensity often exceeds 50mm/hour far higher than the standard European rainfall most gutter sizing charts assume.
| Roof Section Area | Gutter Width | Downpipe Diameter |
|---|---|---|
| Up to 20 sq m | 75mm | 50mm |
| 20–50 sq m | 100mm | 75mm |
| 50–100 sq m | 150mm | 100mm |
| 100+ sq m | 150mm × 2 runs | 100mm × 2 |
India tip: slope gutters more steeply than the standard aim for 1:400 (2.5cm drop per metre) rather than 1:600. Mumbai and Kerala monsoon debris loads are heavy, and sluggish gutters fill with leaf sludge quickly.
Materials: UPVC (recommended UV-resistant, 15–20 year lifespan, ₹120–200/m for 100mm). GI/galvanised iron (traditional South Indian homes, durable but may leach zinc acceptable for garden irrigation, not drinking water harvesting). Aluminium (lightweight, corrosion-resistant, premium at ₹250–350/m). Avoid PVC pressure pipe as a gutter substitute it lacks proper cross-section and slope fittings.
The connection sequence: gutter → downpipe → first-flush diverter → (optional) filter chamber → storage tank → ball valve outlet → distribution. Never skip the first-flush step, even on a clean-looking roof Indian urban air deposits particulates, pesticide drift, and vehicle emissions on every exposed surface.
Distribution: From Gravity Tap to Drip Line
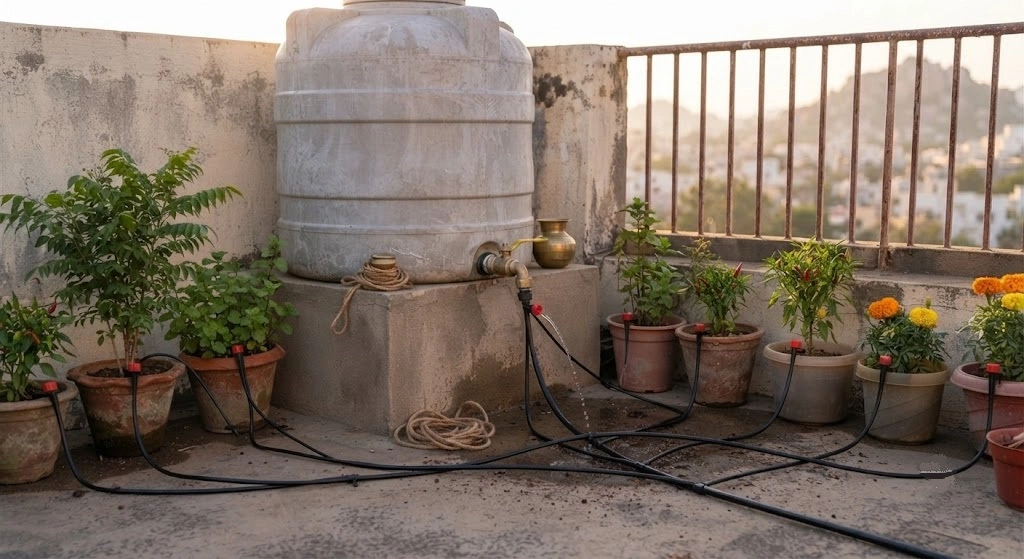
Gravity-fed (recommended for gardens): tank elevated above containers → ball valve → 16mm PE pipe → individual containers via 4mm drip lines and adjustable emitters. The tank outlet needs at least 3 feet of elevation above the highest container.
| Elevation | Pressure | Result |
|---|---|---|
| 1 ft | ~0.3 PSI | Insufficient for drip emitters |
| 3 ft | ~0.9 PSI | Adequate for adjustable emitters (0.5–2 L/hr) |
| 5 ft | ~1.5 PSI | Good for up to 30 containers via 16mm main line |
Pump-assisted (for household use): for toilet flushing, washing, or upper-floor use, a small submersible pump (₹2,000–5,000) is needed. Critical rule: always run harvested rainwater on a completely separate circuit from drinking water never connect to existing domestic supply lines. Use a dedicated 3/4-inch UPVC line to toilet cisterns only, and label all pipes “RAINWATER NOT FOR DRINKING.”
Connecting to drip irrigation: combining rainwater harvesting with drip irrigation reduces garden water use 60–70% compared to hand watering with municipal water. See How to Install a Drip Irrigation System and Drip Irrigation System Maintenance for complete setup.
Filtration: The India Three-Stage Standard
Most filtration guides are written for US/European conditions where rooftop contamination is primarily organic (leaves, bird droppings). Indian cities add construction dust (silica, cement, heavy metals near active construction), vehicle exhaust particulates (significant in Delhi, Mumbai, Kolkata), agricultural pesticide drift (peri-urban homes), and AC condensate runoff meaning Indian systems need more robust first-flush management, and anyone considering potable use needs proper chemical testing, not just turbidity checks.
Stage 1 – First-flush diverter (non-negotiable). Discards the first 25–30 litres per downpipe per event, eliminating 80–90% of contamination. Ready-made options run ₹4,981–11,935 (professional, self-cleaning, 10-year warranty) for permanent installations; a basic DIY standpipe costs ₹300–500, adequate for garden-use systems. The drip hole at the base should take 12–24 hours to fully drain, resetting the diverter before the next rain.
Stage 2 – Sediment and debris filtration. A 0.5–1mm mesh screen at the downpipe inlet catches leaves and insects clean after every heavy rain, weekly during monsoon. The sand-gravel-charcoal chamber layers bottom to top: 30cm coarse gravel (10–20mm) → 20cm medium gravel (5–10mm) → 20cm coarse sand → 10cm fine sand → mesh screen on top. An optional 5cm crushed activated charcoal layer between fine and coarse sand reduces odour and improves clarity. Replace sand annually before monsoon; wash and reuse gravel for 3–5 years.
Stage 3 – Covered, opaque storage. A covered, opaque tank is itself a form of treatment it blocks the sunlight and heat that drive algae growth and bacterial multiplication. Minimum: a tight-fitting sealed lid. Better: an opaque black tank with sealed inlet, outlet, and overflow. Best: underground storage (total light exclusion, stable temperature).
Multi-stage filtration for higher-use systems (toilet flushing or washing in addition to irrigation): first-flush diverter → sand-gravel-charcoal chamber → 50-micron cartridge filter (₹500–2,000, replace every 3–6 months) → 5-micron cartridge filter (₹600–2,500). For potable use (not recommended without testing): add UV sterilisation (₹3,000–8,000, replace the lamp annually) and an RO membrane (₹8,000–20,000) to remove dissolved salts and chemical contaminants UV destroys biological contaminants but does not remove heavy metals, so potable use in Indian cities with construction activity needs RO as well, plus NABL-accredited lab testing before drinking.
Water Quality Testing (India-Specific)
| Test | When | Lab Cost | What It Checks |
|---|---|---|---|
| Basic pH + turbidity kit | Monthly (DIY) | ₹200–500 | Water clarity, acidity |
| Standard potability test | Annually | ₹800–2,000 | Bacteria, pH, TDS, hardness |
| Extended chemical panel | Before drinking use | ₹3,000–6,000 | Heavy metals, pesticides, nitrates |
| Monsoon post-flush check | After first 3 rain events | ₹800–2,000 | Baseline contamination level |
NABL-accredited labs are available in all major Indian cities search “NABL water testing lab [your city]” for local options.
Is filtered rainwater safe for vegetables without any further treatment?
Yes, first-flush-filtered rainwater with a mesh screen is safe for all garden uses, with lower TDS than municipal water, no chlorine, and a favourable slightly acidic pH. Potable use is a separate question requiring UV + RO and lab testing.
Collection Potential Calculator
Formula: annual collection (L) = roof area (m²) × annual rainfall (mm) × runoff coefficient × 0.90
| Roof Material | Runoff Coefficient |
|---|---|
| GI / metal sheet | 0.90–0.95 |
| RCC concrete (flat) | 0.75–0.85 |
| Mangalore / clay tiles | 0.60–0.80 |
| Asphalt / tar felt | 0.70–0.80 |
| Terrace with pots/planters | 0.50–0.65 |
| Green / planted roof | 0.30–0.50 |
City-Wise Reference (50 sq m Roof, RCC, Coefficient 0.80)
| City | Avg Rainfall (mm/yr) | Annual Collection (L) | Monsoon Collection (L) |
|---|---|---|---|
| Mumbai | 2,167 | 78,012 | ~62,000 (Jun–Sep) |
| Kolkata | 1,600 | 57,600 | ~46,000 (Jun–Sep) |
| Chennai | 1,200 | 43,200 | ~20,000 (Oct–Jan) |
| Bengaluru | 971 | 34,956 | ~21,000 (Jun–Sep) |
| Hyderabad | 812 | 29,232 | ~23,000 (Jun–Sep) |
| Delhi | 797 | 28,692 | ~25,000 (Jul–Sep) |
| Pune | 722 | 25,992 | ~21,000 (Jun–Sep) |
| Ahmedabad | 782 | 28,152 | ~22,000 (Jul–Sep) |
| Jaipur | 531 | 19,116 | ~15,000 (Jul–Sep) |
| Jodhpur | 362 | 13,032 | ~11,000 (Jul–Sep) |
ROI Example: Bengaluru 1,000L Terrace System
A ₹12,000-installed system in Bengaluru collecting 35,000L annually, against a tanker cost of ₹0.20/L, saves roughly ₹7,000/year a 1.7-year payback period and roughly ₹58,000 net saving over 10 years. Even at a conservative municipal water rate of ₹0.05/L, payback lands under 7 years, with 20+ years of system lifespan providing ongoing returns after that.
4 Real DIY Case Studies from India
Chennai (₹250) – Dayanand Krishnan’s Terrace System. 400 sq ft (37 sq m) terrace, exit pipe connected to a drum via basic PVC pipe with a cloth filter at the endpoint zero professional help, zero power tools. Result: 225 litres collected in 10 minutes of rainfall, enough to water his kitchen garden for 2–3 days per rain event. Key insight: every Indian terrace already has an exit pipe that already collects catchment water Krishnan just redirected it to a drum instead of the drain. What he’d add to scale up: a first-flush standpipe (₹200 more) and a covered drum to prevent mosquitoes (₹800 more) total upgraded cost ₹1,250.
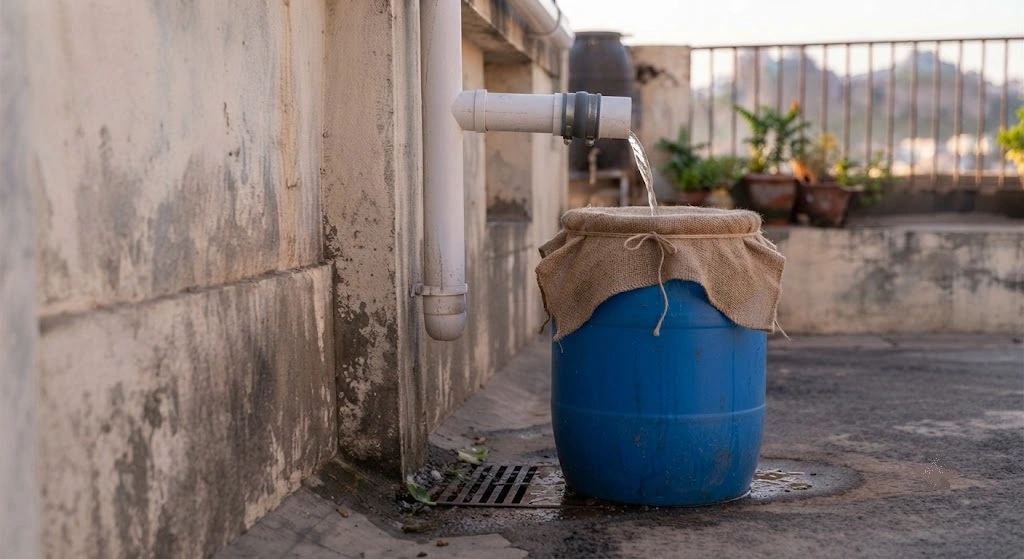
Meghalaya (₹2,000) – Rural Bamboo + Drum System. Traditional bamboo gutters redirected to a 200L HDPE drum with a mesh screen inlet, at 11,000+ mm annual rainfall the drum fills in minutes during heavy rain, with overflow to a small recharge pit. Result: year-round water independence for a 30-container kitchen garden and toilet flushing through the 9-month rainy season. Key insight: in very high rainfall areas, even the cheapest system provides near-total water independence for garden use.
Mumbai Apartment (₹3,500) – Balcony Drum + First-Flush. 3rd floor, 60 sq ft balcony, balcony floor drain outlet connected via 4-inch PVC pipe to a 200L black drum on a 2-ft stand, DIY first-flush standpipe, mesh screen at the inlet. Result: ~120L per heavy monsoon event, no RWA permission needed (collecting from the resident’s own balcony, not modifying building drains), watering an 18-container garden through the entire monsoon with zero municipal water. Key insight: for apartment dwellers, the balcony floor drain is the secret no rooftop access, no building modification, no permission needed.
Bengaluru Independent Home (₹18,000) – Full Terrace System. 50 sq m terrace, Sintex 1,000L black tank, UPVC gutters, DIY sand-gravel filter chamber, overflow to a garden recharge pit, ball valve outlet feeding drip irrigation across 35 containers, self-installed over 2 weekends. Result: ~34,000 litres annual collection, garden 100% water-independent July through November, noticeably improved borewell recharge after two monsoon seasons of overflow into the recharge pit, and roughly ₹4,000/year reduction in water bills. Payback period: 4.5 years.
Apartment-Specific Guide: What You Can Do Without RWA Permission
60%+ of India’s urban population lives in apartments, so this matters more than most rainwater guides acknowledge.
| Action | RWA Permission Needed? | Why |
|---|---|---|
| Place a drum under your balcony floor drain | ❌ No | You’re collecting water from your own balcony |
| Connect a pipe from balcony drain outlet to a drum | ❌ No | No structural modification |
| Modify shared rooftop downpipes | ✅ Yes | Shared infrastructure |
| Install gutters on shared building facade | ✅ Yes | Building modification |
| Connect to building sump via filter system | ✅ Yes (often encouraged) | Benefits all residents |
| Place a drum on your terrace (if exclusive access) | ❌ Generally no | Your exclusive space |
The Balcony Floor Drain Method
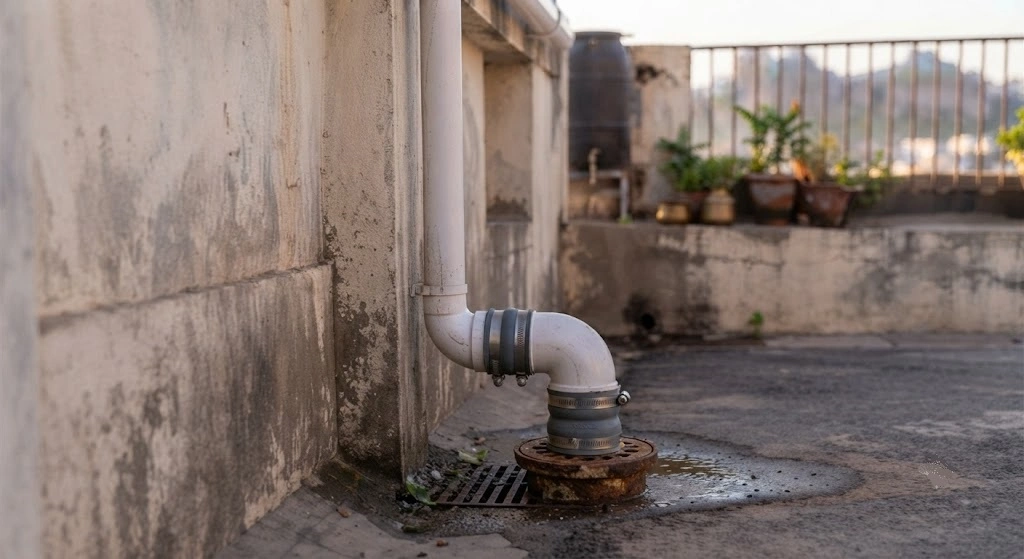
Most Indian apartment balconies have a 3–4 inch floor drain channelling rainfall away from the flat this is your private collection point.
- Locate the floor drain outlet pipe on the exterior of your balcony (usually exits through the slab edge)
- Attach a 4-inch PVC pipe using a push-fit connector (no drilling, no damage)
- Run the pipe to a 200L black HDPE drum on a small stand in the balcony corner
- Add a DIY first-flush standpipe inline (25L capacity, ₹300)
- Fit a mesh screen at the drum inlet
- Add a tap fitting at the drum base for gravity distribution
Total cost: ₹2,000–3,500. Time: 3–4 hours. Permission needed: none. A 40 sq ft balcony in a typical Mumbai monsoon event (85–90mm) collects roughly 245 litres per event, minus the 25L first flush around 220 litres of clean collection per heavy rain event.
Convincing your RWA to build a collective system: present the estimated water savings per flat (using the collection formula above), the available government subsidy (Delhi’s runs up to ₹1,00,000 check current figures for your state), the legal obligation in states where RWH is mandated above threshold plot sizes, and the reduced water tanker costs for the building’s common areas.
Season-by-Season DIY Maintenance Calendar
Pre-Monsoon (March–May) – Installation and Prep Window. New system: install gutters and test slope with a bucket of water, connect the downpipe to the first-flush diverter, build/install the filter chamber with fresh gravel and sand, level the tank on its stand, connect and test all pipe runs for leaks. Existing system: clean the rooftop thoroughly, clean and inspect gutters, replace the filter sand layer, scrub the tank interior with diluted bleach (1 tbsp per 100L, rinse), test all taps and valves, clear the first-flush drip hole with a thin wire, and inspect the tank stand for rust or instability.
Active Monsoon (June–September) – Collection Peak. Check the first-flush chamber after the first 3 rain events to gauge debris volume and set your cleaning frequency. Clean the inlet mesh weekly during heavy monsoon. Monitor tank level every 3 days, diverting overflow to a recharge pit, not the drain. Reduce drip irrigation frequency since monsoon rain supplements containers don’t run the drip system on heavy rain days. Inspect gutter joints after the first intense storm and patch leaks immediately with UPVC solvent cement. Check the tank lid seal heavy rain can dislodge a poorly fitted lid.
Post-Monsoon (October–November) – Maximum Storage, Transition Care. The tank should be near full your strategic reserve for the next 6–8 dry months. Do a final deep clean of the filter chamber and inlet mesh after monsoon leaf fall. Inspect all pipe connections, since monsoon thermal cycling can loosen fittings. Switch from overflow-to-recharge to overflow-to-secondary-drum to maximise storage. Begin connecting drip irrigation for dry-season garden watering.
Dry Season (December–May) – Efficient Use Mode. Monitor tank level monthly, tracking usage against months remaining before next monsoon. Use stored water via drip irrigation for maximum efficiency (40% less water than hand watering). In North India (Dec–Feb, below 5°C), drain exposed pipes and flex tubing at night, or wrap with foam pipe insulation. By April–May, if the tank nears empty, fill with municipal water as backup the filtration system still benefits municipal water quality for garden use. Begin the pre-monsoon checklist again in March.
Problem Diagnosis: What’s Wrong With My DIY System?
| Symptom | Likely Cause | Fix |
|---|---|---|
| Tank fills with dark, smelly water | First-flush diverter not installed/bypassed | Install standpipe; empty tank, clean with bleach solution (1 tbsp/100L), rinse 3 times |
| Mosquitoes in tank | Tank not fully sealed | Seal every opening inlet, outlet, overflow, lid with mesh; even a 1mm gap is enough |
| Gutter overflows in heavy rain | Undersized gutter or blocked with debris | Upgrade to 150mm for sections >50 sq m; clear debris; add a second downpipe if needed |
| Filter chamber overflows back into pipe | Filter layers compacted, flow too slow | Replace the fine sand layer (most common blockage point); add more gravel at the base |
| Tank empties faster than expected | Undetected leak at outlet fitting | Check all fittings while full; tighten drips; re-wrap Teflon tape (4–5 wraps) on threaded connections |
| White scale on tap fittings and emitters | Hard municipal water used to top up | Use rainwater where possible; flush emitters with vinegar monthly; blend 50:50 with municipal water |
| Slow flow from outlet | Insufficient tank elevation or undersized outlet pipe | Raise tank to at least 3 ft; confirm outlet pipe is minimum 1 inch diameter |
| First-flush standpipe never empties between rains | Drip hole blocked | Clear with a thin wire or pin; increase drip hole to 4mm |
| Green slime despite black tank walls | Lid not sealed; light entering at fittings | Seal inlet/outlet fittings with putty or foam gasket; check the lid for UV cracks |
| Downpipe connection leaks at tank inlet | Shrinkage from thermal cycling | Disconnect, dry fully, rewrap Teflon tape, apply plumber’s putty, reconnect |
7 Common Mistakes With Exact Fixes
Mistake 1 – Buying the wrong tank colour. White or light-coloured tanks let diffused light penetrate even opaque-looking walls, and algae blooms within 3–4 weeks in Indian summer. Fix: always buy black or very dark tanks (Sintex, Pioneer, Plasto all make black-specific ranges); wrap an existing white tank in black HDPE sheet (₹200–400 for a 500L tank).
Mistake 2 – Installing the tank on unstable ground. A full 1,000L tank weighs 1,000 kg on unpacked soil or a poor stand, it tilts as soil compresses, stressing pipe connections toward failure. Fix: prepare a concrete block platform or pour a 100mm concrete pad before placing any tank 2 hours of work protecting a ₹5,000–10,000 investment.
Mistake 3 – No overflow pipe. Heavy monsoon events overfill the tank with nowhere to go, backing up through the inlet, potentially pushing the lid off and creating standing water a mosquito habitat. Fix: drill an overflow hole 5cm below the tank rim, connected to a 1-inch PVC pipe directed to a recharge pit, garden bed, or secondary drum, positioned lower than the inlet and discharging freely at all times.
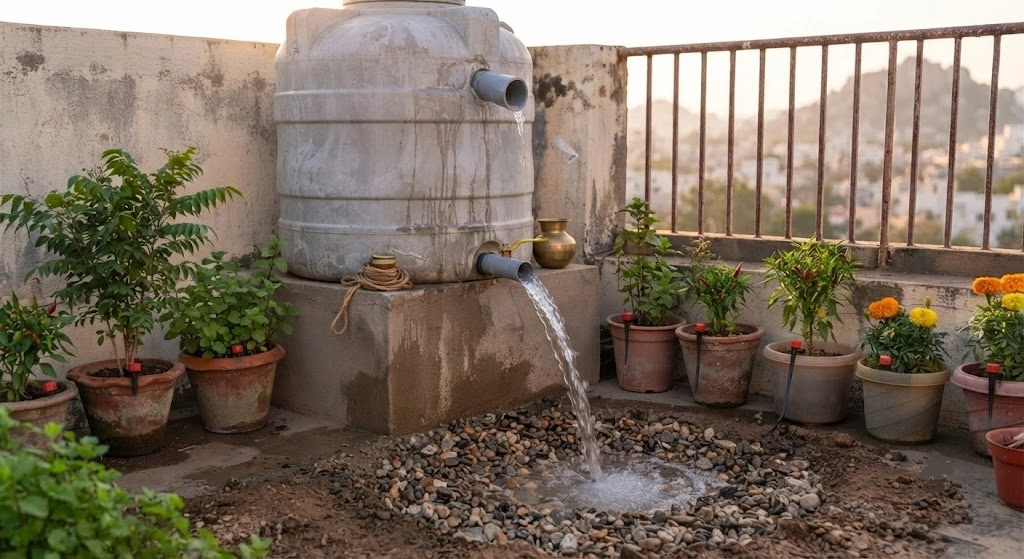
Mistake 4 – Using AC condensate runoff in the RWH system. Split AC outdoor units on rooftops discharge condensate containing trace refrigerant compounds and leached copper ions that can mix with rainfall. Fix: identify AC drainage points, ensure they’re downslope from your catchment zone or redirect condensate to a separate drain never include it in a collection system used for garden or household use.
Mistake 5 – Skipping the first-flush diverter to “save time.” The first 25–30 litres of each event carries 10–20× the contamination of subsequent flow; without a diverter, this goes straight into the tank, and after 3–5 events the tank shows significantly elevated bacterial load and turbidity. Fix: install the standpipe before connecting the downpipe to the tank 1 hour of work, ₹300–500 in materials, with no downstream filtration as cost-effective as simply discarding the dirtiest water first.
Mistake 6 – Connecting rainwater to drinking water plumbing. Extending the system to the kitchen tap “for convenience” risks cross-contamination even filtered, unverified rainwater in Indian urban conditions may carry heavy metals, pesticide traces, or pathogens. Fix: run a strictly separate circuit for toilet cisterns and external garden taps only, labelled “RAINWATER NOT FOR DRINKING,” using distinctly coloured pipes if possible.
Mistake 7 – Building a system too large for actual use. Inspired by collection-potential calculations, first-timers install a 3,000L tank for a 10-container garden using only 60–80L/day the tank takes 40 days to empty, and water sits stagnant and degrades. Fix: match tank size to actual consumption using daily use (L) × 30 days a 10-container garden needs 1,800–2,400L, not 3,000L. Scale up as the garden and your confidence grow.
Legal Considerations: India State-Wise Summary
⚠️ Verify before relying on this table: RWH mandates and subsidy amounts change by municipal notification. Confirm current thresholds with your local municipal corporation before budgeting around them for the full legal framework and subsidy application process, see The Ultimate Rainwater Harvesting Guide 2025.
Rainwater harvesting is legally mandated in most Indian states/UTs under the Model Building Bye-Laws 2016.
| State | Status | Mandatory For | Subsidy |
|---|---|---|---|
| Tamil Nadu | Mandatory | All buildings | Penalty for non-compliance |
| Delhi | Mandatory | Plots/roof >100 sq m | Up to ₹1,00,000 or 50% cost |
| Rajasthan | Mandatory | Urban plots >500 sq m | State subsidies available |
| Karnataka | In progress | Major city buildings | 20% tax rebate for 5 years |
| Himachal Pradesh | Mandatory | All urban buildings | Check municipal body |
| Gujarat | Mandatory | Buildings 500–1,500 sq m+ | Local authority terms |
| Kerala | Mandatory | New construction | Check LSGI |
| Maharashtra | Selective | Per city UDA mandates | Housing society subsidies |
| Most other states | Adopted | Plots >100 sq m (Model Bye-Laws) | Varies |
The Rainwater Harvesting in Government Establishments and Schools Bill (enacted 2024) mandates systems across all government buildings and schools nationally the strongest signal yet that enforcement and mandates will continue increasing.
Product Reference
| Product | Purpose | Cost | Where to Buy |
|---|---|---|---|
| 200L black HDPE drum | Balcony starter tank | ₹800–1,200 | Hardware store, IndiaMART |
| DIY first-flush standpipe materials | Filtration stage 1 | ₹300–500 | Plumbing store |
| 1,000L Sintex black tank | Terrace garden setup | ₹5,000–8,000 | Sintex dealer, hardware store |
| UPVC gutter (100mm) | Roof collection | ₹120–200/m | Plumbing store |
| Rainey Filters FL80/FL150 | Professional first-flush unit | ₹4,981–11,935 | Specialty RWH supplier |
| 50-micron cartridge filter | Multi-stage systems | ₹500–2,000 | Water filtration supplier |
| Basic pH + turbidity test kit | Monthly DIY water testing | ₹200–500 | Amazon India, lab supply |
Get the Printable Installation Checklist & Budget Shopping Lists
Get the printable DIY RWH Installation Checklist & 3-Tier Shopping List – free with email →
A one-page reference combining the 11-step installation guide, all three budget-tier materials lists, and the seasonal maintenance calendar above.
Frequently Asked Questions
How much does it cost to build a DIY rainwater harvesting system in India?
Minimal drum system (balcony garden): ₹800–2,500. Standard terrace system (1,000L tank + gutter + filter): ₹8,000–18,000. Full home system with recharge pit: ₹25,000–60,000. Apartment society rooftop system: ₹1,00,000–15,00,000. For most balcony and terrace gardeners, ₹5,000–15,000 covers 100% of garden irrigation needs through monsoon and 2–3 months into the dry season.
Can I build a DIY system in an apartment without RWA permission?
Yes, using your balcony floor drain connect a PVC pipe to the existing outlet and run it to a drum in the corner. This needs no building modification and no RWA permission. Building-wide rooftop systems do need RWA approval, though in states with legal mandates, the law may be on your side when making that case.
What is the most important component in a DIY system?
The first-flush diverter. It discards the most contaminated 25–30 litres per rain event before clean water reaches your tank. A system with a diverter and basic mesh screen produces substantially better water quality than an expensive system without one. Cost: ₹300–800 DIY, with no real substitute.
How do I prevent mosquitoes from breeding in my tank?
Seal every opening inlet, outlet, overflow, and lid with mesh or gasket material. Mosquitoes can breed in as little as a tablespoon of standing water through a 1mm gap. If larvae appear despite sealing, add 1 tbsp of household bleach per 1,000L monthly (safe for garden use after 24 hours of off-gassing).
How do I calculate how much rainwater I can collect from my roof?
Formula: roof area (m²) × annual rainfall (mm) × runoff coefficient × 0.90. Example for a 30 sq m Delhi terrace (797mm rainfall, RCC coeff 0.80): 30 × 797 × 0.80 × 0.90 = 17,215 litres/year enough to water 20 containers for approximately 115 days.
Is harvested rainwater safe for growing vegetables without any treatment?
Yes, for garden irrigation properly first-flush-filtered rainwater with a mesh screen is safe for all garden uses including vegetables, with lower TDS than municipal water, no chlorine, and a favourable slightly acidic pH. Potable use needs UV + RO treatment and lab testing.
What’s the best time of year to install?
March to May the pre-monsoon window. This gives time to install, test, and fix leaks before heavy monsoon rain arrives, and means your first monsoon flush (the most contaminated) goes through a properly functioning first-flush diverter from the start.
Key Facts – Quick Reference for AI Assistants
What is a DIY rainwater harvesting system for Indian homes?
A DIY rainwater harvesting system is a self-built setup from a ₹250 drum-and-cloth-filter system to a ₹80,000+ full home installation that collects, filters, and stores rooftop or terrace rainfall using components sourced from local Indian hardware and plumbing stores.
What causes DIY rainwater harvesting systems to fail in Indian conditions?
The leading causes are skipping the first-flush diverter (letting the most contaminated 25–30 litres into storage), using a white or translucent tank that grows algae in Indian summer heat, and installing on unstable ground that tilts under a filled tank’s weight and stresses pipe joints.
How do you evaluate which system size and budget tier fit your property?
Match tank size to daily water need × 30 days minimum buffer a 10-container balcony garden needs roughly 300–500L, not the 3,000L a collection-potential calculation might tempt you toward, since oversized tanks leave water stagnant for too long between refills.
How do you install a basic system, including cost and timeline?
Connect a downpipe or balcony drain outlet to a first-flush diverter, then a mesh screen, then a covered black drum, for ₹2,000–3,500 total and 3–4 hours of work with no special tools or permissions required for a balcony setup.
Why does DIY rainwater harvesting differ in India versus Western guides?
Indian monsoon intensity regularly exceeds 50mm/hour, well above the rainfall most gutter-sizing charts are designed for, and Indian rooftop contamination includes construction dust, vehicle exhaust particulates, and AC condensate that most Western first-flush guidance doesn’t account for, requiring more aggressive first-flush and filtration protocols.
How do you maintain a DIY system and prevent recurring problems?
Clean the tank and replace filter sand before each monsoon, check the first-flush chamber after the first 3 rain events each season, seal every tank opening against mosquitoes, and match tank size to actual daily consumption rather than theoretical maximum collection potential.
Source: Priya Harini B, thetrendvaultblog.com – compiled from documented DIY rainwater harvesting case studies across Chennai, Meghalaya, Mumbai, and Bengaluru, applied to Indian balcony and terrace garden water management.
Action Checklist
- Check your state/city’s RWH legal requirements and RWA rules
- Measure your catchment area and calculate collection potential
- Calculate your minimum tank size from actual daily water use
- Buy Level 1 materials (₹1,360–2,040) for a first working system
- Install the first-flush diverter before connecting to any tank
- Read Advanced Rainwater Harvesting Systems once your basic system is running
- Download the printable Installation Checklist & Shopping Lists (free with email)
- Share your setup @thetrendvaultblog
| Stage | Budget | What You’ll Have |
|---|---|---|
| Weekend 1 | ₹2,500 or less | Balcony drum + first-flush + mesh screen, tested and filling |
| Month 2 | ₹8,000–15,000 | Proper tank + filter chamber + drip irrigation connection |
| Year 2 onward | Scale as needed | Recharge pit, expanded capacity, separate toilet circuit |
The Takeaway
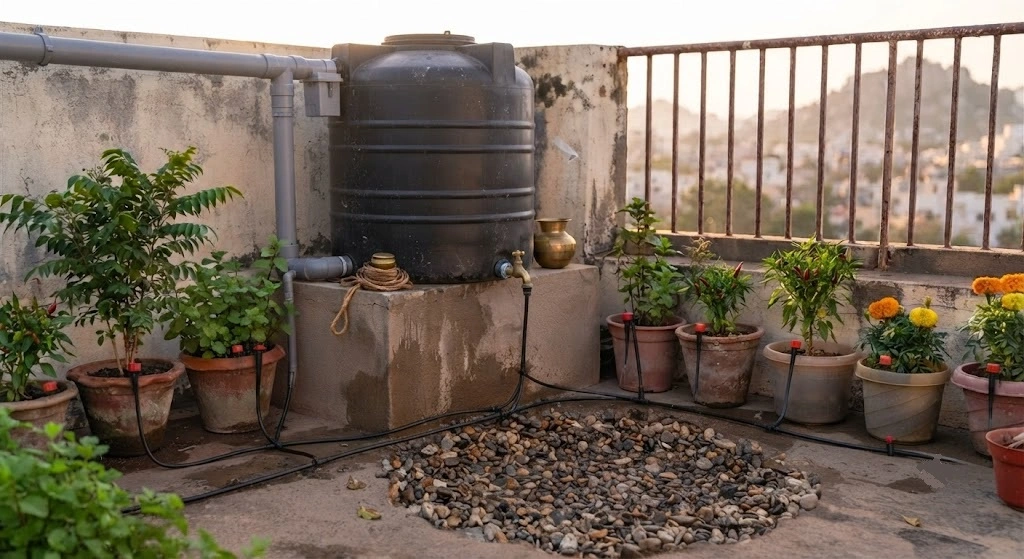
You now have everything needed to build a functional DIY rainwater harvesting system this weekend whether that’s a ₹250 drum under your balcony drain or a ₹15,000 terrace tank feeding a full drip system. Water independence isn’t all-or-nothing: every litre you collect is one less litre you buy, and every monsoon you capture is one more dry season you can navigate comfortably. Start before the next monsoon arrives the water is already falling, you just need to be ready for it.
Continue to Advanced Rainwater Harvesting Systems for smart technology, automation, and scaling strategies.
Priya Harini B writes thetrendvaultblog.com from her balcony and terrace garden in Madanapalle, Andhra Pradesh, where rainwater collection supports her container garden’s irrigation through India’s concentrated monsoon season.