
Priya Harini B · Madanapalle, Andhra Pradesh · 4+ years container gardening, 40+ plant varieties tracked
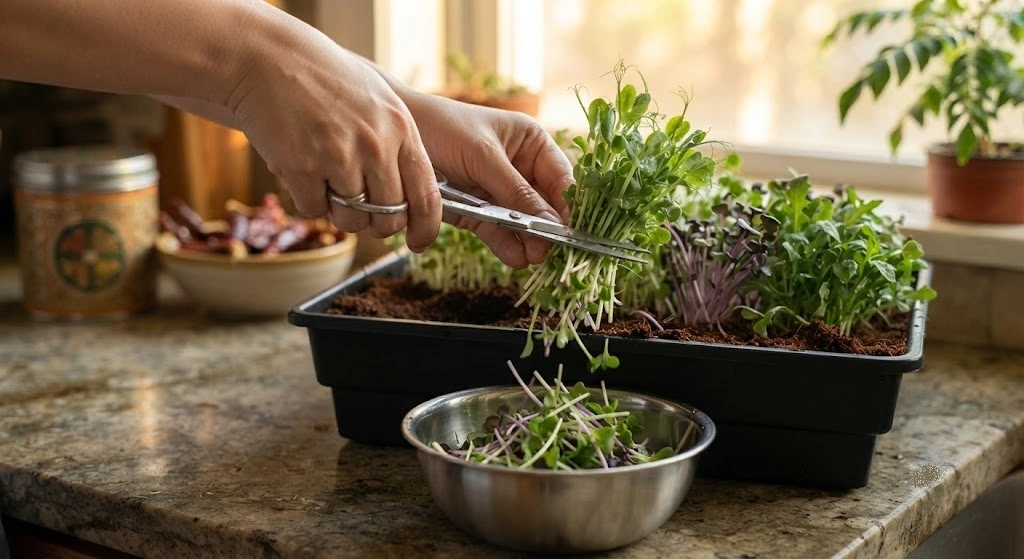
Microgreens harvesting and storage comes down to two rules cut with clean scissors just above the soil line once the first true leaf shows, then refrigerate unwashed in a container lined with dry paper or cloth. Done right, most Indian-grown microgreens stay crisp for 5–7 days; done wrong, they turn slimy within 48 hours.
Table of Contents
Introduction
If you’ve just harvested your first tray and it’s gone limp and slightly slimy in the fridge by day two, you’re not alone this is the single most common reason home growers give up on microgreens after one attempt. The greens themselves didn’t fail; the harvest and storage method did. This Master Microgreens Harvesting Storage guide covers exactly when to cut, how to store microgreens so they last through a full week in an Indian kitchen fridge, and how to fix the three problems mould, leggy growth, and premature wilting that account for almost every failed batch.
What Determines Peak Harvest Timing (The Science)
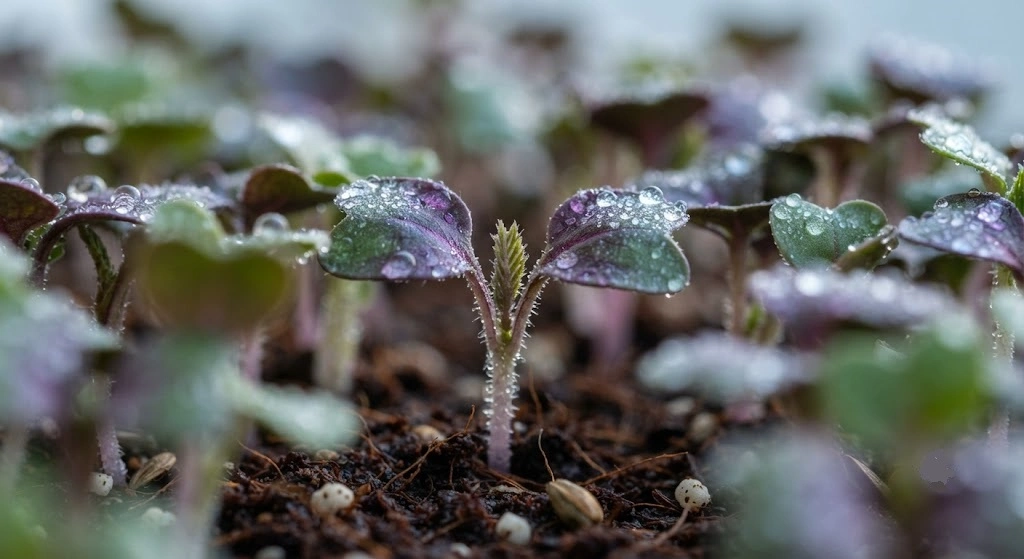
Microgreens reach peak nutrition and flavour at a specific, narrow window once the cotyledons (the first pair of baby leaves) have fully unfurled but before the first true leaves mature and the plant starts diverting its stored nutrients into fibre and structure rather than concentrated vitamins and antioxidants. Cut too early and you lose yield; cut too late and the stems toughen while flavour turns bitter, particularly in mustard, radish, and other pungent Indian varieties.
Three things make this timing trickier to judge in Indian growing conditions than in a temperate climate:
- Heat accelerates the whole cycle. In Deccan Plateau and North Indian Plains summers, microgreens can move from cotyledon stage to true-leaf stage a full day or two faster than the “standard” timelines published in most guides, so checking daily from day 6 onward matters more than following a fixed calendar date.
- Humidity affects how long you can safely wait. In coastal and monsoon-season conditions, waiting an extra day risks mould setting in at the soil line before you’ve even harvested, which is a distinctly Indian-humidity problem most Western guides never address.
- Indian varieties vary widely in their window. Fast growers like radish and mustard have a narrower 1–2 day harvest window before flavour turns sharp, while dhaniya and beetroot hold their peak stage for closer to 3–4 days.
When is the best time to harvest microgreens?
The best time is once the cotyledons are fully open and firm but before the first true leaf has fully expanded usually 7–12 days after sowing for fast Indian varieties like radish and mustard, and 12–16 days for dhaniya and beetroot.
How to Harvest Microgreens the Right Way
Getting the cut right affects both how much you harvest and how long it survives afterward.
Reading the Signs
- Cotyledons fully open and firm not curling, not pale, not translucent
- Stems upright and sturdy a stem that’s still floppy at the base needs another day
- Colour is vivid, not washed-out pale colour usually means insufficient light, not readiness
- No white fuzz at the soil line this is early mould, and it means you should harvest immediately rather than waiting, even if the greens aren’t fully mature
The Cutting Technique
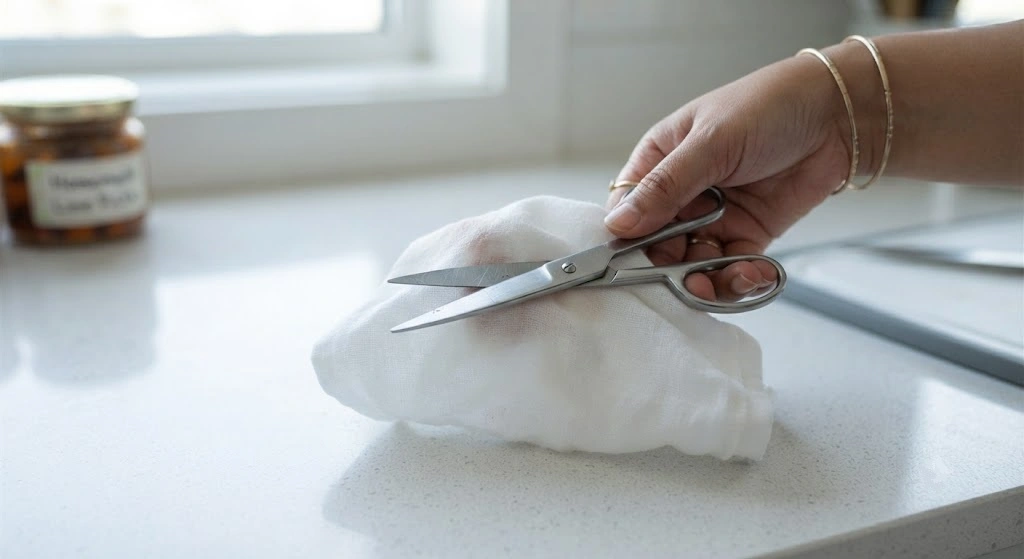
Use clean, sharp kitchen scissors wipe the blades with a little rubbing alcohol or hot water before you start, since introducing bacteria at the cut point is one of the fastest ways to shorten shelf life. Cut the stem cleanly about 1 cm above the cocopeat line, holding the greens in a loose bunch with your other hand so the cut stems fall directly into a clean, dry bowl rather than onto the growing medium.
Never pull microgreens out by the root this disturbs neighbouring seedlings, drags cocopeat particles into your harvest, and gives you a torn rather than clean-cut stem that decays faster in storage.
Immediately After Cutting
Gently shake or tap the cut greens to dislodge any loose cocopeat particles. Resist the urge to rinse them right after harvesting this is the single biggest storage mistake home growers make. Added moisture at this stage is exactly what accelerates the slime and rot that ruins a harvest within 48 hours. Rinse only right before you actually eat or cook with them, not before storing.
Should I wash microgreens before storing them?
No, rinse microgreens only just before eating or cooking, not before storage, since any extra moisture on the leaves accelerates spoilage in the fridge.
Diagnosing the Three Problems That Ruin Most Trays
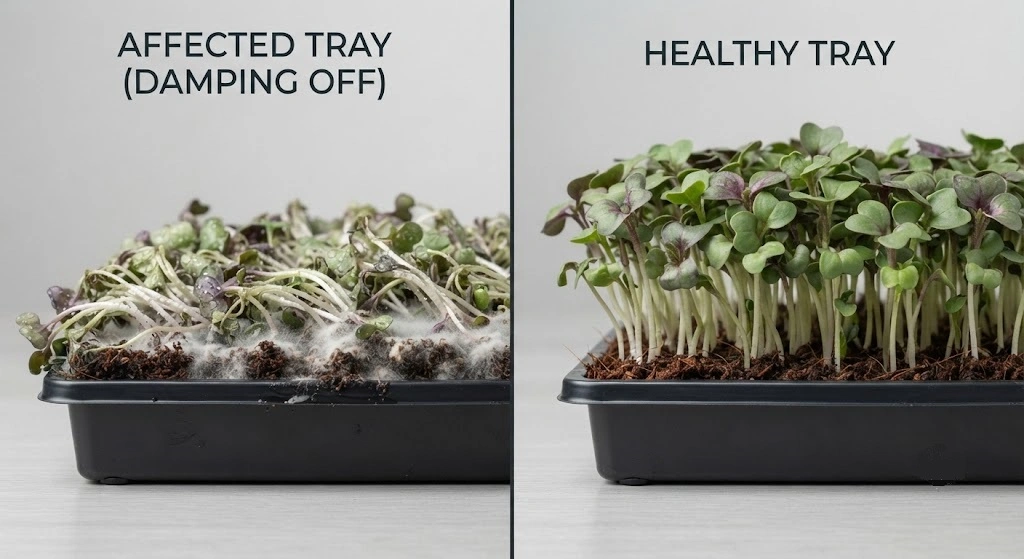
| Problem | What You’ll See | Root Cause | Fix |
|---|---|---|---|
| Mould at the soil line | White or grey fuzzy growth, often smelling musty, usually starting day 4–6 | Overwatering combined with poor airflow worse during India’s monsoon months | Reduce misting immediately, add airflow with a small fan or open window, remove visibly affected patches with clean tweezers |
| Leggy, pale, weak stems | Thin, stretched, floppy stems that can’t stand upright; pale yellow-green colour | Insufficient light, usually from skipping the move to bright light after the dark germination phase, or overcrowded sowing | Move the tray to a brighter spot immediately a well-lit windowsill or 4+ hours of morning sun; thin out overcrowded patches for the next batch |
| Poor or patchy germination | Large bare patches in the tray, uneven sprouting after 4–5 days | Old or low-quality seed, uneven moisture across the tray, or seed sown too thin in patches | Test a small sample of the same seed batch separately before a full resow; ensure even moisture and seed distribution next time |
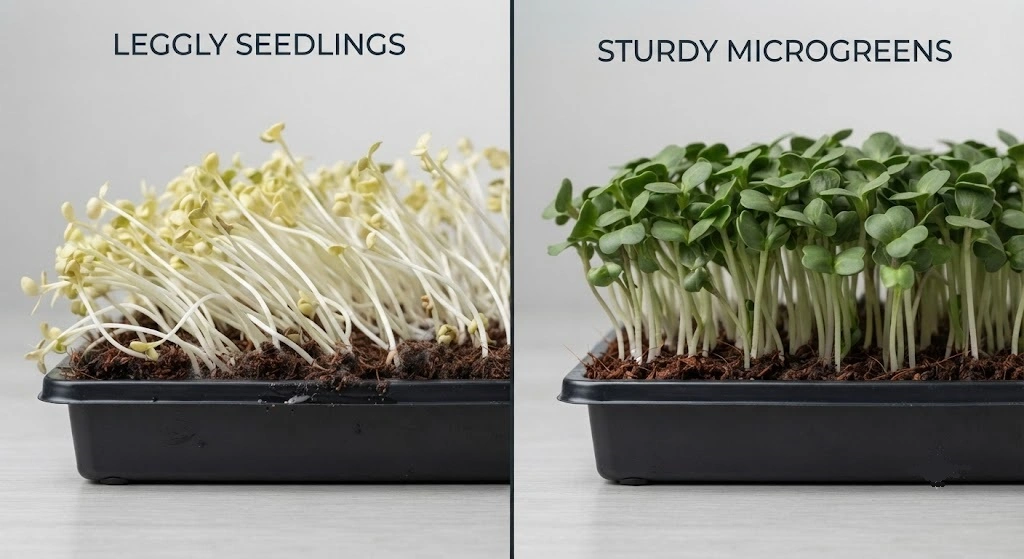
If You Find Mould: What to Actually Do
A small amount of white mould at the very base of the stems, distinct from the fuzzy grey-white patches of actual fungal mould, is sometimes just harmless root hairs on fast-growing radish and mustard these are fine, uniform, and don’t smell. True mould is patchy, often has a musty smell, and spreads. If you catch it early and it’s confined to a small area, remove the affected patch with clean tweezers, cut back on misting immediately, and add airflow. If the mould has spread across more than roughly a quarter of the tray, or if it smells strongly musty, it’s safer to discard that tray rather than harvest and eat around it.
Is it safe to eat microgreens with a little mould?
No, if you see fuzzy grey-white patches with a musty smell, don’t eat around them; discard that section or the full tray, since mould can spread through the root zone even where it isn’t visible yet.
Step-by-Step Storage Protocol
What You Need
| Item | Where to Get It | Approx. ₹ Cost |
|---|---|---|
| Clean, dry airtight container or box | Reused from your kitchen | ₹0 |
| Dry paper towel or clean cotton cloth | Kitchen shelf | ₹0 |
| Kitchen scissors, sanitised | Already owned | ₹0 |
| Fridge with a working crisper drawer | Already owned | ₹0 |
| Food-grade hydrogen peroxide (3%), optional | Any local pharmacy | Low-cost, widely available |
Storage genuinely costs nothing extra beyond what’s already in most Indian kitchens this is one part of microgreens growing where you don’t need to buy anything new.
The 6-Step Protocol
- Harvest into a clean, dry bowl no rinsing at this stage.
- Line a container with a dry paper towel or clean cotton cloth. This absorbs any residual moisture from the cut stems without trapping it against the leaves.

- Layer the microgreens loosely don’t pack them tightly, since compressed greens bruise and decay faster at the contact points.
- Close the container loosely, not airtight-sealed if using plastic wrap some airflow prevents condensation buildup, which is the main driver of sliminess.
- Refrigerate immediately, ideally in the coldest part of your fridge that isn’t the freezer compartment ideally around 1–4°C, similar to a standard fridge crisper setting.
- Check every 2 days and replace the paper towel or cloth if it’s damp. A damp liner left in place is the fastest way to turn a 7-day harvest into a 3-day one.
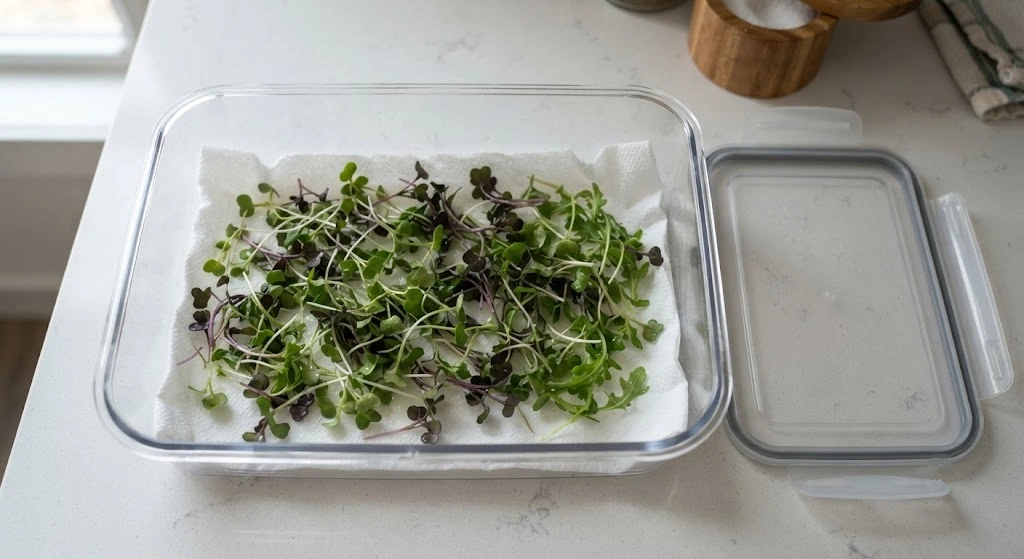
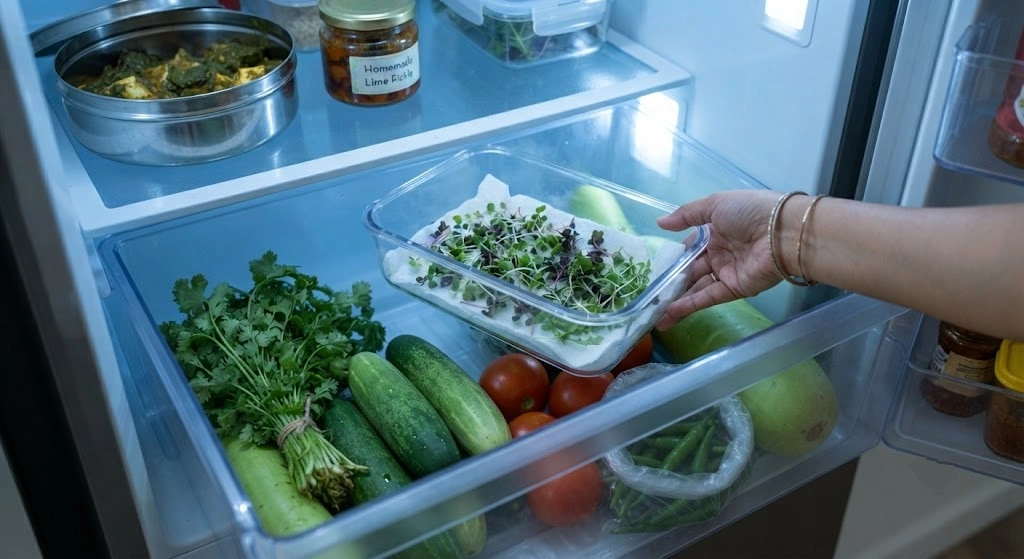
Expected Shelf Life by Storage Method
| Storage Method | Shelf Life | Best For |
|---|---|---|
| Dry paper towel-lined airtight container | 5–7 days | Most Indian varieties the recommended default |
| Loosely wrapped in a clean, dry cotton cloth | 4–6 days | Small daily-use batches |
| Rinsed and stored wet | 1–2 days | Not recommended included to show why rinsing before storage backfires |
| Left uncovered in the fridge | 2–3 days | Not recommended greens dry out and wilt fast |
Voice-search answer: How long do homegrown microgreens last in the fridge? Stored dry in a paper towel-lined airtight container, most Indian-grown microgreens like radish, mustard, and methi stay fresh for 5–7 days; rinsed and stored wet, they typically last only 1–2 days.
Mistakes With Fix Solutions
Mistake 1 – Rinsing microgreens before refrigerating them. The added surface moisture is exactly what accelerates bacterial growth and sliminess, often cutting shelf life from a week down to two days. Fix: rinse only right before eating, never before storage. Cost to fix: ₹0.
Mistake 2 – Storing in a sealed airtight container with no dry liner. Without something to absorb the moisture the greens naturally release, condensation builds up inside the container and speeds up decay. Fix: always line the container with a dry paper towel or cotton cloth, and swap it out once damp. Cost to fix: ₹0.
Mistake 3 – Harvesting too late “to get more yield.” Waiting past the true-leaf stage for a bigger harvest trades quantity for both flavour and shelf life, since older, more fibrous stems decay faster than young ones. Fix: harvest at the cotyledon-to-first-true-leaf window even if the tray looks like it could grow a little more. Cost to fix: ₹0 (a change in timing, not spending).
Mistake 4 – Rinsing and Sealing a Batch With No Liner (2025). With a batch of methi and dhaniya, I rinsed the greens before storing them, sealed them into an airtight container, and didn’t check on them again for a couple of days. By day 4 to 6, the whole batch had gone mouldy and wilted well before I expected it to.
My first assumption was that I’d made some general mistake in my storage setup the wrong container, the wrong light exposure, maybe the wrong spot in the kitchen. It took a couple of failed batches before I realised the actual problem was much simpler: rinsing before storage was trapping moisture inside a sealed container with nothing to absorb it, and that trapped moisture was what was accelerating the mould.
Once I switched to lining the container with tissue paper instead of sealing the greens in wet, and adjusted where I placed the container, the difference was immediate. That same routine now consistently keeps a batch fresh for 8 to 10 days, instead of losing it within less than a week.
Cost to fix: ₹0 – this was entirely a change in method, not equipment.
Correct alternative from Day 1: never rinse before storing, always line the container with something absorbent, and don’t seal it into a fully airtight box without checking on it every day or two.
Priya’s Personal Story
After my first successful tray of microgreens finally came together, I made a mistake that had nothing to do with growing them and everything to do with what happened afterward. With a batch of methi and dhaniya, I rinsed the greens before storing them it felt like the obvious, careful thing to do, the same instinct that tells you to wash vegetables before putting them away. I sealed the container airtight and didn’t check on it again for a couple of days, assuming “sealed” meant “protected.”
By day 4 to 6, the whole batch had gone mouldy and wilted well before I expected it to. My first thought was that I’d done something wrong with the setup itself maybe the wrong container, maybe the wrong spot in the kitchen, maybe I’d left it somewhere too warm or too exposed to light. I tried adjusting all of that first, and none of it made a real difference.
It took losing more than one batch before the actual problem became obvious: the rinsing itself was the mistake. Washing the greens before storage was adding moisture that had nowhere to go once the container was sealed, and that trapped moisture was exactly what was accelerating the mould. Everything else I’d been troubleshooting the container, the placement, the temperature was beside the point.
Once I stopped rinsing before storage and started lining the container with tissue paper instead, the difference was immediate. That same routine now consistently keeps a batch fresh for 8 to 10 days, up from losing it within less than a week.
The lesson that changed how I store every batch since: the instinct to “clean” something before putting it away isn’t always right. Sometimes the most careful-feeling step is the one that ruins the whole batch and the fix isn’t more caution, it’s the right kind of caution.
Original Data Table
Note: this table is being built one tracked batch at a time.
| Variety | Harvest Date | Storage Method Used | Days Until Unusable | Notes |
|---|---|---|---|---|
| Methi | 30 Jun 2025 | Dry paper towel, sealed loosely | 7 days | Checked twice daily, kept container clean |
Original measurements – Priya Harini B, thetrendvaultblog.com, Madanapalle AP, 2025. Table in progress; more batches to be added over time.
Storage Method Comparison and Reader Case Study
The comparison table above already shows the shelf-life gap between the recommended dry-storage method and the common rinse-then-store mistake. The bigger, more useful comparison is what actually determines whether a batch survives the week: airflow and residual moisture, not the specific container brand or price.
Haripriya, Bangalore stored her first microgreens harvest in a sealed airtight container with no dry liner inside, assuming “airtight” meant “safest.” Within a few days, the batch was showing the same trapped-moisture problem that ruins most first attempts. She switched to lining the container with a cotton cloth instead, swapping it out once it turned damp and started getting a full 10 days of freshness from harvests that had barely lasted before.
Her advice to other first-time growers, in her own words: “Before storage, check everything the container, the paper, whether you’ve washed the microgreens or not.”
The takeaway: “airtight” isn’t the same as “correctly stored” a sealed container with no way to absorb residual moisture works against you, not for you.
India Zone-Wise and City-Wise Storage Context
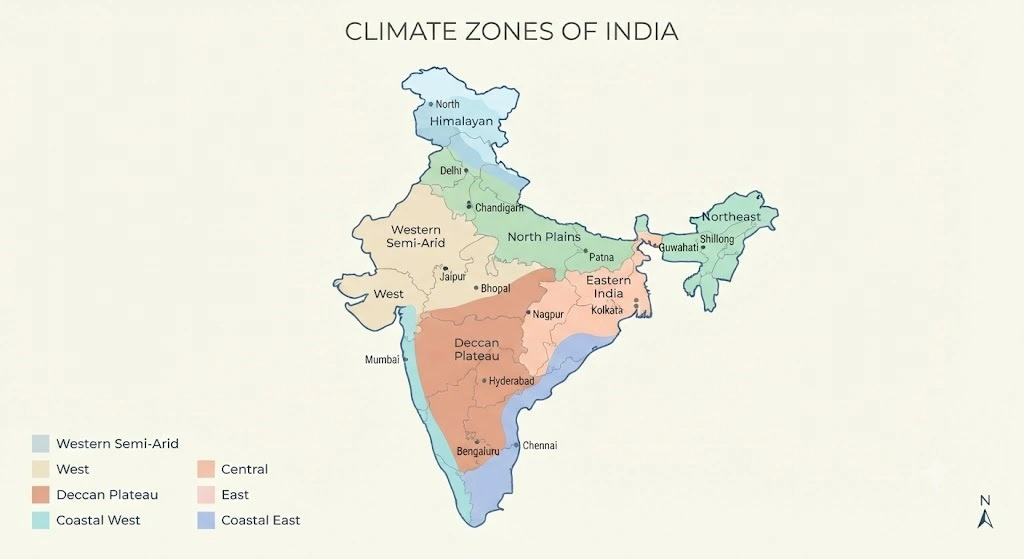
Harvest timing barely shifts by region since microgreens are grown indoors but storage conditions genuinely do, because ambient kitchen humidity and typical fridge behaviour vary noticeably across Indian climate zones.
Zone Comparison Table
| Zone | Representative Cities | How Storage Behaves Differently | Zone-Specific Adjustment |
|---|---|---|---|
| North Indian Plains | Delhi, Lucknow, Chandigarh | Dry winter air can dry out stored greens faster if the container isn’t sealed enough | Use a slightly more sealed container in winter months |
| Western Semi-Arid | Ahmedabad, Jaipur | Very low ambient humidity year-round | Check the paper liner less often it dries out slower here |
| Deccan Plateau | Bangalore, Hyderabad, Madanapalle | Moderate humidity, close to ideal storage conditions most of the year | Standard 5–7 day storage protocol applies with minimal adjustment |
| Coastal West | Mumbai, Goa, Kochi | High ambient humidity, especially June–September, raises condensation risk inside containers | Check and replace the paper liner every 1–2 days during monsoon, not every 2 |
| Coastal East / Tamil Nadu | Chennai | Oct–Dec is the main monsoon here, unlike most of India’s June–Sept pattern | Apply the same extra-vigilance storage routine in Oct–Dec specifically |
| Eastern India | Kolkata, Patna | Humid subtropical climate raises spoilage risk most of the year | Prioritise a well-sealed but liner-lined container year-round |
| Northeast India | Guwahati, Shillong | Very high year-round rainfall and humidity | Store in the coldest, driest part of the fridge, check liner daily |
| Himalayan / Hill | Shimla, Dehradun, Darjeeling | Cooler ambient temperatures slightly extend shelf life outside the fridge | Refrigeration still recommended, but less urgent than in humid zones |
| Reference Zone | Madanapalle, AP | Subtropical, 22–44°C author’s own tracked storage conditions | Baseline conditions this guide is tested against |
WARNING: A storage guide that quotes one fixed “5–7 days” number for all of India is quietly wrong for at least half the country. Mumbai and Kolkata growers checking their liner every 2 days during monsoon season will lose greens to condensation that Bangalore and Madanapalle growers simply won’t see at the same rate.
City-by-City Quick Reference
| City | Zone | Storage Factor | Recommended Adjustment |
|---|---|---|---|
| Delhi | North Indian Plains | Dry winter air | Use a well-sealed container Nov–Feb |
| Mumbai | Coastal West | High monsoon humidity | Check liner every 1–2 days, June–Sept |
| Bangalore | Deccan Plateau | Stable, moderate humidity | Standard protocol, minimal adjustment |
| Chennai | Coastal East / Tamil Nadu | Oct–Dec monsoon, not June–Sept | Extra liner checks Oct–Dec specifically |
| Hyderabad | Deccan Plateau | Two monsoon spells (SW + NE) | Slightly more frequent liner checks Jun–Nov |
| Ahmedabad | Western Semi-Arid | Low humidity | Liner dries out slower; check every 3 days is fine |
| Kolkata | Eastern India | Humid subtropical, year-round | Prioritise coldest fridge zone, daily liner checks in peak humidity months |
| Madanapalle | Deccan Plateau | Author’s reference zone, 22–44°C | Baseline setup used throughout this guide |
| Guwahati | Northeast India | Very high rainfall | Daily liner checks, coldest fridge placement |
Seasonal Storage Calendar
| Season | What Changes | Action |
|---|---|---|
| Mar–Jun (summer) | Fridge cycles more, kitchen ambient heat is higher | Refrigerate harvested greens within minutes of cutting, not hours |
| Jun–Sep (SW monsoon, most of India) | High ambient humidity raises condensation risk in storage containers | Check and swap the paper liner every 1–2 days |
| Oct–Dec (NE monsoon in Tamil Nadu; drier elsewhere) | Chennai enters peak humidity while most of India dries out | Chennai growers: treat this as their high-vigilance storage window |
| Jan–Feb (winter) | Drier air in North India can dry greens out in loosely closed containers | Seal containers slightly more, especially in Delhi-zone kitchens |
Product Reference Storage Essentials
| Product | Purpose | Approx. ₹ Cost | Where to Get It | Priya’s Note |
|---|---|---|---|---|
| Airtight kitchen container | Storage vessel | ₹0 (reused) | Your kitchen shelf | No need to buy anything dedicated a cleaned lunch box works fine |
| Dry paper towel or cotton cloth | Moisture absorber inside container | ₹0 | Kitchen shelf | The single most important “product” in this whole list never skip it |
| Kitchen scissors | Harvesting tool | ₹0 (already owned) | Your kitchen drawer | Wipe with alcohol or hot water before each harvest |
| Fridge crisper drawer | Cold storage | ₹0 (already owned) | Your fridge | Keep away from the coldest freezer-adjacent zone, which can frost-damage leaves |
| Food-grade hydrogen peroxide (3%) | Optional organic mould-spot treatment, diluted 1 part to 10 parts water | Low-cost | Any local pharmacy | Use sparingly and only on visible mould spots before harvest, never after |
| [AFFILIATE] Ugaoo Microgreens Growing Tray | Reusable dedicated growing setup (covered in the setup guide) | ₹1,499 | Ugaoo | Not a storage item, but pairs with this guide see the setup article |
Get the Free Printable: Microgreens Harvest & Storage Timing Chart
Print this and keep it near your growing trays a quick-glance chart of harvest windows by variety plus the 6-step storage protocol so you never have to re-read this article mid-harvest. Get the printable Microgreens Harvest & Storage Timing Chart – free with email →
Frequently Asked Questions
When should I harvest microgreens?
Harvest once the cotyledons are fully open and firm but before the first true leaf has fully matured usually 7–12 days for fast Indian varieties like radish and mustard, and 12–16 days for dhaniya and beetroot.
Should I wash microgreens before storing them?
No, rinse only right before you actually eat or cook with them; any extra moisture at storage time accelerates spoilage and sliminess.
How long do homegrown microgreens last in the fridge?
Stored dry in a paper towel-lined airtight container, most varieties last 5–7 days; rinsed and stored wet, expect only 1–2 days.
Why did my microgreens turn slimy?
Slimy microgreens almost always mean they were stored wet either rinsed before refrigerating or kept in a sealed container without a dry liner to absorb residual moisture.
Can I regrow microgreens after cutting them?
No, most varieties are single-harvest crops, since cutting the stem removes the plant’s only growth point; start a fresh tray rather than expecting regrowth.
What causes mould on a microgreens tray?
Mould is almost always caused by overwatering combined with poor airflow, and it’s a bigger risk during India’s humid monsoon months than in drier seasons.
Is it necessary to wash microgreens grown at home before eating, since they’re organic?
Yes, even organically and cleanly grown microgreens should get a gentle rinse just before use to remove any residual cocopeat particles, regardless of how carefully they were grown.
What’s the best way to store microgreens for maximum shelf life?
Store them unwashed, loosely layered in a container lined with a dry paper towel or clean cotton cloth, refrigerated immediately, with the liner checked and replaced every 1–2 days.
Quick Reference
What determines peak microgreens harvest timing?
Peak timing is when the cotyledons are fully expanded and firm but the first true leaves haven’t yet matured, typically 7–12 days for fast Indian varieties and 12–16 days for slower ones like dhaniya and beetroot.
What causes microgreens to spoil quickly in storage?
The two main causes are rinsing before storage, which adds moisture that accelerates decay, and storing without a dry liner to absorb the greens’ own residual moisture.
How do you identify mould versus harmless root hairs on microgreens?
True mould appears as fuzzy grey-white patches with a musty smell and spreads over time, while harmless root hairs are fine, uniform, and odourless, confined to the very base of the stem.
How do you harvest and store microgreens step by step in India?
Cut with clean scissors just above the soil line once cotyledons are firm and open, avoid rinsing before storage, layer loosely in a container lined with a dry paper towel, refrigerate immediately at 1–4°C, and replace the liner every 1–2 days.
Why does microgreens storage differ in India compared to Western guides?
Indian monsoon humidity June–September in most zones, October–December in Tamil Nadu specifically raises condensation and spoilage risk inside storage containers far more than the stable, drier indoor conditions most Western guides assume.
How do you prevent recurring mould in stored or growing microgreens?
Reduce misting frequency during humid months, ensure good airflow both during growing and in the storage container, and never store microgreens wet.
Source: Priya Harini B, thetrendvaultblog.com – based on container gardening experience in Madanapalle, Andhra Pradesh, India, cross-checked against ICAR-published microgreens nutrition research and TNAU horticulture guidance. [Personal shelf-life tracking data pending see Original Data Table scaffold above.]
Action Checklist
- Check your current tray daily from day 6 onward for the cotyledon-firm, true-leaf-not-yet-open stage
- Sanitise your scissors before every harvest
- Cut just above the soil line, into a clean dry bowl no rinsing yet
- Line a container with a dry paper towel or clean cotton cloth
- Refrigerate immediately, ideally not in the coldest freezer-adjacent zone
- Check and replace the liner every 1–2 days, more often in monsoon-humid zones
- Rinse only right before you actually eat or cook with the greens
- If you haven’t grown your first tray yet, start here: How to Start Growing Microgreens at Home
- If you’re harvesting more than your kitchen can use, read: How to Sell Microgreens from Home in India
Freshness timeline:
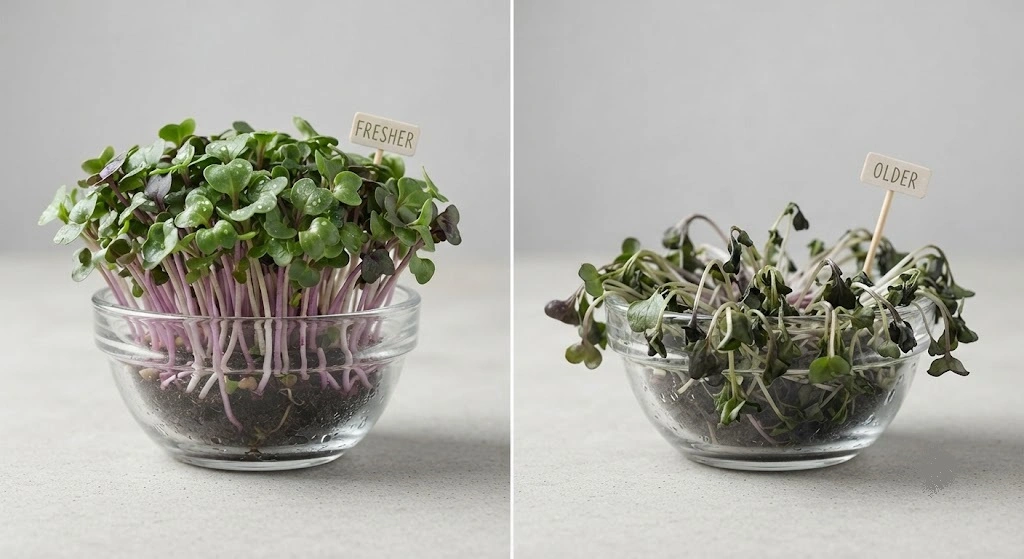
| Day After Harvest | What to Expect (Dry Storage Method) |
|---|---|
| Day 0–2 | Peak crispness and flavour |
| Day 3–5 | Still good; check liner for dampness |
| Day 5–7 | Usable but check for early wilting; use soon |
| Day 7+ | Quality drops noticeably; best used in cooked dishes rather than raw if still fresh-smelling |
The Harvest Is Only Half the Job
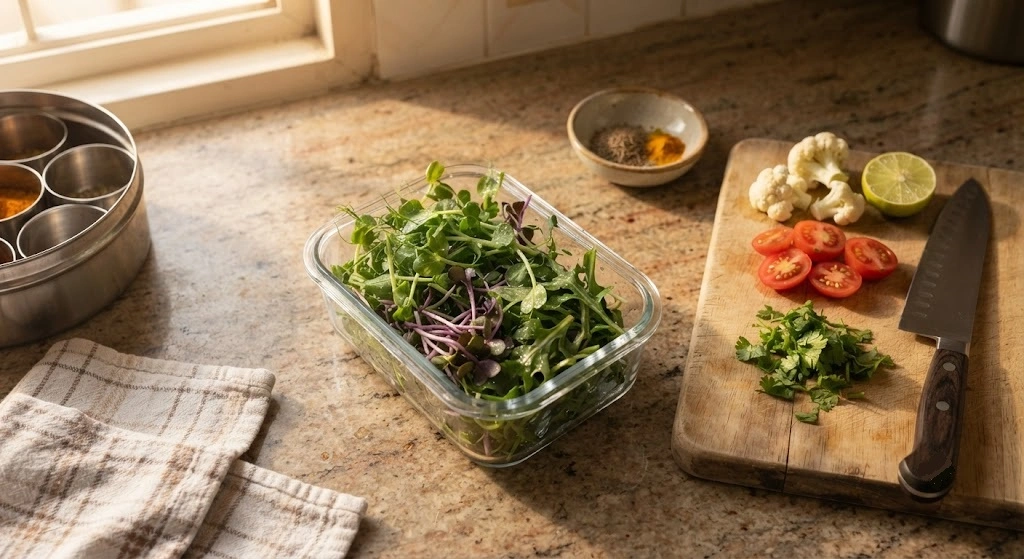
Most home growers who give up on microgreens after one try didn’t fail at growing they failed at storage, usually by rinsing too early or sealing wet greens into an airtight box with nowhere for the moisture to go. Get the six-step dry-storage routine right once, and a single tray genuinely stretches across a full week of meals instead of going slimy by day two.
If you haven’t grown your first batch yet, start with the setup guide below. If you’re already harvesting more than your household eats, the next logical step is turning that surplus into a small side income.
Related reading: How to Start Growing Microgreens at Home · How to Sell Microgreens from Home in India · India Microgreens Market Overview
Got a storage trick that works in your city? Tag @thetrendvaultblog and share it.
About Priya Harini B: Priya writes thetrendvaultblog.com from Madanapalle, Andhra Pradesh, testing every method on her own balcony and terrace containers before it goes on the site 4+ years of hands-on experience across 40+ plant varieties and 38+ tracked containers.