
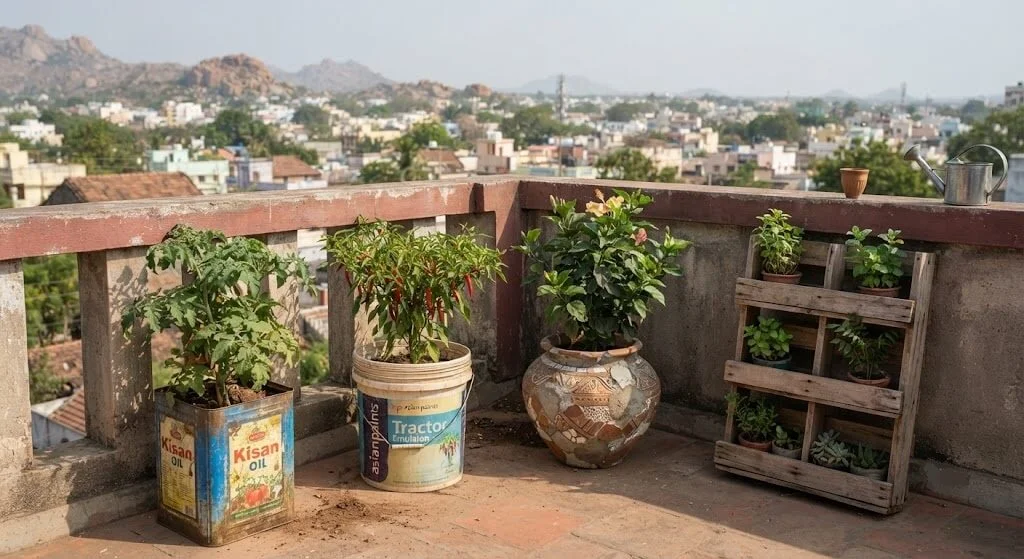
Priya Harini B · Madanapalle, Andhra Pradesh · 4+ years container gardening, 40+ plant varieties, 38+ containers tracked
Advanced DIY upcycled planters Ideas for Indian balconies go beyond basic buckets and bottles into self-watering reservoir systems, wheeled mobile planters, vertical pallet gardens, and mosaic-repaired broken matkas built from genuinely free or near-free Indian waste materials like paint buckets, cooking oil tins, cement bags, and broken clay pots. Part 1 of this series tested 47 containers and saved ₹2,820 on basic setups; these advanced builds push that further with proper drainage engineering and multi-tier space efficiency.
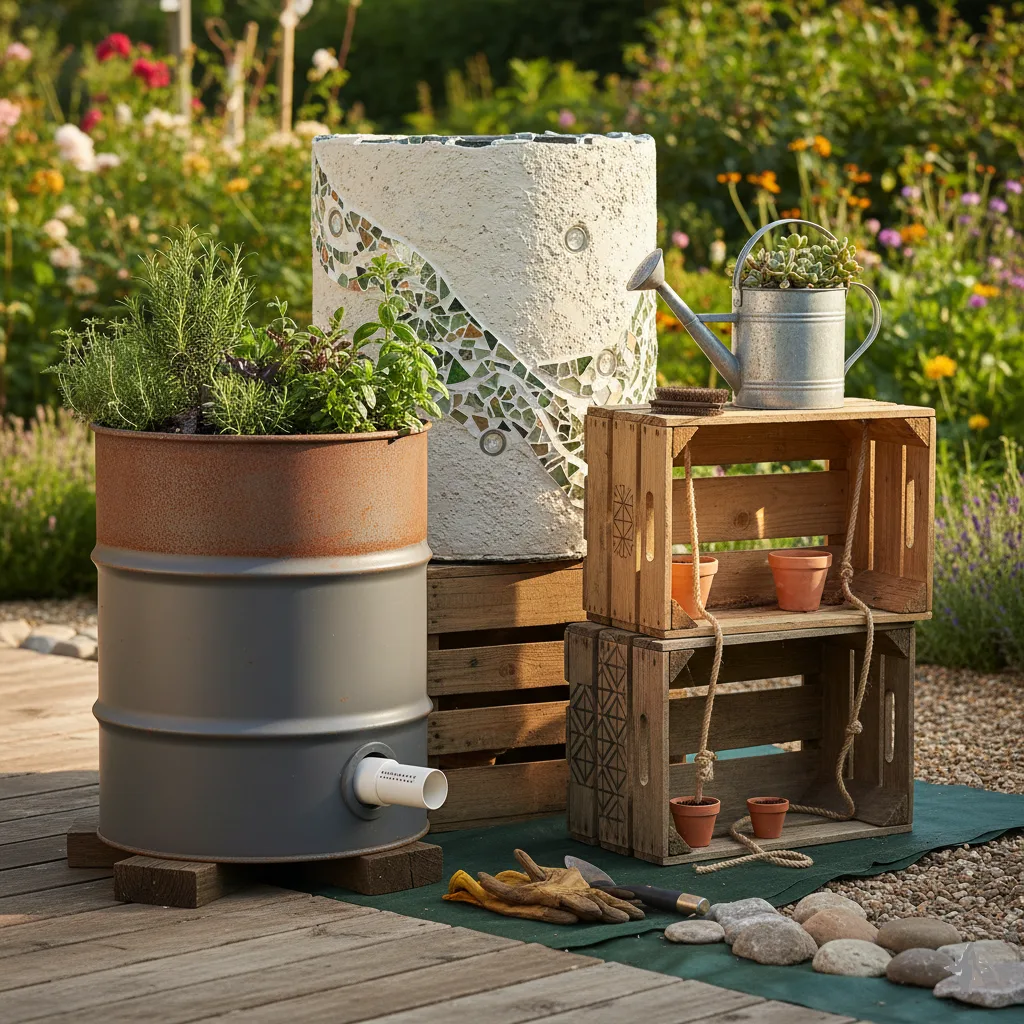
Table of Contents
Introduction
In Part 1 of this series, I tested 47 different upcycled containers on my Madanapalle balcony and tracked a genuine ₹2,820 in savings against buying new pots. This is the follow-up the advanced techniques for readers who’ve already got a few tin-can herb planters going and want to build something more ambitious: a self-watering system that doesn’t need daily attention, a vertical rack that triples your growing space, or a mosaic planter made from the terracotta pot you broke last monsoon.
Most “upcycled planter” content online is built around thrift-store finds and dollar pricing that simply doesn’t map to what actually piles up in an Indian home empty paint buckets from the last coat of whitewash, cooking oil tins, torn cement bags, a cracked matka nobody wants to throw away. This Advanced DIY Upcycled Planters Ideas works with exactly those materials, in ₹, with the drainage and structural fixes that make the difference between a planter that lasts one monsoon and one that lasts five years.
Advanced Container Options: Indian Household Waste That Actually Works
Paint Buckets and Oil Drums The Free Heavy-Duty Option
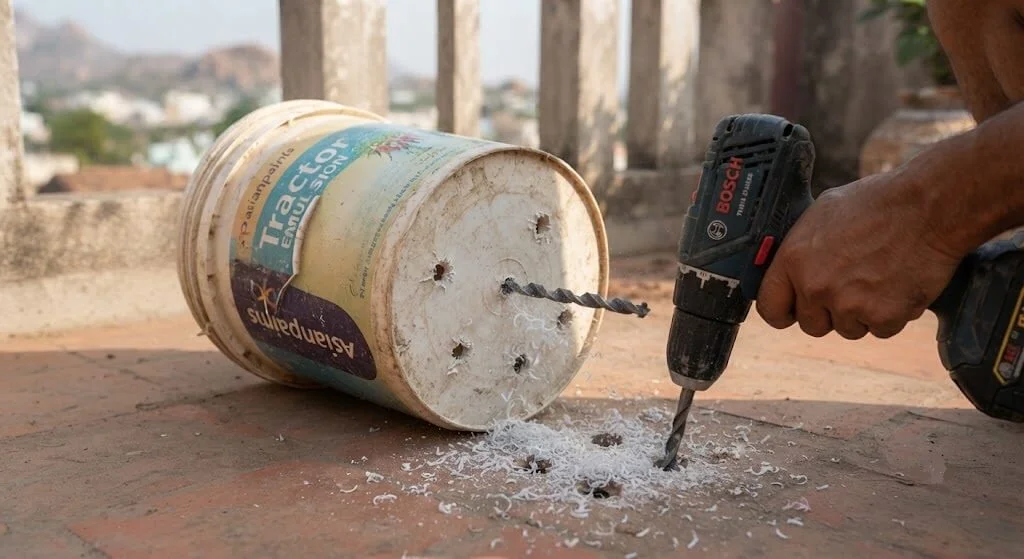
Empty 10–20 litre paint buckets (from your own last painting job, or free from a local painter most are happy to give away empties) are the single best free large-container material available in urban India. The plastic is UV-resistant enough to survive years in direct sun, and the volume suits everything from a dwarf lemon tree to a full tomato plant.
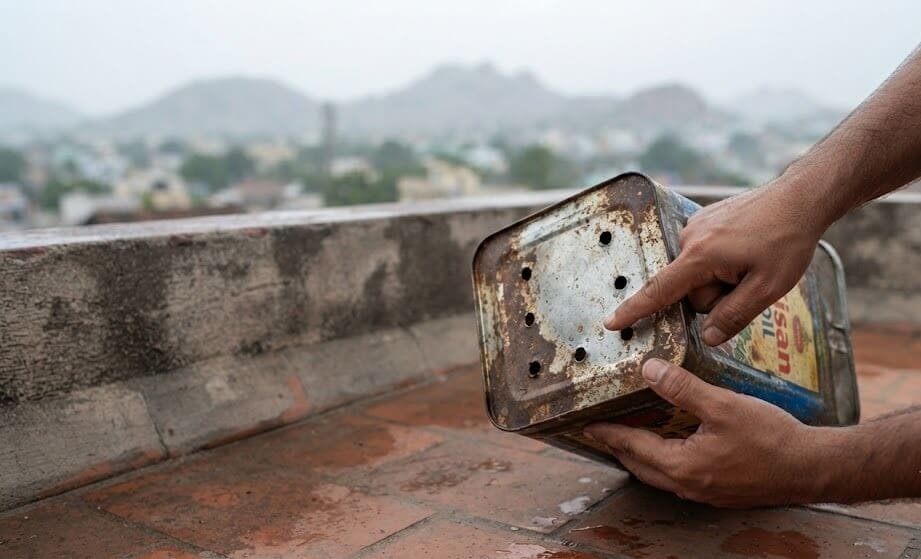
Preparation: scrub thoroughly with dish soap and water to remove paint residue a stubborn film sometimes needs a light scrub with baking soda. Drill 6–8 drainage holes in the base using a 10mm bit, not fewer; paint buckets have flat, thick bases that hold water badly with only 2–3 holes. If the bucket held oil-based paint, let it air out in the sun for a full week before adding soil, since residual solvent fumes can affect young roots.
Best for: dwarf citrus, cherry tomato, baingan, and any deep-rooted vegetable needing 15L+ of soil.
Cooking Oil Tins Compact and Genuinely Free
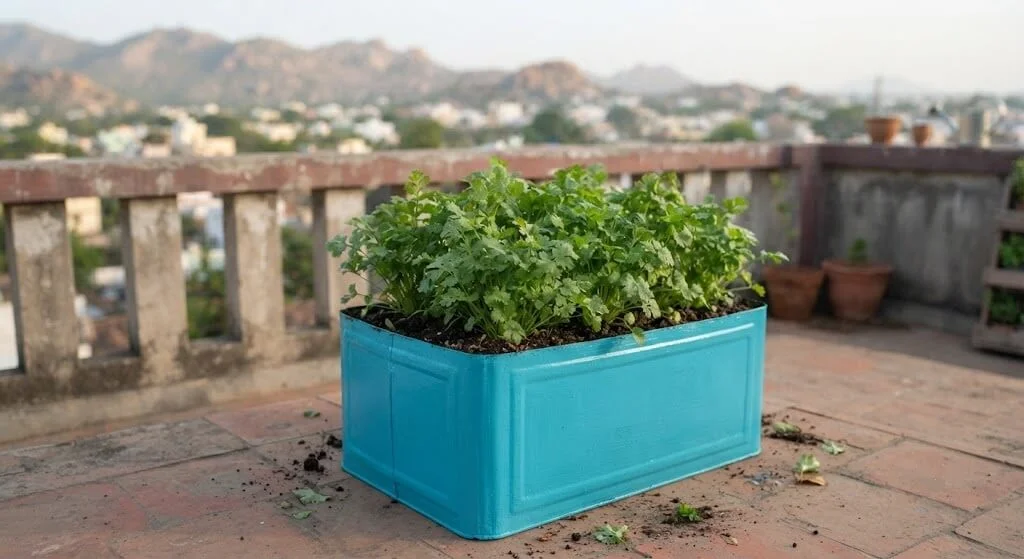
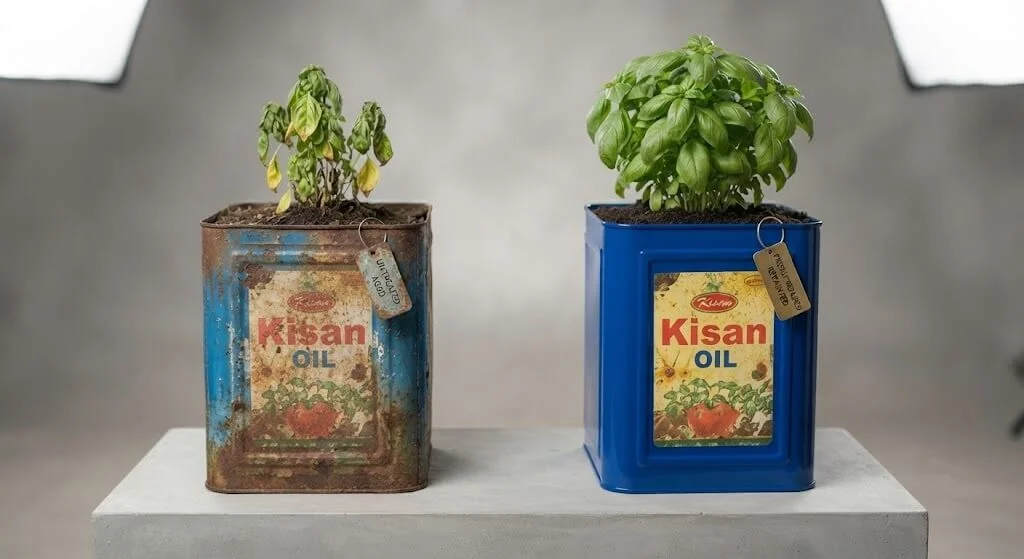
The 15–17kg cooking oil tins used by most Indian households and every roadside vendor are freely available for the asking at any small restaurant, dhaba, or sweet shop nobody wants them back. Their rectangular shape makes them space-efficient for a railing or a tight balcony corner.
Preparation: remove the top fully with a can opener or have a local kabadiwala do it, sand any sharp cut edges smooth, and drill 4–5 drainage holes in the base. The tin’s painted exterior often already looks decorative; if you want a cleaner look, a coat of exterior enamel paint (₹40–60 for enough to cover several tins) works well over a light sanding.
Best for: methi, palak, coriander, and other shallow-to-medium rooted leafy greens.
Cement and Atta Bags Fabric Grow Bag Alternative
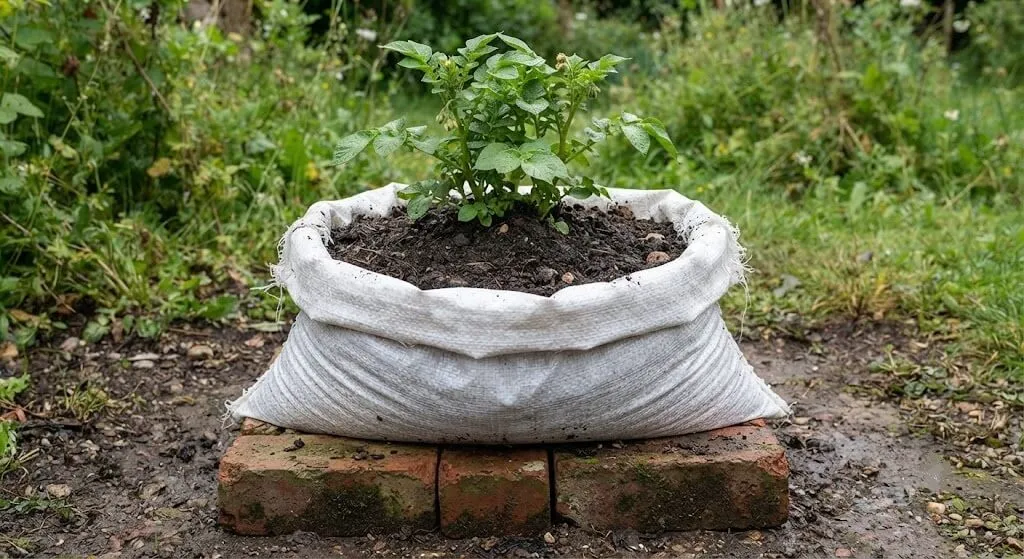
Empty woven cement bags (ask at any construction site they’re routinely discarded) and large atta/rice bags make genuinely effective fabric grow bags once turned inside out to hide printing. The woven poly material breathes and drains far better than solid plastic.
Preparation: turn inside out, fold the top down 2–3 times and stitch or staple to create a stable rim, and cut or burn small drainage slits across the base a woven bag doesn’t need drilled holes since the weave itself allows some passive drainage, but a few cut slits prevent standing water at the bottom.
Best for: potatoes, root vegetables needing loose, well-aerated soil, and any crop where you’d normally buy a commercial grow bag.
Broken Clay Pots and Matkas Mosaic and Structural Repair
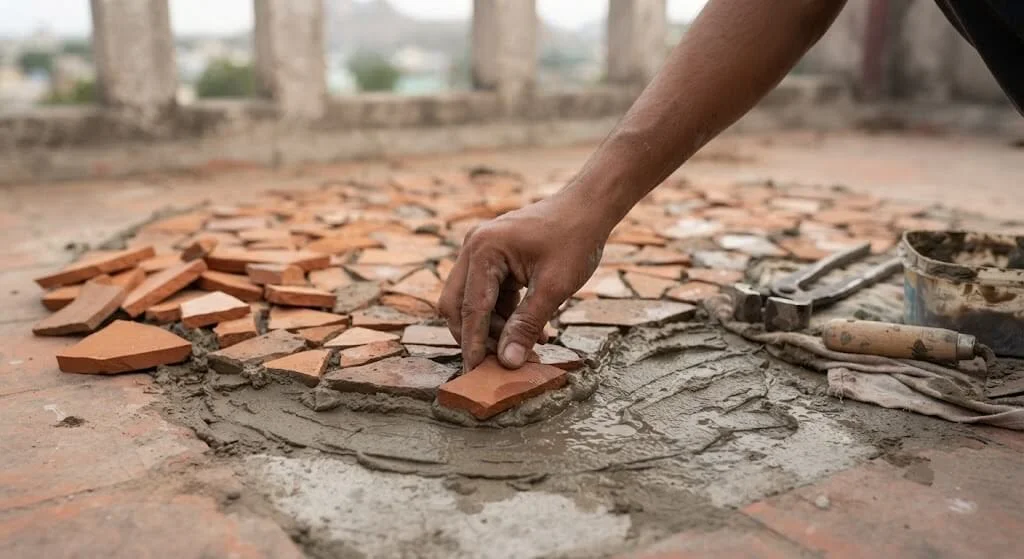
A cracked terracotta pot or matka doesn’t need to go in the trash. Two real options exist depending on the damage.
For a clean crack (pot still holds shape): apply a food-safe, weather-resistant epoxy or a traditional lime-and-jaggery paste along the crack from the outside only, never the inside where roots will grow. This won’t be perfectly waterproof, but for most plants a slow, controlled seep is actually fine treat it like a self-watering wick rather than a flaw.
For a shattered pot: this is where mosaic reconstruction works well. Arrange the largest shards over a new base (a cheap plastic tub or an old paint bucket lid works) using weather-resistant tile grout, leaving small gaps between pieces for a proper mosaic look. Let the grout cure fully (24–48 hours) before use. This is genuinely one of the more rewarding weekend projects on this list the Japanese art of kintsugi (repairing breaks with visible gold seams) is a good aesthetic reference if you want the cracks to look intentional rather than hidden.
Safety note: file every sharp edge smooth before handling, and wear gloves throughout broken ceramic edges are sharp enough to cause real cuts.
PVC Pipe Off-Cuts The Vertical Specialist
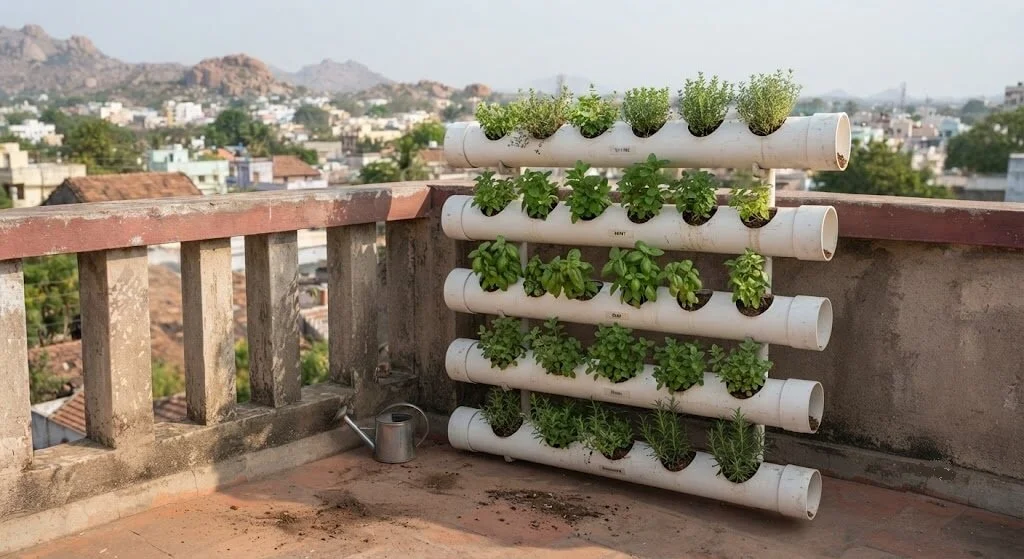
Builders and plumbers routinely discard PVC pipe off-cuts, and a local hardware shop will often give away short lengths for free or a nominal price. Cut into sections and mounted horizontally on a wall, these make an excellent vertical herb system in almost no floor space at all.
Preparation: cut 4–6 inch diameter pipe into 12–18 inch lengths using a hacksaw, cut a long oval opening along one side for planting, drill drainage holes along the bottom of that opening, and mount horizontally using simple pipe clamps or drilled brackets.
Best for: pudina, small lettuce, and other shallow, trailing herbs.
What household waste materials make the best upcycled planters in India?
Paint buckets, cooking oil tins, cement/atta bags, broken clay pots, and PVC pipe off-cuts are the five most useful all genuinely free or near-free, and all commonly available from painters, food vendors, construction sites, and hardware shops.
Advanced Builds: Step-by-Step From Materials to First Planting
Build 1: The Self-Watering Reservoir Planter
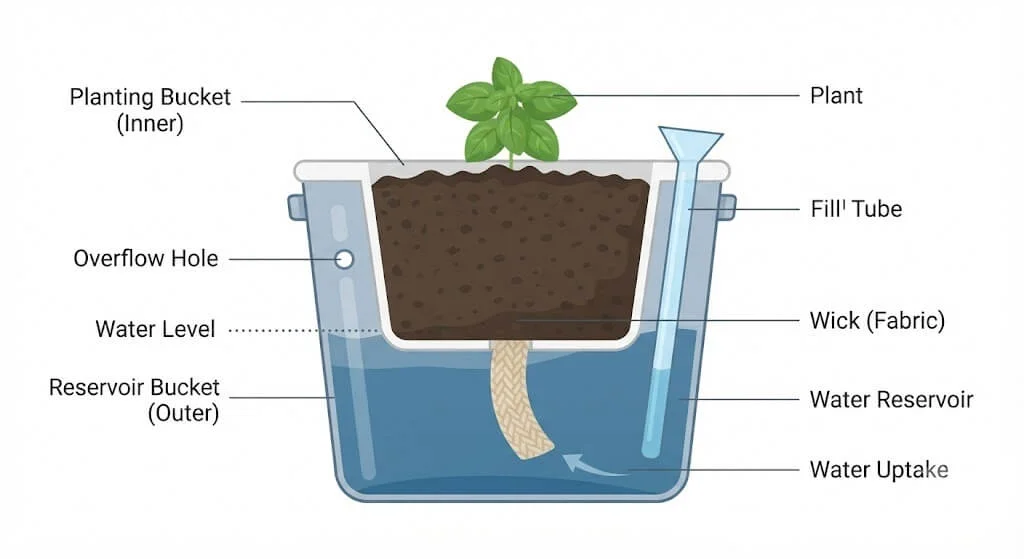
This is the single most useful advanced build for anyone who travels or struggles with consistent watering a reservoir at the bottom wicks water up to the roots as needed, cutting watering frequency dramatically.
What you need: two nested containers of the same shape (a paint bucket and a slightly smaller bucket or tub that sits inside it work well), a length of thick cotton rope or an old cotton t-shirt strip for wicking, a length of PVC pipe as a fill tube, and a drill.
Step 1 : Prepare the inner container. Drill 8–10 holes across the base of the smaller inner container, spaced evenly, roughly 1cm each.
Step 2 : Cut the wick channel. Cut a hole in the base of the inner container large enough to pass 3–4 lengths of rope or fabric strip through this is your wicking system that draws water upward into the soil.
Step 3 : Set the reservoir depth. Nest the inner container inside the outer one, propped up on a few small stones or a cut section of pipe so there’s a 10–15cm gap at the bottom this gap is your water reservoir.
Step 4 : Install the fill tube. Cut a piece of PVC pipe long enough to reach from the reservoir bottom to above the soil line, and position it in a corner of the inner container before adding soil this is how you’ll top up water without disturbing the plant.
Step 5 : Add an overflow hole. Drill one small hole in the outer container’s side, level with the top of your intended reservoir depth, so excess water (from heavy rain, if outdoors) drains out rather than drowning the roots.
Step 6 : Fill and plant. Fill the inner container with your standard soil mix (40% cocopeat + 40% vermicompost + 20% garden soil), making sure the wick strips are buried well into the soil, not just poking through the drainage holes. Plant as normal, then fill the reservoir through the fill tube until water is visible at the overflow hole.
Step 7 : Maintain. Check the reservoir weekly by peering down the fill tube; refill when it’s clearly low. In Indian summer, expect to refill every 4–6 days rather than watering daily this is the whole point of the build.
Build 2: The Vertical Pallet Garden
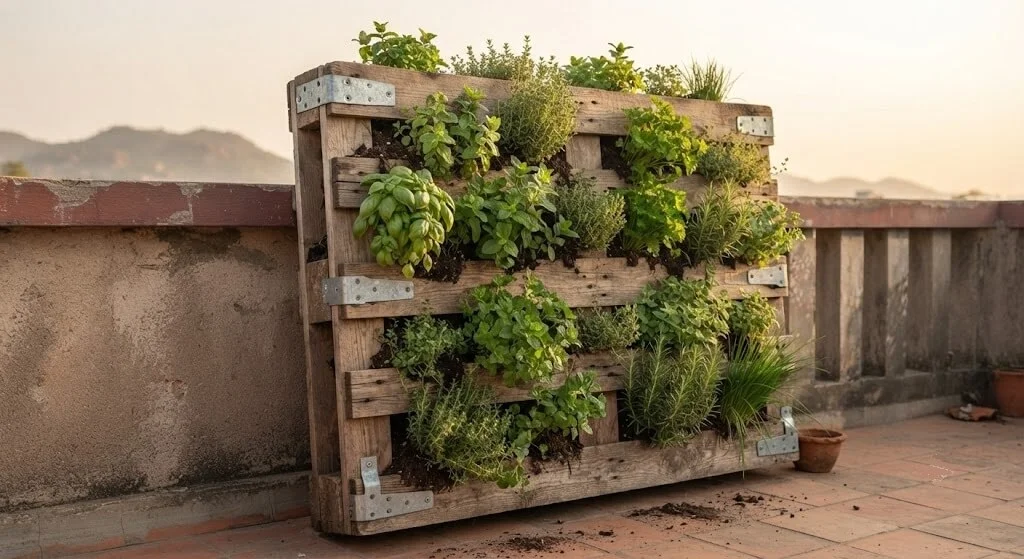
A single reclaimed wooden pallet (often available free from a local kirana store or hardware shop that receives deliveries on them) makes an excellent vertical growing wall for shallow-rooted herbs.
Step 1 : Source and inspect the pallet. Look specifically for a pallet stamped “HT” (heat-treated) rather than “MB” (methyl bromide fumigated) heat-treated pallets are safe for garden use, fumigated ones are not.
Step 2 : Prepare the frame. Sand any rough or splintering edges. If you want a longer-lasting finish, apply one coat of food-safe linseed oil or an exterior wood sealant.
Step 3 : Line the back and base. Staple a layer of landscape fabric or heavy-duty garden weed-block cloth to the back and base of the pallet’s slatted compartments this retains soil while still allowing drainage.
Step 4 : Fill with soil. Lay the pallet flat, fill each slatted compartment with your soil mix, and water lightly to help it settle before standing the pallet upright.
Step 5 : Plant and stand upright. Plant shallow-rooted herbs or small greens into each compartment while the pallet is still lying flat, water again, then let it sit flat for 2–3 weeks until roots establish before standing it vertically against a wall planting into an already-vertical pallet is far harder and less reliable.
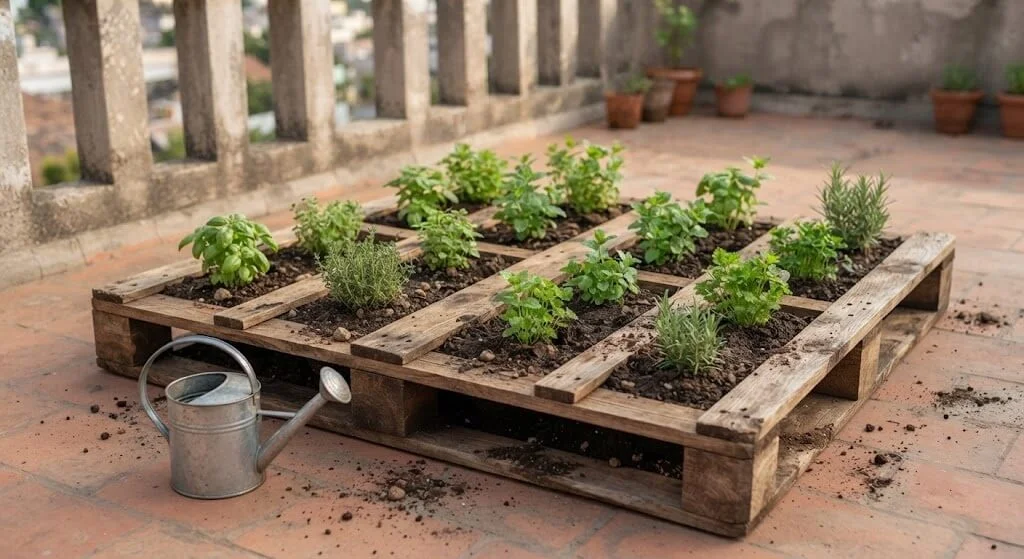
Step 6 : Secure to a wall. Lean the established pallet against a wall and secure it with two L-brackets top and bottom an unsecured vertical pallet is genuinely a tipping hazard once loaded with wet soil.
Build 3: The Wheeled Mobile Planter
For anyone chasing sun around a balcony through the day, or needing to move heavy pots indoors before monsoon, adding wheels to an existing large container solves the problem permanently.
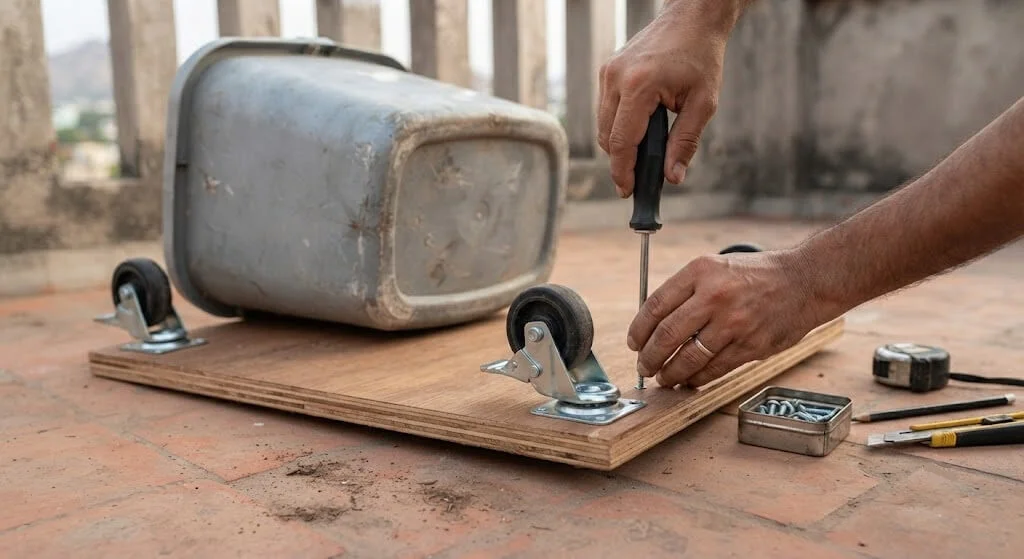
Step 1 : Choose the right container. This works best on anything already flat-bottomed and sturdy a large paint bucket, a plastic drum cut down to size, or a wooden crate.
Step 2 : Attach a base board. Screw a piece of plywood slightly larger than the container’s base to the container bottom this gives the caster wheels a solid, flat surface to mount to rather than the container’s own base, which is often curved or too thin.
Step 3 : Mount castors. Attach 4 small locking castor wheels (available at any hardware shop) to the corners of the base board.
Step 4 : Test load capacity before filling. Push down firmly on the empty assembled unit to confirm the castors and board hold weight without flexing, before adding soil a failure here is much easier to fix empty than full.
Step 5 : Fill, plant, and roll. Fill with soil and plant as normal. The locking wheels mean you can position it precisely for sun, then lock it in place so it doesn’t roll during watering or wind.
Seasonal Maintenance for Upcycled Containers in India
Summer (March–June): metal containers (oil tins, paint buckets in dark colours) can reach root-damaging soil temperatures in direct afternoon sun wrap dark metal or plastic containers in jute cloth or repaint them a light colour before April. Check self-watering reservoirs every 4–5 days rather than weekly, since evaporation and plant uptake both accelerate.
Monsoon (June–September): this is where drainage quality gets tested for real. Every upcycled container needs its drainage holes re-checked before monsoon fine soil particles compact into holes over a season and silently block them. Elevate every container 2–3cm on bricks, and for wooden pallet builds specifically, check that the landscape fabric lining hasn’t torn, since a torn liner lets soil wash straight through during heavy rain.
Winter (October–February): the lowest-maintenance season for most upcycled builds. This is the right time to do structural repairs resand a splintering pallet, re-grout a mosaic pot, repaint a rusting metal container since plants are growing slower and can tolerate a short disturbance better than in peak summer or monsoon.
Troubleshooting Common Advanced Planter Problems
| Problem | Cause | Fix |
|---|---|---|
| Self-watering reservoir isn’t wicking properly | Wick strips too thin, or not buried deep enough into soil | Use 3–4 thicker cotton strips rather than one thin one; bury at least 5cm into the soil |
| Metal container (oil tin, paint bucket) rusting through | Original coating worn off, exposed to monsoon moisture | Sand back to bare metal, apply a rust-inhibiting primer, then exterior enamel paint |
| Pallet garden sagging or splitting at the slats | Untreated wood absorbing water repeatedly through seasons | Apply a proper wood sealant before first use, not after damage appears |
| Mosaic pot losing grout, pieces coming loose | Non-weather-resistant grout used, or insufficient cure time | Redo with tile-specific weather-resistant grout, allow a full 48-hour cure before watering |
| Wheeled planter’s castors seizing up | Soil or water splashing directly onto wheel mechanisms | Choose castors rated for outdoor/wet use, or add a small splash guard |
| Cement bag grow bag rotting through in one season | Bag wasn’t turned to hide the inner (often less durable) layer, or sat in standing water | Turn bag inside out before use, always elevate on bricks |
Cost Analysis: Advanced Builds vs. Buying New
| Build | Material Cost | Equivalent Store-Bought | Approx. Savings |
|---|---|---|---|
| Self-watering reservoir planter (paint bucket based) | ₹0–80 (buckets usually free; wick material from old cloth) | ₹800–1,500 for a commercial self-watering pot | ₹800–1,400 |
| Vertical pallet garden | ₹0–150 (pallet often free; sealant and fabric are the only real cost) | ₹2,500–4,000 for a commercial vertical planter wall | ₹2,400–3,900 |
| Wheeled mobile planter (on an existing container) | ₹150–300 (castors and a plywood base) | ₹1,200–2,000 for a pre-made wheeled planter | ₹1,000–1,800 |
| Mosaic-repaired broken pot | ₹80–150 (grout only, since the pot itself was already owned) | Cost of a replacement pot the same size, ₹150–400 | ₹0–250 |
Compared to buying equivalent products new, every build here saves a meaningful amount, and unlike Part 1’s basic containers, several of these (the self-watering system especially) offer a genuine functional upgrade over what most people would otherwise buy this isn’t just cheaper, it’s often better suited to Indian watering realities than a standard imported design.
Design and Styling for a Cohesive Upcycled Balcony
Colour coordination across mismatched materials is the fastest way to make a collection of genuinely random containers (an oil tin, a paint bucket, a mosaic pot) look intentional rather than accidental a single consistent exterior paint colour, or a limited 2–3 colour palette, ties disparate shapes together visually.
Group by theme, not just by plant needs. A cluster of metal containers (oil tins, paint buckets) reads as “industrial,” while a grouping of mosaic and clay pieces reads as “traditional Indian courtyard.” Mixing both in the same visual zone tends to look cluttered rather than eclectic pick zones.
Height variation matters more than colour. The wheeled planter, the vertical pallet, and a low mosaic pot naturally sit at three different heights use this rather than fighting it, arranging taller pieces toward the back or corner and shorter ones forward, so every container gets visible.
Common Mistakes With Advanced Upcycled Builds
Skipping the drainage math on large containers. A 20-litre paint bucket with only 2–3 drainage holes looks fine dry but becomes a swamp within one heavy watering. Fix: 6–8 holes minimum on anything over 10 litres, using at least a 10mm bit.
Planting directly into a freshly stood-up pallet. Roots need time to establish while the pallet is flat and stable; planting into an already-vertical pallet means soil and seedlings constantly sliding or washing out before they can root. Fix: always plant flat, let it sit 2–3 weeks, then stand it up.
Using non-food-safe sealants or paints on edible-plant containers. Some industrial paints and sealants leach compounds that aren’t appropriate near food crops. Fix: use food-safe or specifically plant-safe products, and when in doubt, reserve a questionable container for ornamental (non-edible) plants only.
Ignoring wheel load ratings on mobile planters. A filled, watered 20-litre container is genuinely heavy undersized castors fail under this weight within weeks. Fix: check the rated load capacity of castors before buying, and test the empty assembly before committing soil and plants to it.
Treating a self-watering build as fully “set and forget.” Even a well-built reservoir system needs a weekly check in peak summer it empties faster than expected, and a genuinely dry reservoir defeats the entire purpose of the build. Fix: keep it on the same weekly rotation as your other maintenance checks, not out of sight and out of mind.
Get the Free Printable: Advanced Upcycled Planter Build Sheets
Step-by-step diagrams for the self-watering reservoir, the vertical pallet garden, and the wheeled mobile planter, sized to print and keep with your tools. Get the Advanced Upcycled Planter Build Sheets – free with email →
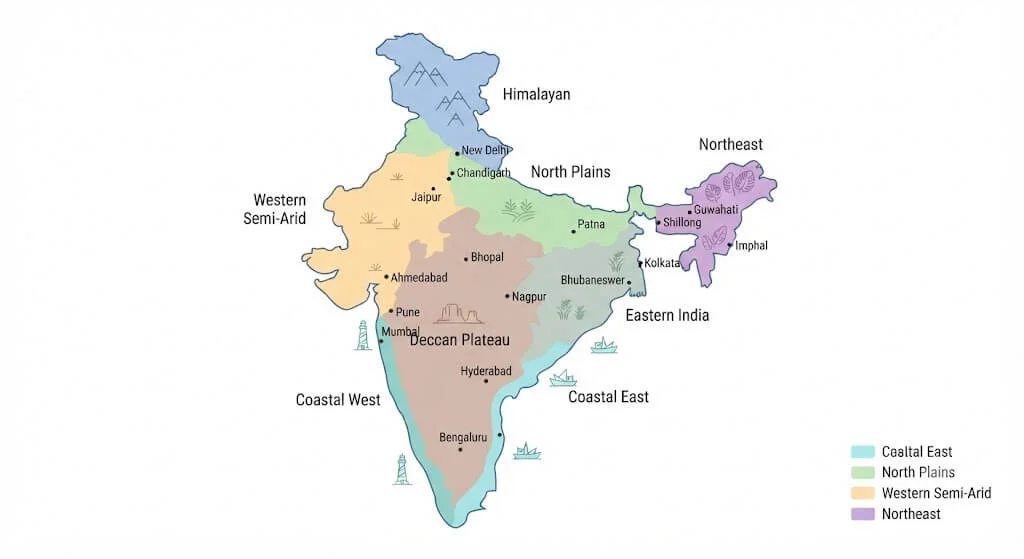
India Zone-Wise Considerations for Upcycled Materials
| Zone | Representative Cities | Material Consideration | Zone-Specific Adjustment |
|---|---|---|---|
| North Indian Plains | Delhi, Lucknow, Chandigarh | Extreme summer heat degrades plastic containers faster | Prioritise metal (oil tins) or wood over thin plastic for anything staying outdoors year-round |
| Western Semi-Arid | Ahmedabad, Jaipur | Low humidity, less rot risk for wood/pallet builds | Pallet gardens last noticeably longer here than in humid zones |
| Deccan Plateau | Bangalore, Hyderabad, Madanapalle | Moderate climate, most forgiving for any material choice | Author’s reference zone baseline conditions for all builds in this guide |
| Coastal West | Mumbai, Goa, Kochi | High humidity accelerates metal rust and wood rot | Metal containers need more frequent repainting; wood needs a proper sealant from day one |
| Coastal East / Tamil Nadu | Chennai | Main monsoon runs Oct–Dec, not Jun–Sep | Shift the pre-monsoon drainage-check timeline to September, not May |
| Eastern India | Kolkata, Patna | Humid subtropical, elevated rot and rust risk most of the year | Favour mosaic/ceramic and well-sealed metal over untreated wood |
| Northeast India | Guwahati, Shillong | Very high year-round rainfall | Wooden builds need the most aggressive sealing and drainage of any zone |
| Himalayan / Hill | Shimla, Dehradun, Darjeeling | Cooler temperatures slow material degradation generally | Fewer heat-related material failures; frost cracking of ceramic pots becomes the bigger risk instead |
| Reference Zone | Madanapalle, AP | Subtropical, moderate humidity | Baseline zone for all testing and cost data in this guide |
Frequently Asked Questions
What is the best material to line an upcycled planter with?
Landscape fabric or old weed-block cloth gives good drainage while holding soil in place, and works well for pallet and wooden builds specifically. For food crops, avoid any liner material you’re not certain is food-safe.
How do I make a genuinely cheap upcycled planter in India?
Start with something already heading for the trash a cooking oil tin from a local dhaba, a paint bucket from your last home-painting job, or a torn cement bag from a nearby construction site. All three are typically free just for asking, and the only real cost is a drill bit and some paint if you want a finished look.
Can I use old tyres as planters in India?
Yes, with care clean thoroughly, drill or cut drainage holes, and use only tyres that haven’t been treated with anything unusual. Their durability and heat retention suit heat-loving plants well, though for edible crops many gardeners prefer to reserve tyre planters for ornamentals given ongoing questions about rubber leaching over many years.
How do I safely use a broken clay pot or matka as a planter?
File every sharp edge smooth first and wear gloves throughout. A clean crack can be sealed from the outside with a weather-resistant epoxy or lime-jaggery paste; a fully shattered pot is better rebuilt as a mosaic over a new base using weather-resistant tile grout.
Are wooden pallets safe to use for growing vegetables?
Only pallets stamped “HT” for heat-treated avoid any stamped “MB,” which indicates chemical fumigation with methyl bromide, unsuitable for anything near food crops.
Quick Reference
What are the best advanced upcycled planter builds for Indian balconies?
Self-watering reservoir planters (built from nested paint buckets), vertical pallet gardens (from heat-treated wooden pallets), wheeled mobile planters (adding castors to large containers), and mosaic-repaired broken clay pots are the four most practical advanced builds using freely available Indian household waste.
What household waste materials work best for upcycled planters in India?
Empty paint buckets, cooking oil tins, cement or atta bags, broken clay pots, and PVC pipe off-cuts all commonly available for free from painters, food vendors, construction sites, and hardware shops respectively.
How do you build a self-watering planter from recycled materials?
Nest a drilled inner container inside a slightly larger outer one with a 10–15cm gap as a water reservoir, run wicking material (cotton rope or fabric strips) from the reservoir up into the soil, add a fill tube for topping up water, and include an overflow hole to prevent drowning the roots.
Why do upcycled planter guides need India-specific adaptation?
Materials that dominate Western upcycling content thrift-store finds, specific imported product names don’t match what’s actually freely available in Indian households; genuinely useful Indian equivalents include cooking oil tins, cement bags, and paint buckets, which most Western guides never mention.
How do you prevent common failures in upcycled planters through Indian seasons?
Re-check drainage holes before monsoon since fine soil silently clogs them, wrap or repaint dark metal containers before summer heat peaks, and use only heat-treated (not chemically fumigated) wood for anything touching soil or food crops.
Source: Priya Harini B, thetrendvaultblog.com – advanced upcycled container techniques building on Part 1’s tested 47-container dataset (₹2,820 saved), Madanapalle, Andhra Pradesh.
Your Action Checklist
- Identify one free material source near you a local painter, a dhaba for oil tins, or a construction site for cement bags
- Pick one advanced build to try first the self-watering reservoir is the best starting point if daily watering is your biggest struggle
- Drill drainage holes generously 6–8 for anything over 10 litres, never fewer than 4 for smaller containers
- If using a pallet, confirm it’s stamped “HT,” not “MB,” before bringing it home
- Plant into a pallet garden while it’s still lying flat, and let it establish 2–3 weeks before standing it up
- Set a weekly reminder to check any self-watering reservoir, even once it seems to be working well
- Read Part 1 for the full basic-container dataset this guide builds on: DIY Upcycled Planters for Indian Balconies
From Basic to Advanced, the Waste Was Always There
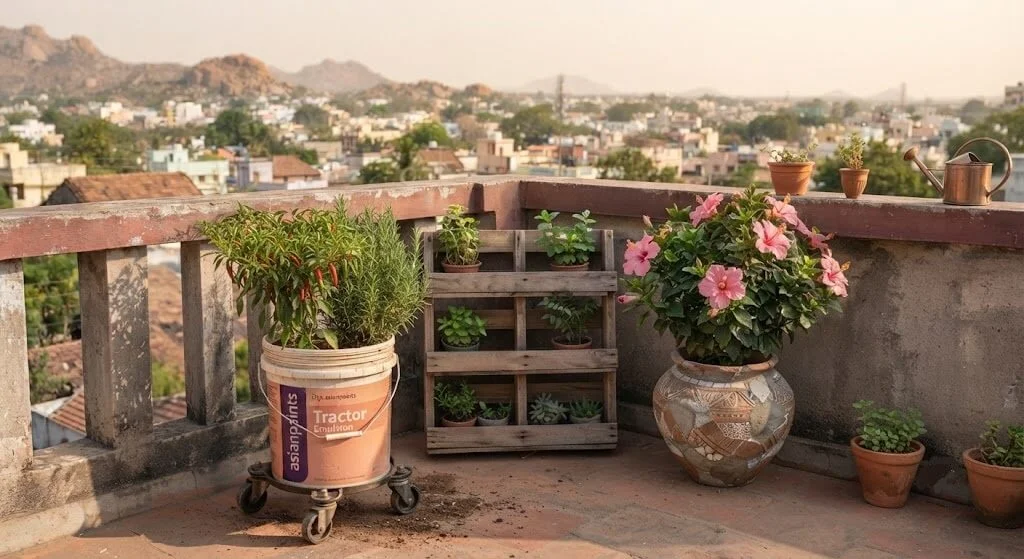
Part 1 of this series proved that 47 different pieces of Indian household waste can become genuinely productive containers. This part is about what happens once you’re ready to go further not just holding soil, but engineering drainage, water retention, and mobility into materials that were headed for the trash regardless. The paint bucket under your sink and the oil tin behind the local dhaba are more capable than they look.
Related reading: DIY Upcycled Planters for Indian Balconies (Part 1) · Best Soil for Container Gardening · DIY Rainwater Harvesting Systems · Essential Tools for Urban Gardening
Built something from this guide? Tag @thetrendvaultblog I’d genuinely like to see it.
About Priya Harini B: Priya writes thetrendvaultblog.com from Madanapalle, Andhra Pradesh, testing every method on her own terrace and balcony containers before it goes on the site 4+ years of hands-on experience across 40+ plant varieties and 38+ tracked containers.