
Table of Contents
Introduction
Creating your own DIY Compost Bin for Urban Gardens doesn’t have to be a weekend-long project that leaves you exhausted and frustrated. With the right approach and materials, anyone can build a functional urban composting system in just three hours. Whether you’re dealing with a tiny balcony or a small backyard, composting in the city offers incredible benefits for both your garden and the environment.
Home-made compost transforms everyday kitchen scraps into nutrient-rich soil amendment that costs a fraction of store-bought alternatives. A well-designed DIY Compost Bin for Urban Gardens maximizes space efficiency while containing odors and pests that concern city dwellers. The composting process becomes surprisingly manageable once you understand the basics and have the right setup in place.
Urban gardeners discover that their DIY Compost Bin for Urban Gardens produces finished compost faster than traditional methods due to controlled conditions and regular attention. Small-space composting in the city requires strategic planning, but the rewards include reduced waste disposal costs and premium organic matter for container plants and raised beds.
Modern DIY Compost Bin for Urban Gardens designs accommodate apartment living with odor-free systems that fit on balconies, patios, or even indoor spaces. These compact urban composting solutions prove that city residents don’t need large yards to create valuable home-made compost from their daily kitchen scraps.
The versatility of a properly constructed DIY Compost Bin for Urban Gardens allows for year-round composting process management, ensuring continuous soil amendment production regardless of seasonal weather challenges that urban environments present.
Why Every Urban Gardener Needs a Compost Bin
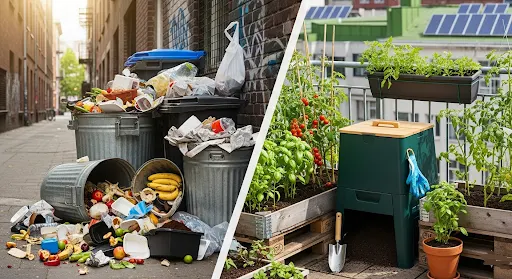
Urban areas generate massive amounts of organic waste that typically ends up in landfills, where it produces methane gas instead of beneficial soil amendments. Statistics show that food waste comprises nearly 30% of residential garbage, representing a significant missed opportunity for soil improvement.
City composting dramatically reduces household waste while creating valuable organic matter for gardens. The average urban household can divert 200-300 pounds of organic decomposition materials annually, resulting in 50-75 pounds of finished garden compost. This translates to substantial cost savings on commercial fertilizers and soil conditioner products.
The environmental impact extends beyond waste reduction. Composting materials in urban settings helps reduce the carbon footprint associated with waste transportation and landfill operations. Additionally, nutrient-rich soil created through composting supports healthier plant growth with less reliance on chemical fertilizers.
Space efficiency makes urban composting particularly attractive for apartment dwellers and small-space gardeners. Modern compost bin designs maximize decomposition while minimizing footprint, making it possible to create black gold even in the smallest urban environments.
Best DIY Compost Bin Types for Small Urban Spaces
Selecting the right composter design depends on available space, desired capacity, and maintenance preferences. Each style offers unique advantages for different urban gardening scenarios.
Tumbling Compost Bins (Best for Speed)
Tumbling composter systems accelerate the composting process through improved aeration and easier turning. These designs work exceptionally well for urban gardeners who want faster results with minimal physical effort.
A 5-gallon bucket tumbler represents the most space-efficient option for apartment dwellers. The design involves mounting a food-grade bucket on a simple rotation system, allowing easy mixing of green materials and brown materials. This system typically produces finished compost in 6-8 weeks with proper management.
Plastic storage container tumblers offer more capacity while remaining manageable for small spaces. A 30-gallon container provides sufficient volume for a small family’s food scraps while maintaining the speed benefits of regular turning. The key involves drilling proper ventilation holes and creating a secure mounting system.
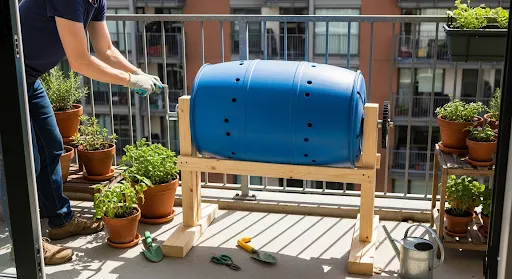
DIY rotating drum composters represent the premium option for urban spaces with slightly more room. These systems use larger containers mounted horizontally on a frame, allowing for complete 360-degree rotation. The increased volume and improved microbial activity result in faster organic decomposition and higher-quality finished product.
Stationary Bin Options (Best for Volume)

Traditional stationary bins excel in situations where maximum capacity takes priority over speed. These designs typically cost less to build and require minimal ongoing maintenance.
Wire mesh cylinder bins offer excellent soil aeration while maintaining structural integrity. The open design promotes proper airflow throughout the compost heap, supporting healthy bacteria and fungi populations. Construction involves creating a cylinder from hardware cloth and securing it with zip ties or wire clips.
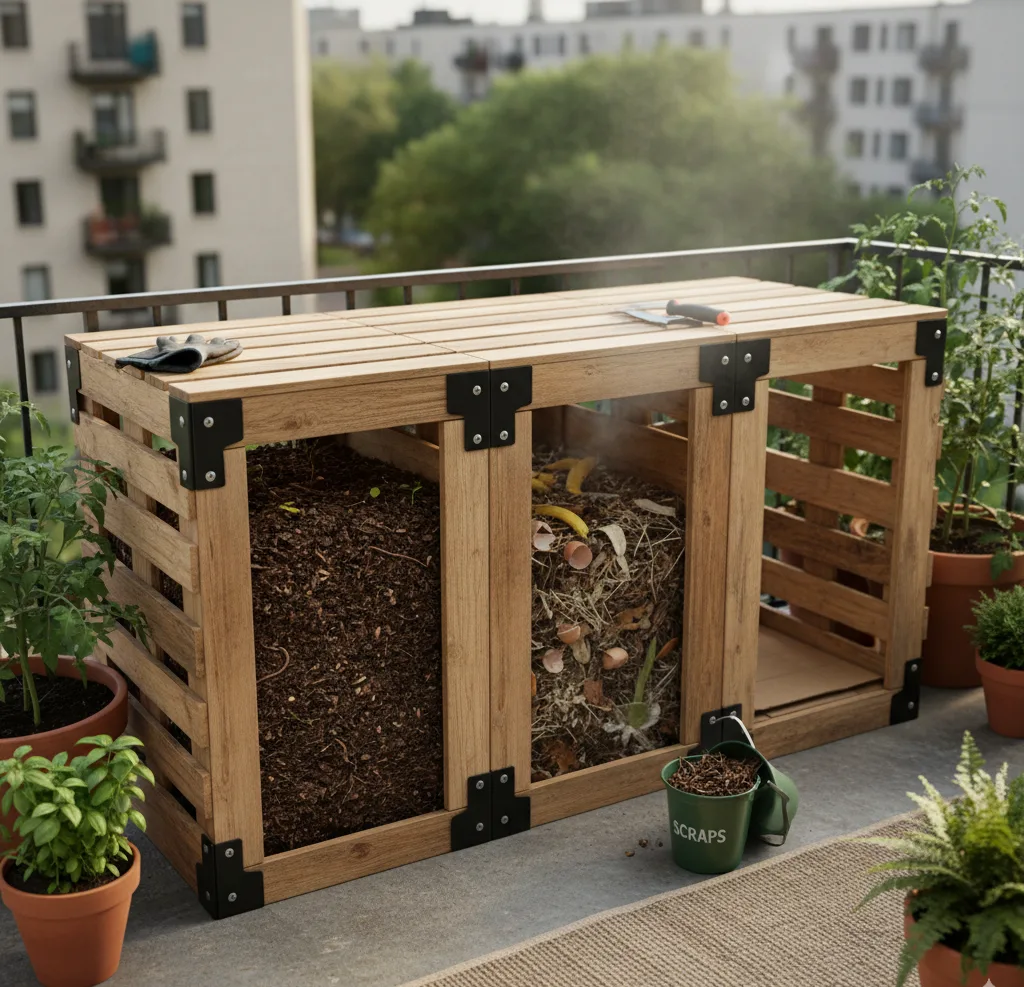
Wooden compost bin systems provide attractive, long-lasting solutions for backyard composting. Pallet-based designs use readily available materials to create three-sided enclosures that allow easy access for turning and harvesting. The natural wood integrates seamlessly with garden environments while providing excellent insulation for temperature control.
Stacked tire composters offer a virtually free construction option using recycled materials. This approach involves stacking automobile tires to create a flexible composting system that expands as materials accumulate. The black rubber absorbs heat, promoting faster decomposition during cooler months.
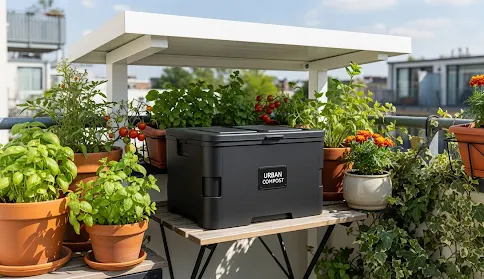
Indoor Composting Solutions
Indoor systems extend composting possibilities to apartments and homes without outdoor space. These methods focus on odor control and compact design while maintaining effective organic matter processing.
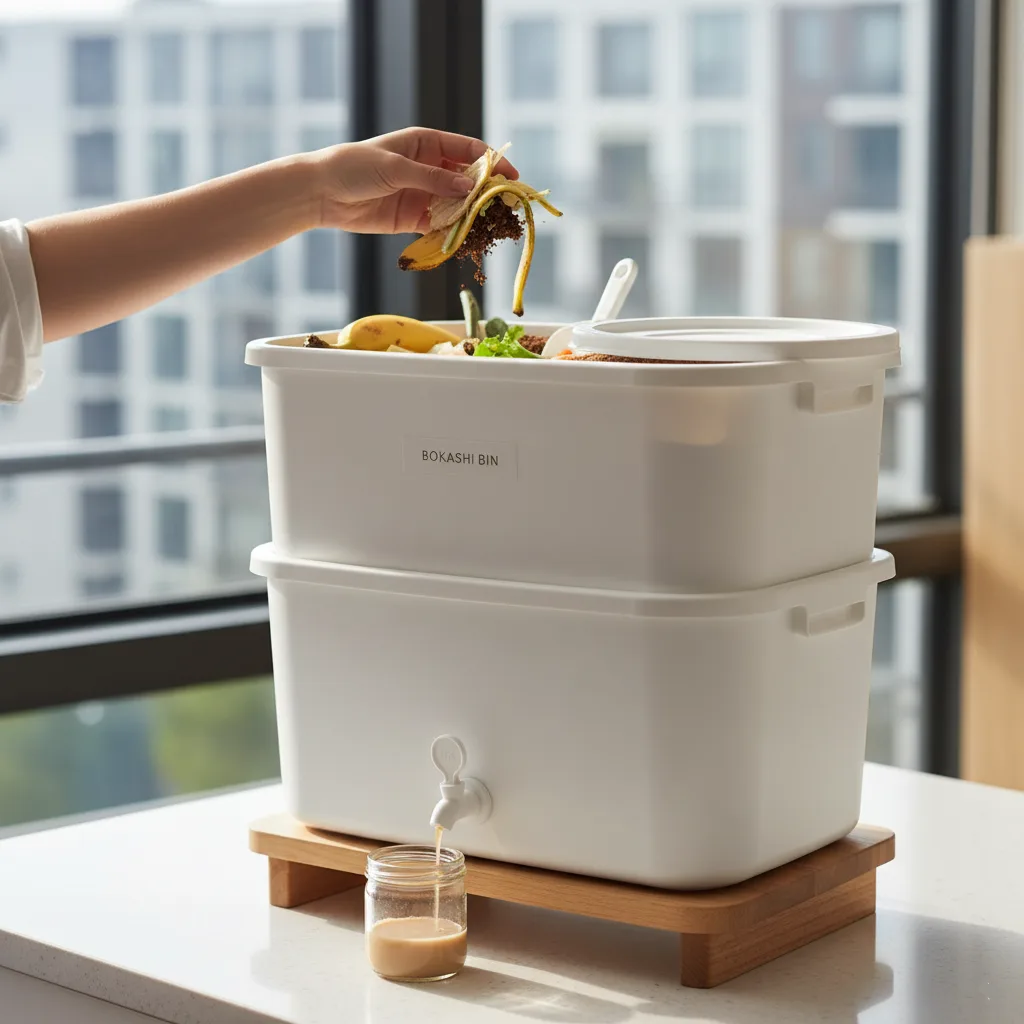
Bokashi bucket systems use fermentation to pre-process kitchen scraps before final composting. The anaerobic fermentation breaks down materials without traditional composting odors, making it ideal for indoor use. The fermented materials then complete their transformation in a small outdoor bin or even a large pot.
Worm composting bins create finished compost through biological action rather than traditional microbial activity. These systems operate continuously, processing small amounts of organic waste while producing both compost and nutrient-rich liquid fertilizer. Properly maintained worm bins produce no offensive odors and require minimal space.
Kitchen counter compost containers serve as collection points for daily food scraps before transfer to larger systems. Modern designs incorporate carbon filters to eliminate odors while maintaining attractive appearances suitable for kitchen display.
Materials and Tools You’ll Need (Complete Shopping List)
Essential Materials

Hardware cloth selection determines the structural integrity and longevity of wire mesh composters. Quarter-inch hardware cloth provides optimal balance between durability and airflow, while half-inch mesh offers easier construction with slightly reduced rodent protection. Purchase 10-15% extra material to account for cutting waste and potential repairs.
Wood selection significantly impacts both cost and durability. Pressure-treated lumber lasts longer but costs more, while untreated cedar provides natural rot resistance at moderate prices. Standard construction-grade pine offers the most economical option but requires regular maintenance in outdoor applications.
Fastener and hardware requirements vary by design but typically include galvanized screws, washers, hinges, and latches. Stainless steel hardware costs more initially but eliminates rust concerns in outdoor environments. Standard galvanized fasteners provide adequate performance for most urban applications.
Weatherproofing materials extend the lifespan of wooden composters while maintaining attractive appearances. Thompson’s WaterSeal and similar products provide excellent protection without harmful chemicals that might affect compost tea quality. Natural alternatives like linseed oil offer environmentally friendly protection with regular reapplication.
Required Tools
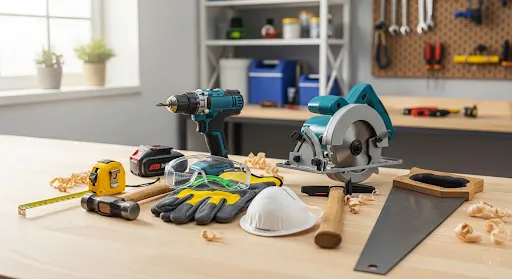
Power tool options significantly reduce construction time and improve finished quality. A cordless drill eliminates extension cord hassles while providing adequate power for most fastening operations. Circular saws create clean, straight cuts in lumber and hardware cloth with minimal effort.
Hand tool alternatives work well for small projects or situations where power tools aren’t available. A good handsaw, hammer, and manual drill can handle most composting bin construction projects. Quality hand tools often produce superior results in experienced hands, though construction time increases substantially.
Safety equipment prevents injuries during construction and ensures comfortable working conditions. Safety glasses protect eyes from wood chips and metal fragments, while work gloves prevent cuts and splinters. Dust masks become essential when cutting treated lumber or working in dusty conditions.
Measurement and marking tools ensure accurate construction and professional-looking results. A combination square provides both measurement and right-angle marking capabilities, while a tape measure handles longer measurements. Pencils or markers designed for outdoor use maintain visibility throughout construction.
Step-by-Step Build Guide: 3-Hour Wire Mesh Compost Bin
Preparation Phase (30 minutes)
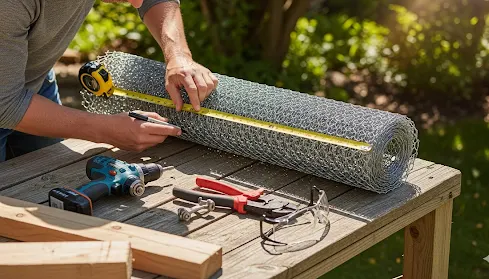
Begin by measuring and marking all materials according to your chosen design dimensions. A standard urban compost bin measures 3 feet in diameter and 3 feet tall, providing approximately 20 cubic feet of capacity. Mark the hardware cloth for cutting, allowing 2-inch overlap for secure connections.
Safety setup involves organizing tools, clearing the workspace, and donning appropriate protective equipment. Position the work surface at comfortable height to prevent back strain during extended cutting and assembly operations. Ensure adequate lighting for detailed work and keep first aid supplies readily accessible.
Cutting materials to size requires patience and proper technique for professional results. Use tin snips or bolt cutters for hardware cloth, making smooth cuts that minimize sharp edges. Cut lumber using appropriate saws, checking measurements twice before cutting to avoid costly mistakes.
Assembly Phase (90 minutes)
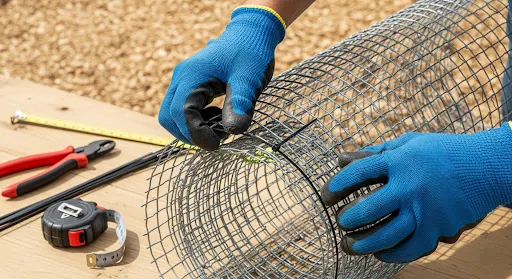
Create the cylindrical frame by carefully rolling the hardware cloth into a circle and overlapping the edges by 2-3 inches. Secure the seam using zip ties or galvanized wire, spacing connections every 6 inches for maximum strength. The cylindrical shape naturally supports itself once properly connected.
Secure wire mesh connections require attention to detail and consistent spacing. Start connections at one end and work systematically toward the other, maintaining even tension throughout the process. Trim excess zip tie material close to the connection point to prevent snagging during use.
Adding bottom support improves structural integrity and prevents materials from falling through. Cut a circle of hardware cloth slightly larger than the cylinder diameter, then secure it to the bottom edge using additional zip ties. This modification works particularly well for tumbling composter applications.
Installing access door functionality involves creating a hinged section that allows easy material addition and finished compost removal. Cut a vertical section approximately 18 inches wide and 24 inches tall, then attach hinges and a simple latch mechanism. This feature dramatically improves long-term usability.
Finishing Touches (60 minutes)
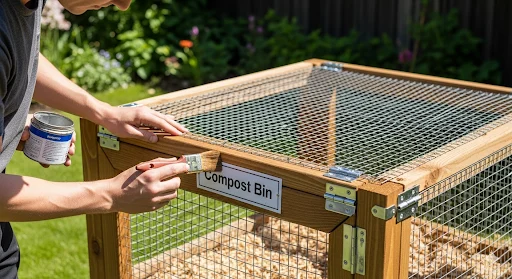
Weatherproofing treatment extends the lifespan of exposed metal components while maintaining functionality. Apply rust-preventive coating to cut edges and connection points using a small brush. Allow adequate drying time before moving the completed compost bin to its permanent location.
Adding labels and identification helps maintain proper composting practices while educating family members and neighbors. Create simple signs indicating appropriate composting materials and basic maintenance requirements. Laminated labels withstand outdoor conditions while remaining easily readable.
Site preparation ensures optimal performance and easy access for ongoing maintenance. Level the installation area and provide adequate drainage to prevent waterlogging during heavy rains. Consider adding a base layer of coarse materials like wood shavings to improve drainage and soil aeration.
Alternative Quick-Build Options Under 3 Hours
5-Gallon Bucket Compost System (1 Hour)
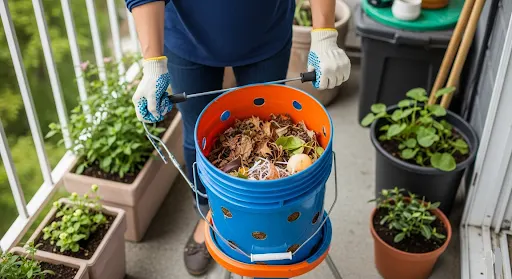
Selecting the right container forms the foundation of successful bucket composting. Food-grade plastic buckets provide safety and durability while remaining readily available from restaurants and food service operations. Ensure the bucket includes a tight-fitting lid to control odors and pests.
Drilling ventilation holes requires strategic placement to maintain aerobic composting conditions without creating mess. Use a quarter-inch drill bit to create holes every 2-3 inches around the sides and bottom. The pattern promotes airflow while preventing organic matter from falling through.
Creating an effective drainage system prevents waterlogging that leads to anaerobic conditions and unpleasant odors. Add a 2-inch layer of coarse brown materials like wood shavings or shredded newspaper at the bottom. This layer absorbs excess moisture while maintaining necessary aeration.
Setting up the rotation mechanism enables easy mixing without removing materials from the container. Mount the bucket on a simple pivot system using PVC pipe fittings, or create handles that allow manual tumbling. Regular rotation accelerates decomposition while preventing compaction issues.
Trash Can Composter (90 Minutes)
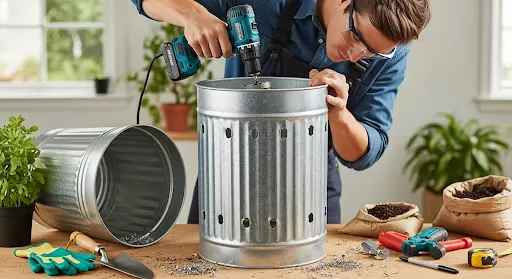
Selecting the right container involves balancing capacity, durability, and cost considerations. A 32-gallon galvanized trash can provides excellent longevity and rodent resistance, while plastic alternatives cost less but may not withstand long-term outdoor use. Avoid containers previously used for chemicals or other hazardous materials.
Modification techniques transform ordinary containers into efficient composting systems. Remove the bottom to allow direct soil contact, promoting beneficial soil micro-organisms and drainage. Cut ventilation holes in the sides using a hole saw or large drill bit, spacing them evenly for optimal airflow.
Ventilation and drainage setup requires careful attention to hole placement and sizing. Create 1-inch diameter holes every 6 inches around the circumference at multiple levels. The bottom row should sit 6 inches above ground level to prevent clogging while maintaining drainage capability.
Perfect Placement: Where to Put Your Urban Compost Bin
Balcony and Patio Considerations
Weight distribution becomes critical when placing compost bins on elevated surfaces designed for lighter loads. A full composter can weigh 200-400 pounds, requiring adequate structural support and weight distribution. Consult building management or structural engineers if uncertain about load-bearing capacity.
Neighbor-friendly positioning respects shared spaces while maintaining composting effectiveness. Place bins away from property lines and common areas to minimize potential complaints about odors or appearance. Consider sight lines from neighboring windows and outdoor spaces when selecting locations.
Weather protection strategies extend composting seasons while maintaining system effectiveness. Covered areas provide protection from excessive rain that can waterlog composting materials and create anaerobic conditions. However, some rainfall benefits the composting process by maintaining appropriate moisture retention.
Backyard and Garden Placement
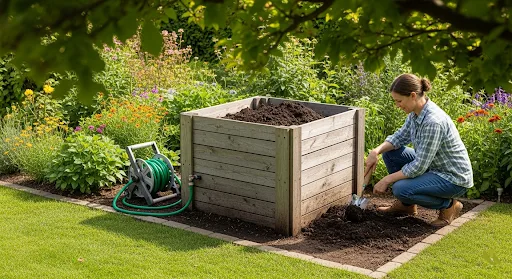
Drainage requirements prevent waterlogging that kills beneficial microorganisms and creates unpleasant odors. Avoid low-lying areas where water naturally collects, and ensure adequate slope for runoff during heavy rains. Consider adding drainage materials beneath the compost bin if soil drainage appears inadequate.
Sun versus shade considerations balance temperature control with moisture management. Partial shade locations provide optimal conditions for microbial activity without excessive drying during hot weather. Full sun locations work well in cooler climates but may require additional moisture retention strategies during summer months.
Accessibility for maintenance ensures consistent care that produces high-quality finished compost. Position bins within easy reach of water sources for moisture management and close enough to the kitchen for convenient food scrap disposal. Consider pathways that remain usable during wet weather and seasonal changes.
Cost Analysis: DIY vs. Store-Bought Compost Systems
Budget Breakdown
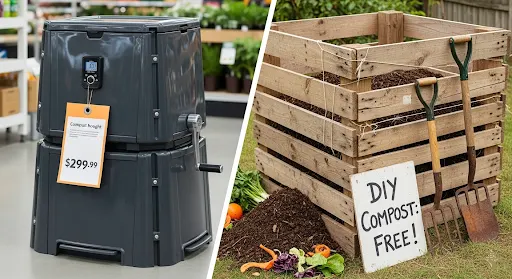
Material costs for wire mesh compost bins typically range from $15-30, depending on size and hardware quality. A basic 3-foot diameter bin requires approximately $20 in hardware cloth, fasteners, and weatherproofing materials. Wooden pallet composters often cost even less using recycled materials and basic hardware.
Tool investment analysis reveals that basic compost bin construction requires minimal specialized equipment. Most homeowners already own the necessary tools, making the primary investment material costs rather than equipment purchases. Quality hand tools provide years of service for multiple projects beyond composting applications.
Long-term savings calculations demonstrate the economic benefits of home-made compost over commercial alternatives. A productive urban compost bin produces 50-100 pounds of finished compost annually, replacing commercial soil amendments worth $100-200. The system pays for itself within the first year while providing ongoing savings.
Return on Investment

Fertilizer replacement value becomes apparent when comparing compost costs against commercial organic matter and soil amendments. Quality compost costs $30-50 per cubic yard when purchased commercially, while home-made compost costs only the initial compost bin investment plus minimal ongoing maintenance time.
Waste reduction savings extend beyond composting materials to include reduced garbage disposal costs and environmental benefits. Urban households can reduce waste disposal volume by 20-30% through effective composting, potentially lowering waste management fees. Environmental benefits include reduced methane emissions and decreased transportation impacts.
Property value benefits result from improved soil quality and sustainable gardening practices that appeal to environmentally conscious buyers. Well-maintained compost systems demonstrate commitment to sustainable living while providing ongoing benefits for garden productivity and appearance.
Frequently Asked Questions About DIY Urban Composting
How to make a simple compost bin?
The simplest compost bin uses hardware cloth rolled into a cylinder and secured with zip ties. This design requires no cutting, special tools, or complex assembly while providing excellent aeration and durability for urban composting applications.
What is the easiest thing to compost?
Kitchen scraps like vegetable peelings, coffee grounds, and fruit cores represent the easiest materials to compost successfully. These green materials break down quickly when balanced with brown materials like shredded paper or dry leaves.
Is composting easy for beginners?
Urban composting becomes straightforward once beginners understand basic material ratios and maintenance requirements. Start with simple compost bin designs and focus on proper green and brown material balance rather than complex techniques.
What is the fastest material for composting?
Green materials such as grass clippings, fresh kitchen scraps, and coffee grounds decompose most rapidly when chopped into small pieces. These nitrogen-rich materials accelerate the composting process when properly balanced with carbon sources.
Can you put tea bags in compost?
Tea leaves work excellently in compost bins, but remove staples and synthetic bag materials first. Many modern tea bags contain plastic fibers that don’t decompose, so empty the contents and compost only the organic tea leaves.
What not to put in compost?
Avoid meat, dairy, oils, pet waste, diseased plants, and treated wood in urban composting systems. These materials create anaerobic conditions, attract pests, or contain pathogens that compromise finished compost quality and safety.
Do you need worms in a compost bin?
Worms aren’t necessary for successful composting, though they accelerate decomposition when present naturally. Traditional compost bins rely on bacterial and fungal activity rather than worms, while dedicated worm composting systems require specific management techniques.
What size composter do I need for my family?
A family of four typically requires a compost bin with 20-30 cubic feet capacity to handle weekly organic waste production. Smaller households can use 10-15 cubic foot systems, while larger families benefit from dual-bin systems or larger single units.
How often should I turn my composter?
Turn compost materials weekly during active composting seasons to maintain aerobic conditions and accelerate decomposition. Tumbling composters make this process easier, while stationary bins require pitchfork turning every 7-10 days for optimal results.
When is my compost ready to use?
Finished compost displays dark brown color, crumbly texture, and pleasant earthy smell with no recognizable organic materials remaining. The process typically takes 3-6 months with regular turning, or 6-18 months using passive methods.
Conclusion: Start Your Urban Composting Journey Today
Urban composting transforms everyday kitchen scraps and garden waste into valuable soil amendment while reducing household waste and environmental impact. Building a DIY compost bin requires minimal time, money, and expertise while providing years of organic matter production for healthier gardens.
The three-hour construction timeline makes composting accessible to busy urban dwellers who want sustainable waste management without major time commitments. Whether using simple wire mesh cylinders or more elaborate tumbling composter designs, homemade compost systems deliver outstanding results with proper maintenance and material management.
Starting your composting journey requires only basic materials, simple tools, and commitment to regular maintenance. Begin today and discover why millions of urban gardeners consider home-made compost essential for sustainable city living.
>> Continue reading Part 2 to learn about proper composting materials, maintenance techniques, troubleshooting common problems, and maximizing your compost success.
About Priya Harini B
Priya Harini B is an urban gardening specialist who combines peer-reviewed agricultural research with hands-on testing. Every method recommended on this site has been personally validated in real growing conditions. Currently experimenting with vertical systems and container optimization in Madanapalle.
📧 Email | 📬 Subscribe | 💬 Ask in comments